|
|
Post by Jeff Lande on Sept 30, 2010 6:27:22 GMT -5
Hello all... I am in the early stages of bringing and old friend back to life. Seems the thing to do here is to post pictures of the progress. (really I just wanted to share my progress with people that can relate... my wife still doesn't get it)  I originally assembled my GT2 (or rather GTE) back in the late 80's, picked up a body at the freight company that did all the hauling for Bradley before they went out of business. Unfortunately, I didn't find them until after they had a major fire that wiped out most of their inventory. I put about 10,000 miles on it, then got married and moved to California. So, it got parked and has been sitting ever since. (June, 1989) Here's what the pan looked like and the progress I've made so far: 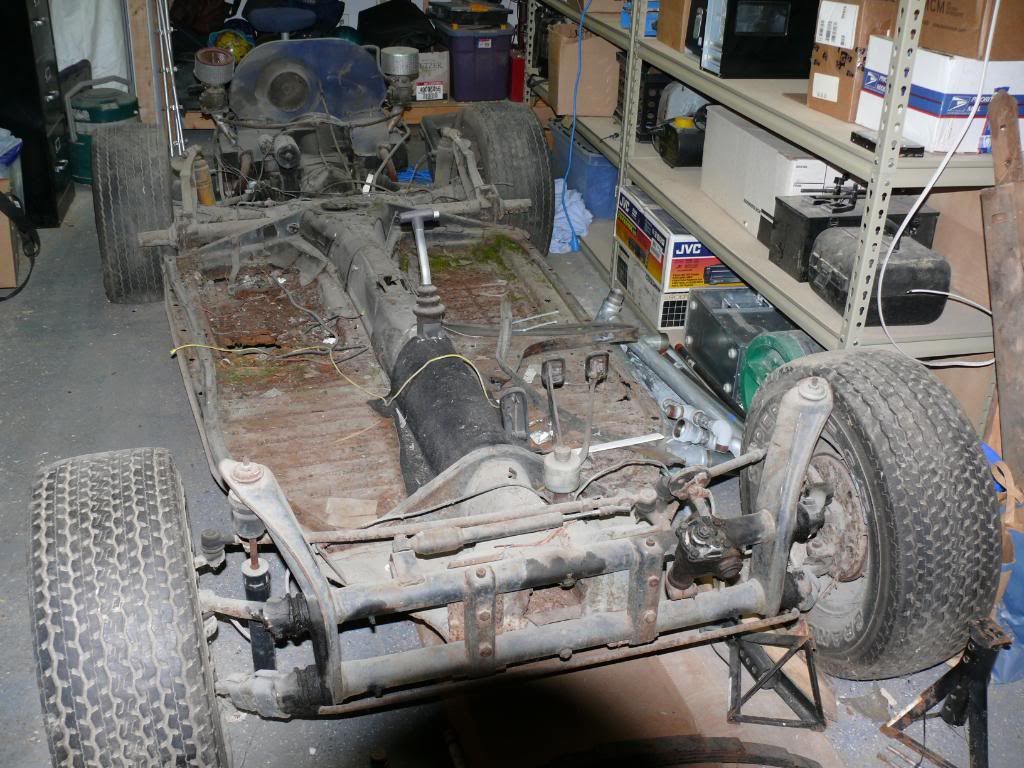 not sure that's supposed to be there: 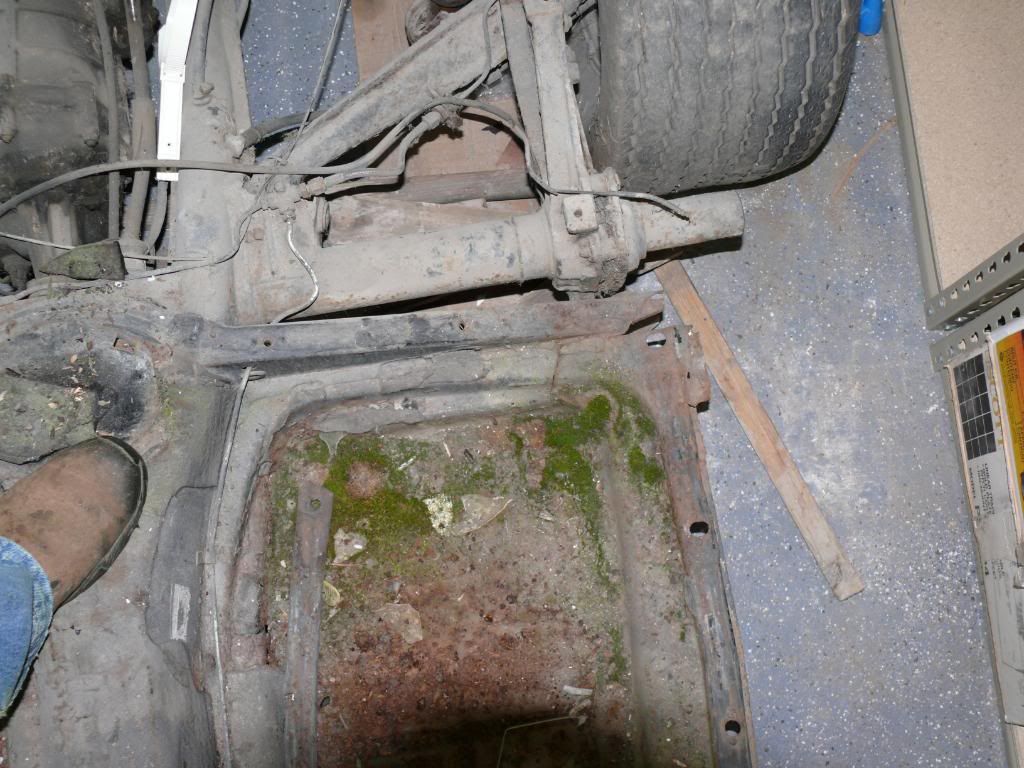  Making progress: 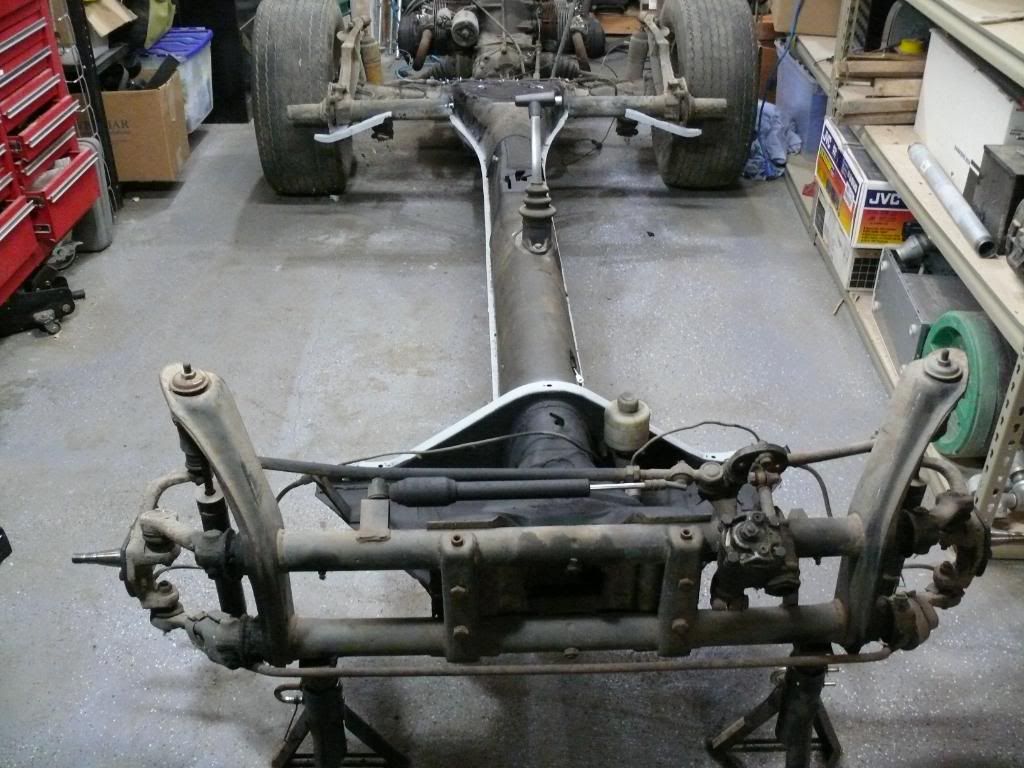  dang mice got into the doghouse of course... 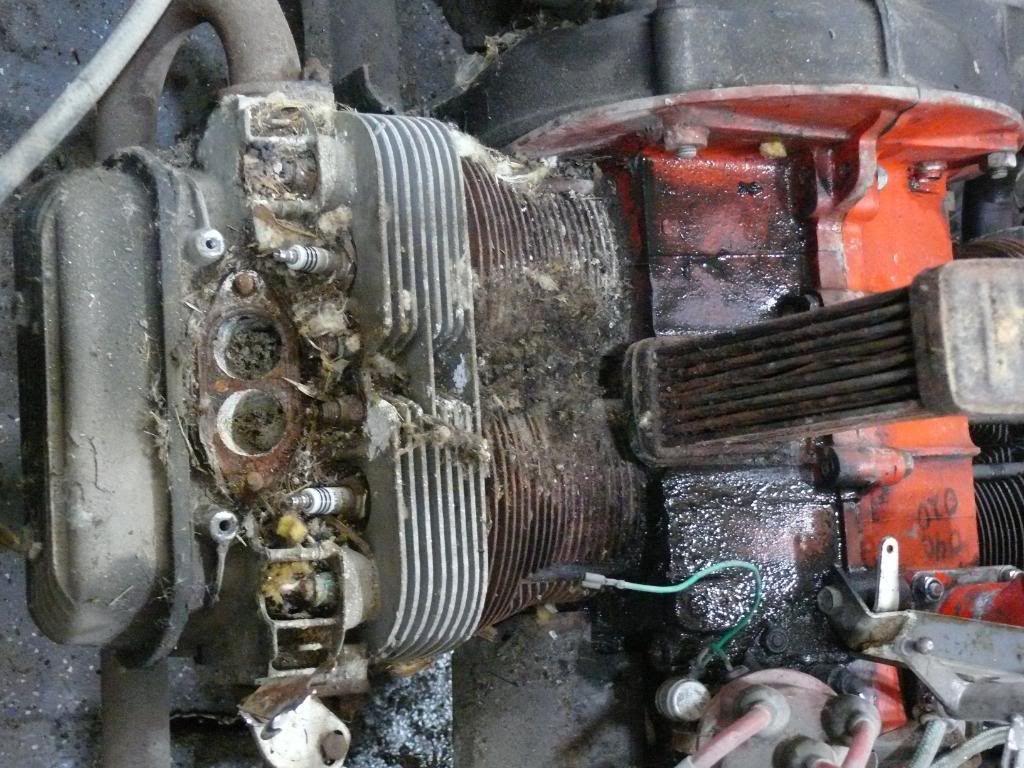 almost ready for the body, new pans, front discs, new shocks, cleaned up the motor (one new cylinder): 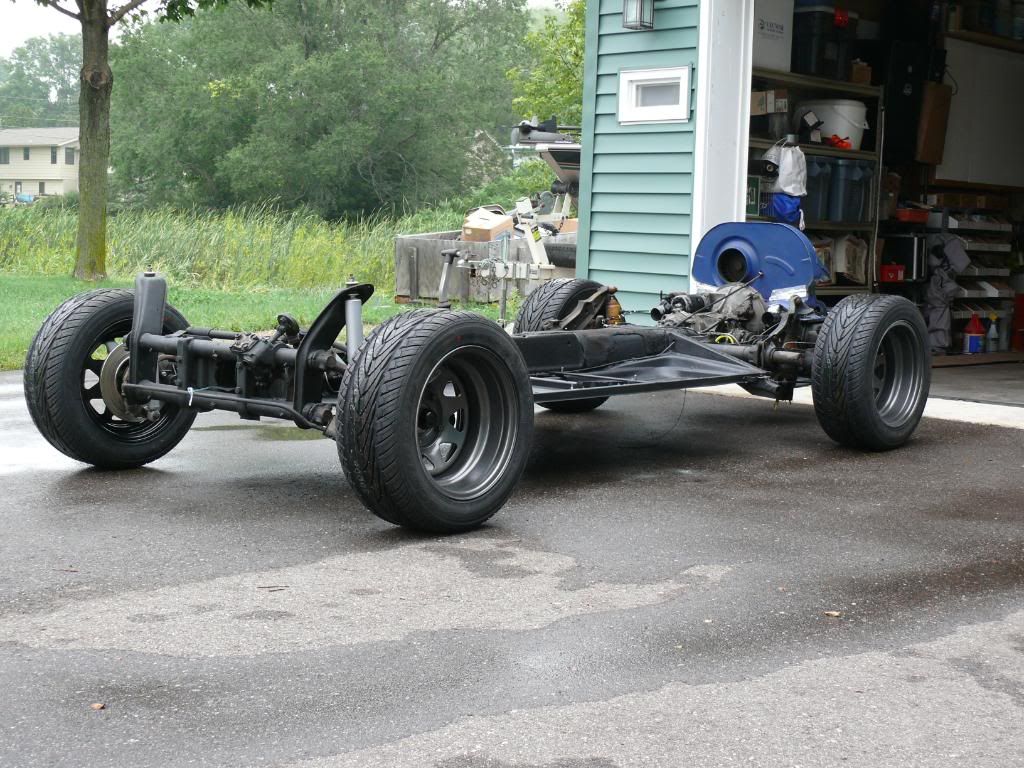 Just waiting for the carbs to come back from being rebuilt (maybe today even) before I drop the body back on, wanna make sure it starts first, in case I have to completely re-do the engine. 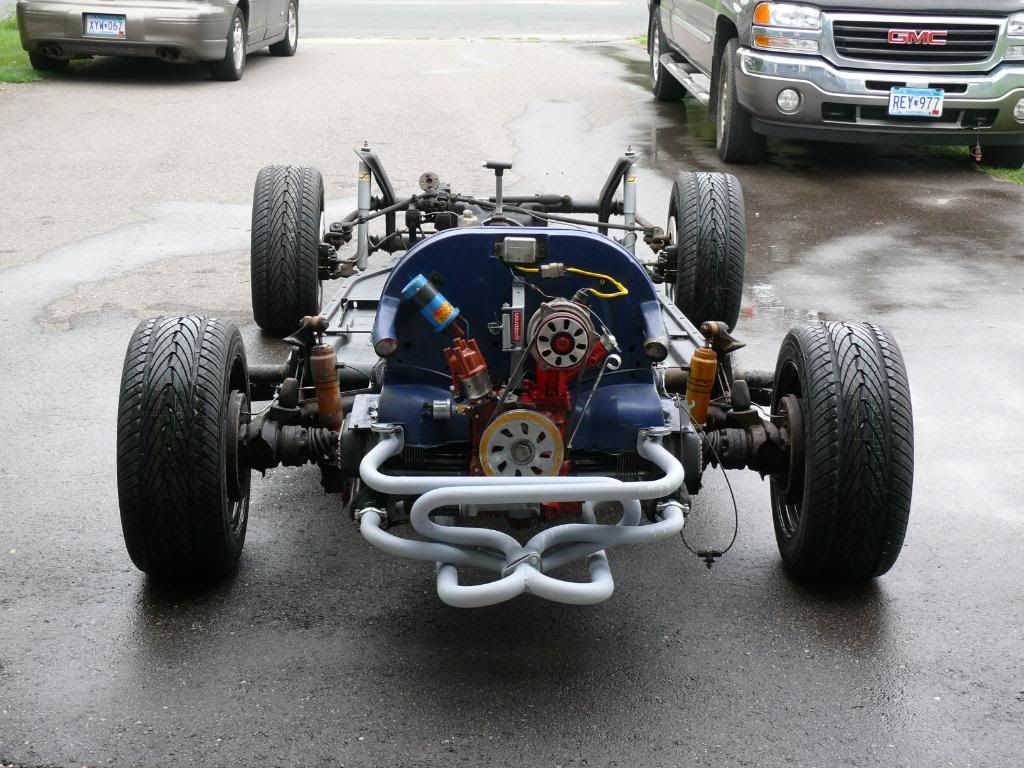 One of the first orders of business will certainly be to get a copy of the assembly manual, which would have been nice to have 25 years ago. Even tho it's a GTE, it seems to have the infamous butt-sag problem (never knew such a thing existed till I stumbled across the forum here a few days ago), so I've got plenty of work ahead of me this winter... |
|
|
|
Post by Jeff Lande on Sept 30, 2010 6:31:30 GMT -5
not sure why the pictures aren't working...  |
|
|
|
Post by dawgdk on Sept 30, 2010 7:48:39 GMT -5
Hi welcome to the forum!!!! There are some really good people hear that knows about these cars fairly well So if ya have any questions just ask. Sometimes you may not get the answer you want but it will be an honest answer that will help you along the way. Maybe someone can help with your pictures too. I think you have to go through photobucket or another photo site.
|
|
|
|
Post by Gary Hammond on Sept 30, 2010 8:48:38 GMT -5
Hi jslande01,  I found the problem with your pics!  You entered the URL from the web page each pic was listed on, instead of the URL of each pic itself.  The difference was this phrase.................... (?action=view¤t=) ........................had to be deleted from each of the URL's you originally entered.  |
|
|
|
Post by Jeff Lande on Sept 30, 2010 9:30:36 GMT -5
thanks Gary, all fixed.
Jeff
|
|
|
|
Post by mrbigh on Sept 30, 2010 10:28:04 GMT -5
Nice pictures of the upgrade and rejuvenating process. Keep up the tedious job............ ;D
|
|
|
|
Post by centralvalleygter on Sept 30, 2010 14:25:00 GMT -5
Love to see cars that were deteriorating being restored. Good work.
Was going to ask where in California you are, but after rereading it looks like you were in California, but not any longer.
Keep us apprised of the progress.
Warmest....
|
|
|
|
Post by topdude on Sept 30, 2010 17:53:30 GMT -5
it looks like the long steering tie rod is bent- might be a good time to replace it with a straight one prior to drooping the body back down.
|
|
|
|
Post by mrbigh on Sept 30, 2010 18:54:36 GMT -5
Man, you'r right; and I have the same problem in mine.
|
|
|
|
Post by Jeff Lande on Sept 30, 2010 20:47:02 GMT -5
weird... it does look bent in the picture. When I parked it, it drove straight. Hmmmm.... I'm gonna go look at it.
|
|
|
|
Post by superdave008 on Sept 30, 2010 21:22:34 GMT -5
Wow ! That's a lot of work and time well invested . can't wait to see more pictures of the work in progress.
Thanks for the post .
Superdave
|
|
|
|
Post by big bob on Oct 1, 2010 10:06:24 GMT -5
looks really good,,
love the big tires and deep dish wheels. it gets them out from under the car and gives it a big base. i've been having trouble finding reasonable deep dish wheels, with wide tires.
GTE, i thought meant electric. what exactly is the difference between GTII and GTE?
big bob
|
|
|
|
Post by dawgdk on Oct 1, 2010 11:50:18 GMT -5
Bib Bob the base of the gt and gte are differant so the batteries will fit properly!!! the gte also had a hood
|
|
|
|
Post by Jeff Lande on Oct 1, 2010 13:33:04 GMT -5
The wheels came from www.petepaulsen.com/Catalogofwheels/VW.htmThey are 15x8 with 2" backspace, white ranger spokes painted with Duplicolor Graphite wheel paint. If my measurements are correct, the wheels should end up just about flush with the body. (fingers crossed) Tires are Kumho Ecsta AST 225/50/15. Should be almost the same circumference as the original 5.60-15's so the speedo should be fairly accurate. The whole setup was just under $600. I'll get a couple pics of the body uploaded this weekend... door alignment definitely shows signs of the dreaded butt-sag problem. Or maybe its because there was never any support up front either and it's been sitting for 20+ years. |
|
|
|
Post by big bob on Oct 1, 2010 15:07:12 GMT -5
right, so why does a GTE have an engine if its electric? you mean he's just using the body from a GTE? either way, its looking good....
big bob
|
|
|
|
Post by Jeff Lande on Oct 1, 2010 15:35:57 GMT -5
correct... GTE body, basically the same as a GT2, just has cutouts for electrical connectors and a big "trunk" lid up front. Not sure about any other differences, since I've never looked that close at a GT2.
Thought about trying to make it an electric. Just don't have the funds and since I had the engine, I figured I'd just get it going as-is.
|
|
|
|
Post by dawgdk on Oct 2, 2010 18:43:58 GMT -5
the airdam was differant on the gte also at least on the later models they made it different so it would except the steel battery frame. They also made the gte after they quit making the gtII  |
|
|
|
Post by Jeff Lande on Oct 5, 2010 16:07:19 GMT -5
Time for a few exterior pics: 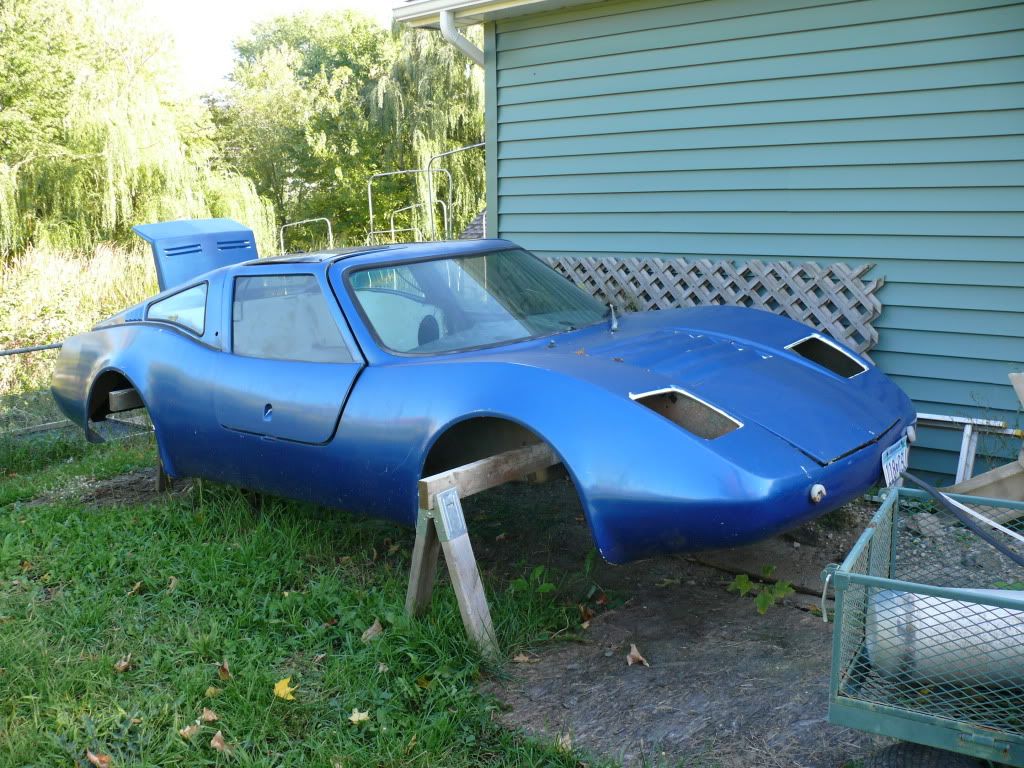 I assume this is "classic" butt-sag or maybe nose-sag? 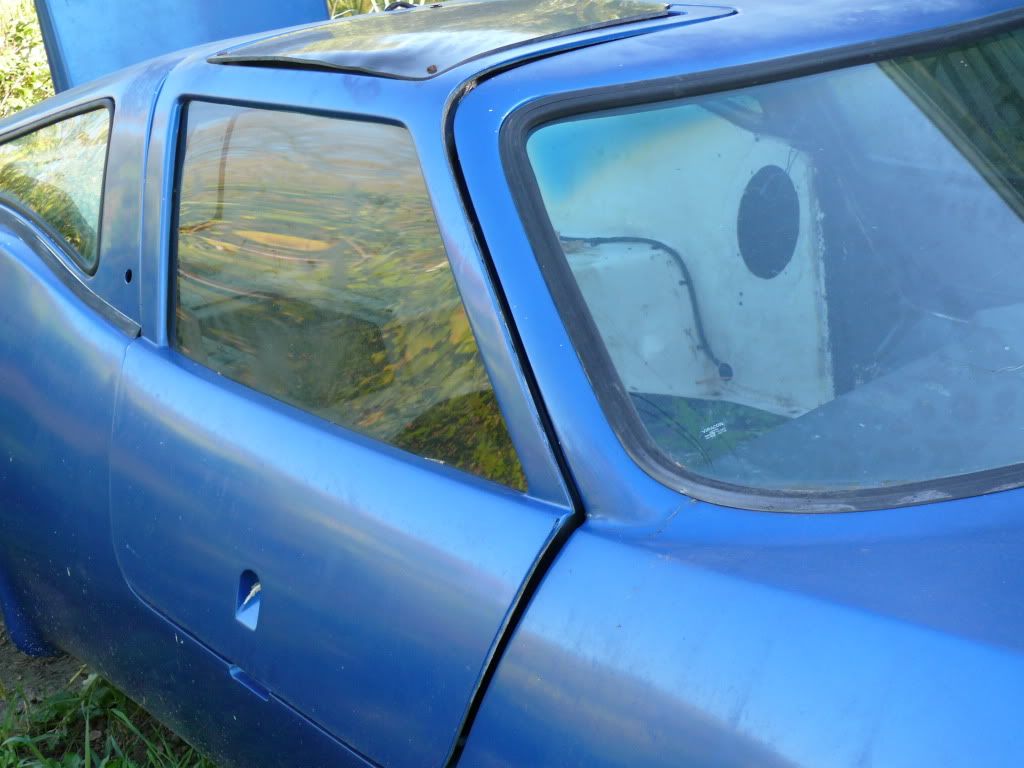 difficult 'shield repairs ahead (good thing they're easy to come by  ) :  always hated the popups, definitely going to do something different up front: 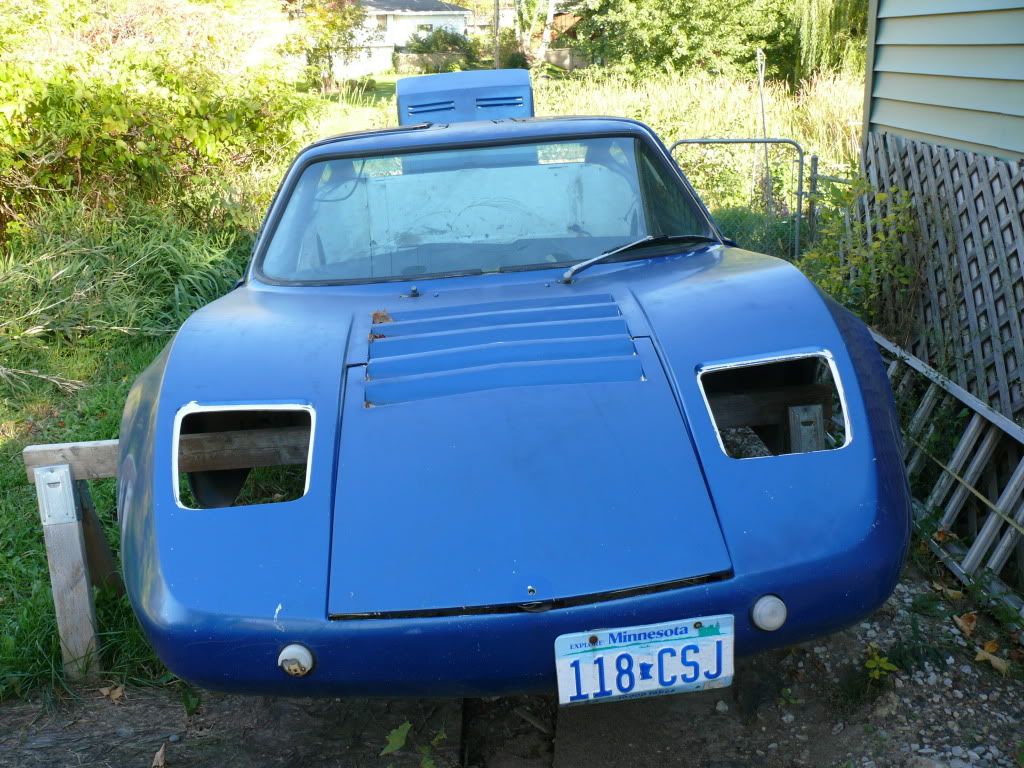 and you gotta love the schoolbus tail lights. 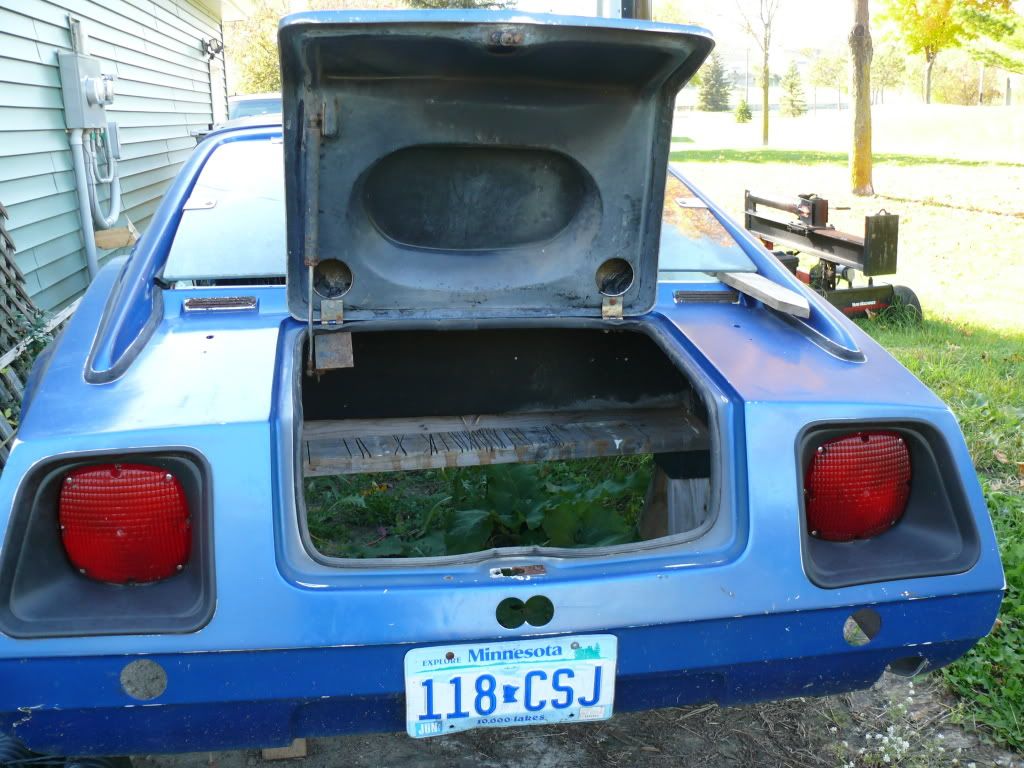 |
|
|
|
Post by Jeff Troy on Oct 5, 2010 23:14:56 GMT -5
I'm one of the few who actually do love the bus lights. If you're keeping them, you'll find that they look even better if you paint the plastic bezels the same color as the car.
Best of luck. Nice work so far.
Warmest regards,
|
|
|
|
Post by dawgdk on Oct 6, 2010 7:05:20 GMT -5
There is butt-sag there you can tell by how flaired out the top of the fenders are on the back!!!!
|
|
|
|
Post by Jeff Lande on Oct 6, 2010 9:52:19 GMT -5
Jeff Troy - the nice thing about these is I should be able to put a nice set of blue-dots in there... dawgdk - just one more thing I'm going to have to do before I get it on the road... make some butt-sag supports. I'm going to have to learn how to weld now. Or keep leaning on my neighbor's skills. I didn't notice the back fenders flaring out any more than the fronts, what I notice the most is the door alignment, or rather mis-alignment.
|
|
|
|
Post by dawgdk on Oct 6, 2010 10:28:18 GMT -5
The first picture shows the butt-sag at the rear of the rear-quarter glass. it looks almost like a crease in the picture. The butt-sag actually aint that bad on yours. As far as the doors go none fit perfect!!! Also you have the earlier gt11 electric body the later ones had an airdam under the front. What is the extra cutout on the rear corner for? You have a nice body to work with compared with most i've seen!!
|
|
|
|
Post by Jeff Lande on Oct 6, 2010 10:35:20 GMT -5
I had put a single quiet pack exhaust on the header at one point (my mom didn't like how loud it was) - I was 18 at the time... the outlet turned up right into the body so I took a jigsaw to it.
That will be filled back in when I roll it into the garage for the winter. I've just fabricated my new exhaust. I kind of like the way it turned out. Will post pics once they're installed and ready.
Should have my carbs back today or tomorrow... looking forward to seeing if this thing will actually start after sitting for so long.
|
|
|
|
Post by Jeff Lande on Oct 11, 2010 14:45:16 GMT -5
The saga continues... Got the carbs back only to find my electric fuel pump no longer worked and my starter had apparently disintegrated inside. Who would have thought 20 yrs sitting next to the garage would be so detrimental...  Anyway, AAP has a starter for $39 and I took apart the pump and cleaned up the varnish and it's pumping like mad. Now I just need a real battery (deep cycle from the boat with jumper cables just doesn't push enough amps) and hopefully it will start. |
|
|
|
Post by jspbtown on Oct 11, 2010 15:05:48 GMT -5
Starters from an autostick are a very worthwhile upgrade.
|
|
|
|
Post by Jeff Lande on Oct 12, 2010 6:28:14 GMT -5
|
|
|
|
Post by Jeff Lande on Oct 13, 2010 21:50:58 GMT -5
one more shot of the engine now that I have it basically done [ and running  ] and basically ready for the body... 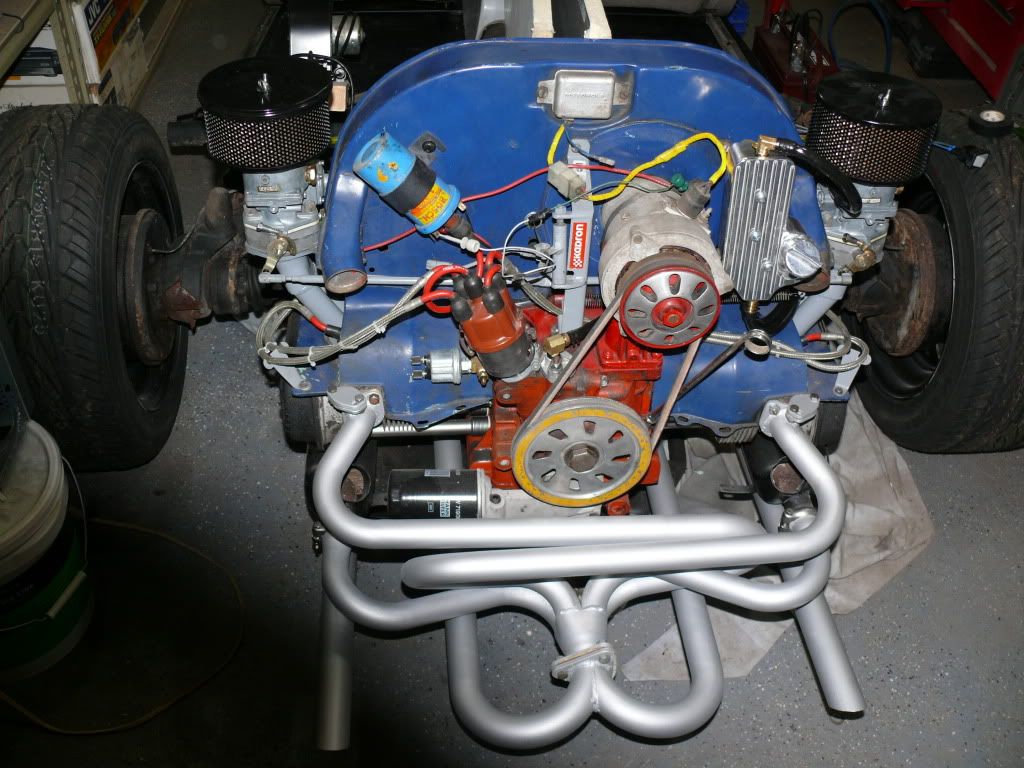 saw someone did this on another bug website with the fuel lines, thought it looked like a good idea. 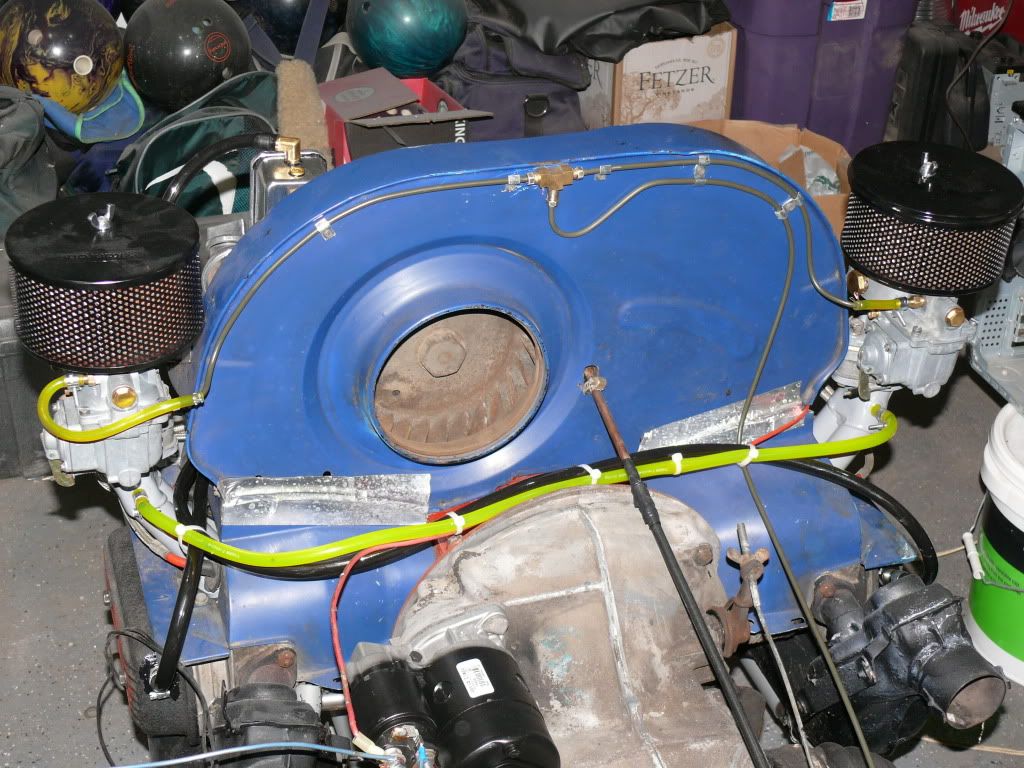 |
|
|
|
Post by Charlie on Oct 13, 2010 22:44:28 GMT -5
WOW! It is lookin good! I can not wait to see it finished!
|
|
|
|
Post by Jeff Lande on Jun 8, 2011 22:58:21 GMT -5
got the body on 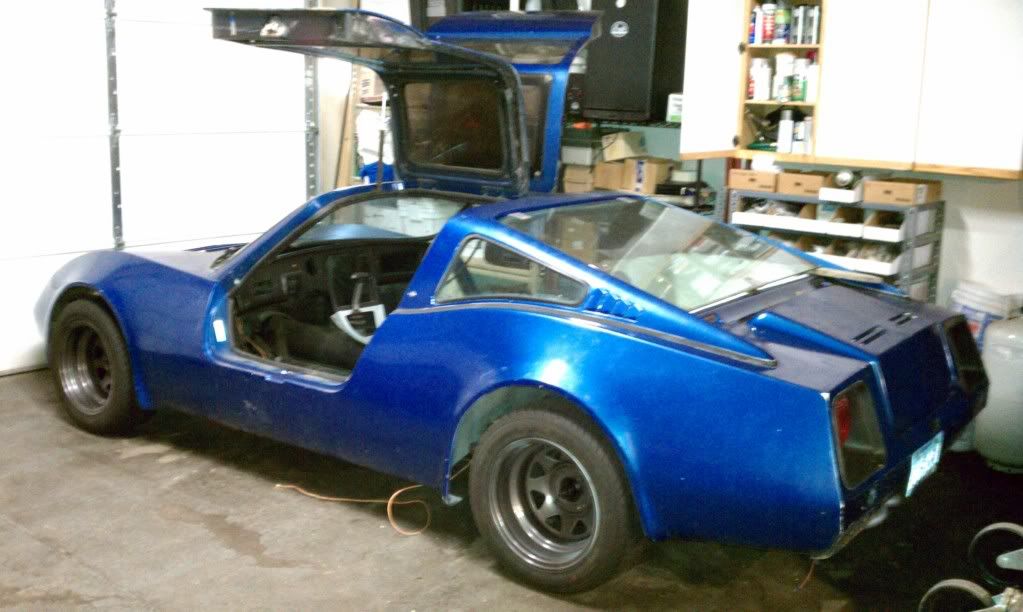 |
|
|
|
Post by Jeff Lande on Jun 8, 2011 22:59:03 GMT -5
tires fit flush, just as expected... 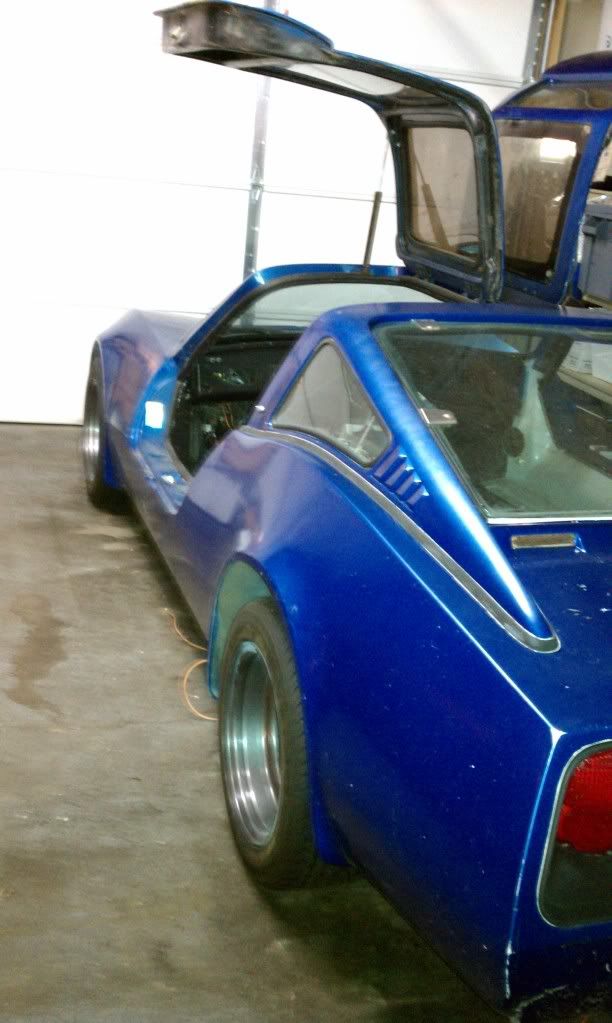 |
|