|
|
Post by kitcarguy on Sept 11, 2011 18:33:38 GMT -5
Headlights are installed, but I forgot to take some pics. While I was there today I got to thinking. I have no seat belts. How can I even put them in?
|
|
|
|
Post by kitcarguy on Sept 14, 2011 20:09:56 GMT -5
And we now have headlights 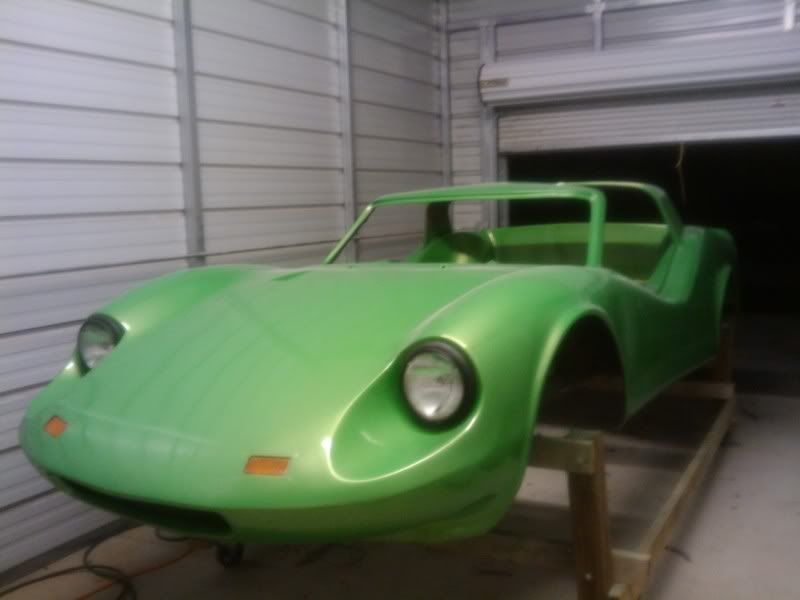 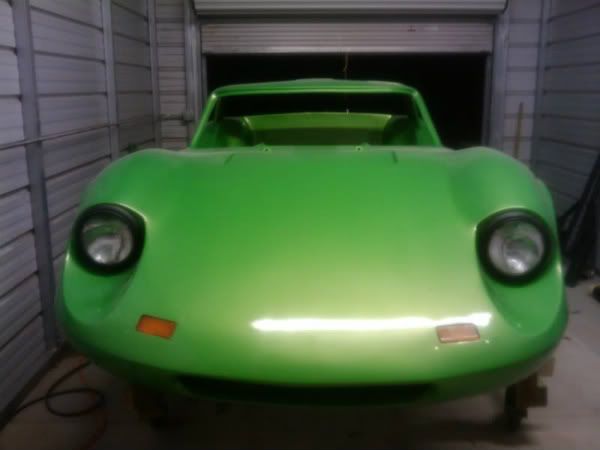 |
|
|
|
Post by kitcarguy on Sept 18, 2011 20:18:59 GMT -5
My dumb questions never end. Here is a new one. I just re-assembled my pedal assembly after replacing the brake spring . While trying to install it every time I bolted it up the clutch pedal would flop forward and the cable would fall off. Resulting in me having to unbolt everything again.
Did I miss something when I put the pedals back together?
|
|
|
|
Post by Dan MacMillan on Sept 18, 2011 20:36:51 GMT -5
There should be a metal tab on the floor that sets the pedal height and stops it from flopping. 1st item on the left 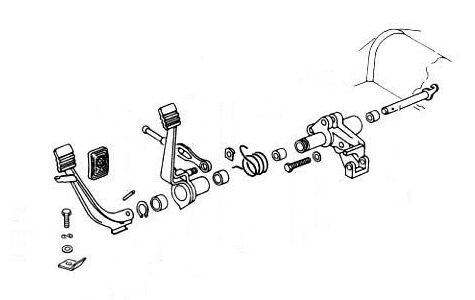 |
|
|
|
Post by kitcarguy on Sept 18, 2011 20:45:32 GMT -5
There should be a metal tab on the floor that sets the pedal height and stops it from flopping. Gotcha, I thought that was for the brake only. |
|
|
|
Post by kitcarguy on Sept 28, 2011 20:08:22 GMT -5
Well now that I am back from a week of racing I can get back to work on this car. Unfortunately now I am at a point where I am waiting on the new tank to be finished and the seats to be covered. Never fun waiting on others to get things done.
Oh well!
|
|
|
|
Post by kitcarguy on Oct 11, 2011 7:29:30 GMT -5
What have you guys used for gas cap/fillers?
|
|
|
|
Post by Gary Hammond on Oct 11, 2011 9:58:01 GMT -5
Hi Donnie,  I'm using a Seadog #351110 stainless flip up gas filler sold by several marine supply websites. Here's a picture of it installed.  Gary Hammond,   |
|
|
|
Post by skip20 on Oct 12, 2011 6:15:59 GMT -5
What have you guys used for gas cap/fillers? I'm planning on using the gas cap from the Spitfire. They are flip to in 2 shape. You can get it round or egg shape. Using the egg shape one on the GTII. Here a picture of a round one on a Spitfire & restored.  |
|
|
|
Post by kitcarguy on Oct 12, 2011 9:08:27 GMT -5
Problem solved . Drove over to west marine and got what I needed...haha
|
|
|
|
Post by kitcarguy on Oct 12, 2011 19:20:31 GMT -5
|
|
|
|
Post by jspbtown on Oct 12, 2011 21:15:29 GMT -5
Index the rear torsion bars and either adjusters up front or dropped spindles.
|
|
|
|
Post by kitcarguy on Oct 12, 2011 21:29:43 GMT -5
Index the rear torsion bars and either adjusters up front or dropped spindles. Thanks man, was thinking some 2.5 drop spindles in the front but was not sure about the rear. I was reading up on the rear about lowering the rear torsion bars. I never did like messing with suspension stuff. To much could go wrong..haha Is there a way you recommend doing it? 69 IRS is what I have |
|
|
|
Post by jspbtown on Oct 13, 2011 8:43:06 GMT -5
The rear is real easy. I hope others will chime in because its been a while so I may forget some steps.
Where the rear arms attach to the axle there are a few bolts. First mark the relationship from the arm to the mount near the wheel. I use a cold chisel or hack saw to make a little line across both the arm and the rear bearing assembly. That was you can just re-align the marks. I then put a good size hydraulic jack under the end of the arm. Some people use a special tool, others use a chain. The reason being that those arms will want to spring down pretty violently when released. Then remove the bolts.
Then remove the cap that covers the torsion bars on the other end of the arm. I would then mark the relationship of the arm and the bar. You can then GENTLY pry the bar off of the lower stop that its resting on. Once its off the stop you can release the pressure on the arm by lowering the jack. Once the pressure is off the arm should come out and you can re-index the arm on the torsion bar.
The torsion bar has inner and outer splines. Each set of splines adjusts the bar in different increments. I would just go 1 notch on the outer part. Remember...you want to move the arm upwards. A little goes a long way. Do this for both sides. Then re-install the cap (sometimes you need a longer bolt to pull the cap in. Use the longer bolt to pull the cap in, then install a stock bolt, then another stock bolt, then remove the longer bolt and use a stock bolt). After the cap is on jack the arm back up onto the stop and re-install the arm onto your rear axle housing.
Overall its not hard. Use marks to establish your baseline. Some people use an angle finder on the arm (measure after you drop it off the stop) and then index it up and measure that angle and use for the opposite side. I never have used one. I just mark the torsion bar inside the arm and move it a notch. You can also measure how far it hangs above the level floor with no tension and make sure your equal on both sides.
You may have to do it more than once to get it right where you want it. Always settle for a little higher as it will drop over time.
|
|
|
|
Post by kitcarguy on Oct 13, 2011 9:57:29 GMT -5
Thanks . This helps a bunch. I am also trying to decide what rims I am go with. I like the way the vette rims fill up the wheel wells but they are just to darn big. There are a few empi wheels I like but I am afraid that they will sit in to much and not look right. The vette rims have an adapter and what appears to be a 1 inch spacer
|
|
|
|
Post by jspbtown on Oct 13, 2011 11:04:31 GMT -5
probably the aluminun spacers that have the 1 offset bolt. I have them on my Avenger but am taking the rear ones off since they push my rims out to far.
Just take some measurements off the rim regarding the backspacing so you know what sized rims to get.
|
|
|
|
Post by Wyn on Oct 13, 2011 11:11:38 GMT -5
|
|
|
|
Post by kitcarguy on Oct 13, 2011 11:24:13 GMT -5
Thanks Wyn,
And this is why I do not like to mess with suspension ...
"Note: Reindexing a torsion bar is more difficult and dangerous than the average DIY mechanic may be aware of. The spring plate is under tension and has enough force to break bones, amputate body parts of kill you if you put your head under the plate. This job should not be attempted by those not thoroughly familiar with all the safety precautions involved with this task."
I like my arms and bones and think I might find a vw guru to do the rear of the car...haha
|
|
|
|
Post by Wyn on Oct 13, 2011 11:41:16 GMT -5
Donnie, I have the tool, but it scares me too. The arthritis is getting bad in my hands so I really dont need any broken bones too.
The torsion assembly I used for my chassis was used in someone's rail buggy, so I have no ideal if he had changed the torsion settings. I will not know until I get the car fully load.
Wyn
|
|
|
|
Post by kitcarguy on Oct 13, 2011 11:55:36 GMT -5
Some things even I will stay away from...hahaha
|
|
|
|
Post by jspbtown on Oct 13, 2011 12:26:55 GMT -5
While precaution is always good I can tell you from experience that this is not really that hard. Of course if you are uncomfortable in doing it then by all means don't. Just like anything else.
Looking at the quote I found this part really amusing: "or kill you if you put your head under the plate".
Really? Do you realize that you would have to basically lay under the car, with your head under the rear wheel area, all while prying the torsion arm off the torsion bar. Not only would you have to be a circus performer but you would have to be absolutely STUPID as well.
Its silly things like that which get there own life on the wonderful web. People see it and believe it without thinking about it.
Here are the facts....the arm is under pressure. It will want to snap downward. The only thing preventing it from snapping downward is a little ledge that it rests on. If while your removing the bolts that connect it to the rear axle area it "may" slip off the little ledge and shoot downward. So common sense tells you not to have your feet (or your frickin HEAD) anywhere under that arm. If you support it with a jack it won't do that.
So Donnie, don't do it if your not comfortable with doing it, and definitely watch your guru do it when he does. Because afterwards I bet you will say "Geez...that wasn't that hard".
|
|
|
|
Post by kitcarguy on Oct 13, 2011 14:39:58 GMT -5
HAHAHA I am sure you are right . I might have at it this weekend.
|
|
|
|
Post by kitcarguy on Oct 14, 2011 21:51:02 GMT -5
Anyone have any rim suggestions? As you can see the 85 vette rims are just not working for it. I am thinking all black or black with a chrome lip. They are 16" now . I seem to think I really need 15s and low profile tires but what do you guys think?
|
|
|
|
Post by jspbtown on Oct 15, 2011 9:27:23 GMT -5
Its all about rim size, offset and tire diameter. I would take a look at what you have and decide what you don't like.
For instance...how is the overall width? Does it fill the well? To wide? Not wide enough? If you take the tire size and go to tirerack you can get the specs on the tire for its width & height. You can then decide how wide of a tire you want. remember...a tire that is 1" narrower will be 1/2" narrower on each side.
For height (and more importantly is how they fit in the well left to right) how does that fit? Does it hit the fender lip when you turn it (or when the rear goes through its limited suspension movement)?
Last is offset. How does the rim fit in regards to hitting the control arm? Or extending past the fender lip? Do you want them to tuck in more or stick out more? Using what you have will allow you to decide what you want.
Another bit of wisdom is don't go too low profile on your tires. Too stiff of a sidewall will make the car ride even worse. A larger sidewall with the pressure down will smooth the ride out considerably.
I would rather use a 15" rim with a 60 series tire then a 19" rim with a 40 series tire.
|
|
|
|
Post by kitcarguy on Oct 15, 2011 11:27:08 GMT -5
Surprisingly the corvette rims/tires fit well. I like that they sit almost flush with the fenders. They are somewhat wide though as you can see from this photos I posted earlier.
The car does not seem to have any issue turning. i did get to drive it for the first time last night and I did not hear/feel any issues.
My only real dislike is that the car is just sitting to high. I picture it at least 2-3 inches lower than what it currently is.
|
|
|
|
Post by brianboggs on Oct 21, 2011 4:49:31 GMT -5
I always liked the combo Jeff had on the orange GT he did a couple of years ago. Torque Thrust type wheels. 15's will obviouslt fit the rear just maybe some shorter tires. The fronts you could go with 14's unless you put disc brakes on it. I got some rims from a Blazer/S-10 that looked good and ended up putting them on the buggy. They look like mesh wheels.
|
|
|
|
Post by jspbtown on Oct 21, 2011 8:25:45 GMT -5
I really liked these ARE 398s that I put on the Avenger. 16x8 (or maybe 9) with 245 50 16 tires. The front has an old scholl Select-a-drop and I didn't have to adjust the rear yet. Its a little high in this picture but there was no motor in it. It might be a little low with the motor...I am not sure yet. 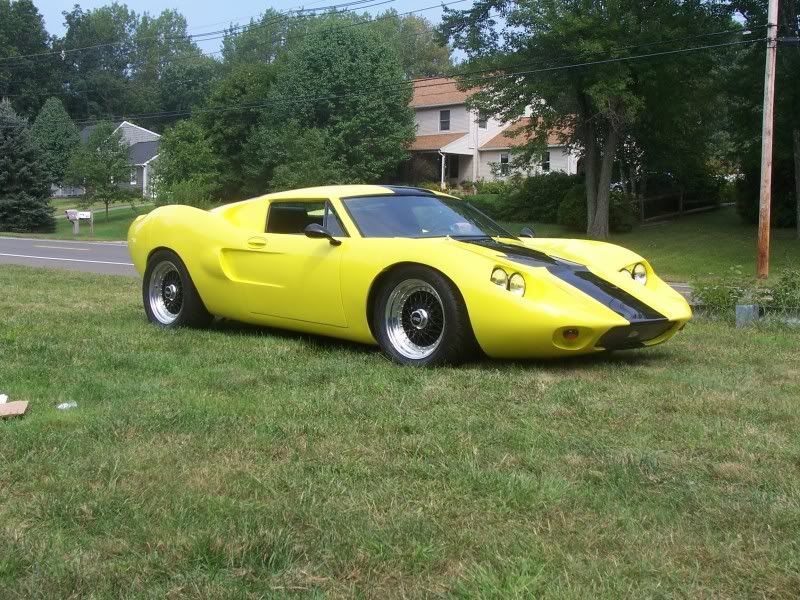 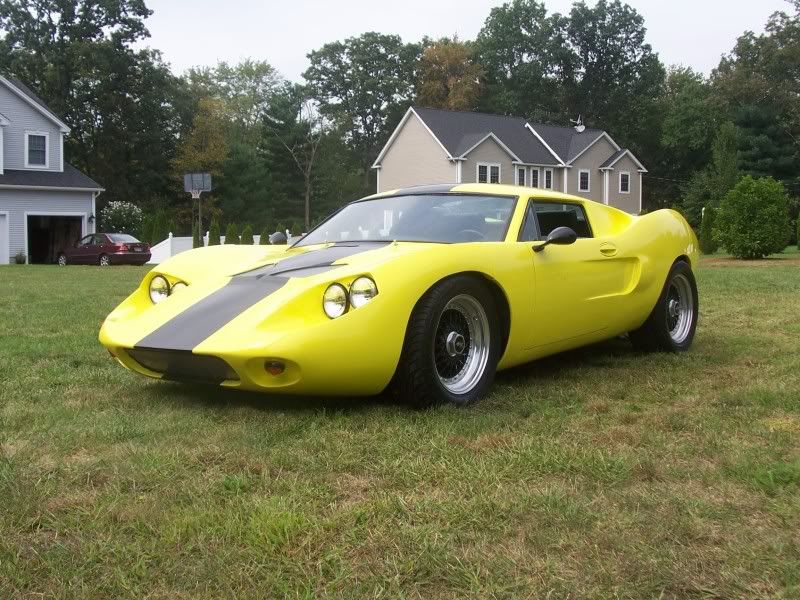 |
|
|
|
Post by kitcarguy on Oct 21, 2011 20:40:36 GMT -5
Your car has such a great stance.
|
|
|
|
Post by kitcarguy on Oct 26, 2011 19:57:47 GMT -5
Uggg....
So I was getting a thumping noise from what appeared to be my right rear wheel. I checked the bearings and they looked almost new, well greased and in good shape. Checked the axle/cv joints and I decided to replace them. Just got it all back together and I am still getting this thumping noise.
It could just be the tire, but after really listening to it it seems as though it could be coming from the center of the car instead.
Anyone have an idea of what could be causing this noise. I hear it when I am at around 15mph and it continues with the more speed the car sees.
|
|
|
|
Post by brianboggs on Oct 27, 2011 5:23:27 GMT -5
Jack the rear of the car up and run it. See if one wheel is not centered or bent. Be sure and block the front wheels when you do this.
|
|