|
|
Post by Wyn on Jul 9, 2013 14:21:13 GMT -5
I'll be using these switches, but they are a bit expensive 4 of them was over $100. Two of them will mount just inside each of the doors hand grip opening; It is a bit tight on spacing. As you reach to grab the door you press the buttom to pop the latch. Power will not be applied until a remote proximity sensor picks up a signal from an RF pendant attached to the Key Flob. The other two will be used as engine cover release, and to release the latch in the 3" rear window lifting servo. Instead of using that pull cable and knob.  |
|
|
|
Post by Wyn on Jul 8, 2013 20:46:19 GMT -5
I had just ordered two more for my doors. Because of the movement range I will need to extend the activation arm on the GT-2 latch. So now I'll need to take it all aparts again. Wyn
|
|
|
|
Post by Wyn on Jul 8, 2013 20:31:17 GMT -5
Skip, The solenoid I purchased it from Amazon.  Wyn  |
|
|
|
Post by Wyn on Jul 7, 2013 23:38:47 GMT -5
Any and all the wiring harnesses should work, as for a front engine cars, with the VW some of the
wires will be short to the engine. I used the EZ Wiring 21 on my Brad. It is all based on your knowledge
of how all the function of the wiring and equipment works and your ability to work around problems.
Do you understand how to wire the Hazard sw to the lights and turn signal sw together, how the turn
signal sw works and determine which connection from the sw goes to which wire, Why does the
GT-2 use a converter for the lights? How to wire the wipers from the sw, With the VW there are 3 or
more different windshield wiper systems and each one is wired differently. Don't use the wiring diagram
from the brad, there are functional errors in the wiring and its a rats nest. That my opinion!
With what I've said here overwhelms you, your better off to get someone to wire the car for you.
Many of the members here have wired there own cars with no or very little problems.
So if you do your own wiring thats great and good luck. We are all here to help you.
Wyn
|
|
|
|
Post by Wyn on Jul 7, 2013 0:31:53 GMT -5
smyrnaguy, you can email me the pics and I'll post them on my server aeolus@alink.com. I welded a bracket to hold a BearClaw latch for my engine cover. I found a coil with one kilo of power so I'm hoping it will pop the engine cover with the bear claw. If that works I'll get 2 more coils to use in each door to pop the standard GT-2 latches, and still use the inside hand pulls to open the doors from the inside.   |
|
|
|
Post by Wyn on Jul 4, 2013 10:09:46 GMT -5
|
|
|
|
Post by Wyn on Jul 3, 2013 13:59:45 GMT -5
|
|
|
|
Post by Wyn on Jul 3, 2013 13:20:04 GMT -5
Mercer, is this the image you were trying to show. If it is you do not have a good web address to it from your site. I copyed it and saved it to one of my servers to get a good web address to it. This is my web address and image name for your picture. users.alink.com/aeolus/mercer77.jpg |
|
|
|
Post by Wyn on Jul 2, 2013 20:21:38 GMT -5
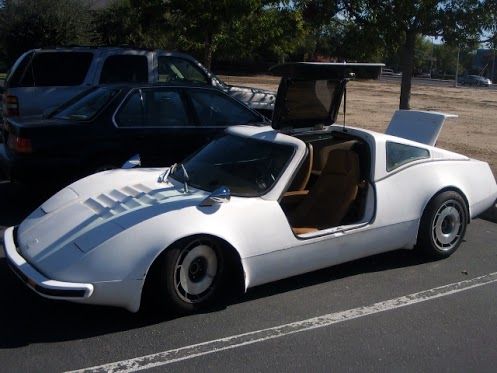
Syngledad36 I copied all the post files less the HELP post. This is the only one that I have seen without the flip up headlights, looks pretty good in my opinion but would be a descent amount of work I imagine. 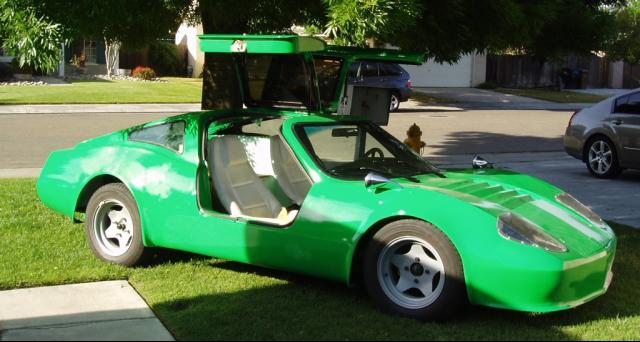 Wynn, this car was built by a 16 year old. It is an electric. A quick search brings him up. Looks like the valkrie/avenger headlights. he also built the front airdam/spoiler himself. As far as the headlight bucket removal, I have seen a few different gt2's with thin headlights mounted in the top of the recess with plexi-glass covers. This whole post should not be here in classifieds (unless of course it's classified info). That being said, here was a build from about 4 years ago that I still look at amazed at the inventive twist to headlights:    I just found that picture online :/ wish I knew the owner. |
|
|
|
Post by Wyn on Jun 28, 2013 8:33:23 GMT -5
I had cut off the relay portion of the VW fuse block because it had the dimmer relay and 3 other relay locations. I used the relay block part with a wiring harness from E-Z Wiring. I re-bundled the harness to route engine wiring to the rear. 3 wires were too short but easily spliced. I don't know if they will do it, but if you order from EZ ask if they can make the engine wires about a foot longer to give a little more room for routing. and make the Solenoid Power (Red), the Coil Positive (Pink), and the IGN Switch Start (Violet) 5 feet longer. I used the EZ 21 package. Wyn  www.ezwiring.com/index.html www.ezwiring.com/index.html |
|
|
|
Post by Wyn on Jun 23, 2013 19:50:15 GMT -5
What do the glass pans use for the outer frame support? Do they rely on the old support? I would imagine you need a solid perimeter for the body to bolt on to and support the glass itself. The glass pans use no other support than the stucture of the car. The glass pans are much stronger than the metal pans especialy the new pans made in mexico. It scares me to stand on the metal pans the glass pans were much better support, at the time I weighed over 320 lbs. The glass pans do not have the outer edge fold like the metal pans. If you think you need support cut the outer edge and mounting holes from the old pans and use that to support the glass pans. Or have a machine shop to make a new support for the glass pans. I really don't think you need it. Wyn |
|
|
|
Post by Wyn on Jun 23, 2013 9:51:27 GMT -5
Looks like something happend at Flickr on your pictures other than that you did it right. You know you can edit your post if you need to change the address of the pictures or other information. I had used fiberglass pans on my first chassis, which I really liked and they can be installed without removing the body. They are much more on the quiet side and feel to be stronger. But the state of Ohio would let me use the chassis as the prevouse owner had cut the chassis through the Vin number making the chassis totaly unusable to register it. I wish I could have reused them but you need parts of the old pan to mount the glass ones to. mainly the rear edge and the lip along the tunnel. I built a complete new chassis so I had no edge to use. The old chassis with the Fiberglass pans.  This is my new chassis with metal pans. The area in yellow is whats needed to mount the glass pans.  vwinnovations.com/index.php?option=com_hikashop&view=product&layout=show&Itemid=96 vwinnovations.com/index.php?option=com_hikashop&view=product&layout=show&Itemid=96 Glass Action, LLC PO Box 27265 Prescott Valley, AZ 86312 Wyn |
|
|
|
Post by Wyn on Jun 22, 2013 23:34:36 GMT -5
Get the CD from Jeff Troy for the GT-II well worth the money. Hi, themosh, My Bradley GT and GTII CDs hold files of the complete, original assembly and wiring manuals, and any official updates. The GT CD also holds roughly 36 years and 645 thousand actual miles worth of useful information. Ordering is easy. Just send $35 through PayPal to jefftroy@aol.com. If you don't use PayPal, you can send $35 by check or money order to: Jeff Troy 759 New Holland Ave. Lancaster PA 17602 Be sure to state whether you need the GT or the GTII CD. The cars – and the manuals -- are very different. One of the many advantages of the CD over an original printed manual is that you can take the pages you need out to the shop and not have to worry about dogging them with oil, grease or other shop debris. If you ruin a page, you can just print another. One of my CDs just may be the best money you can spend on your car. I'm sure that anyone who has one -- and most owners do -- will tell you that it's extremely helpful. Bradley GT Information for Owners on CD-ROM Section 00: Text files Section 01: 1976 Original Configuration - Metallic Brown Section 02: 1980 First Rebuild - Cream, Copper and Brown Section 03: 1985 Second Rebuild - White, Blue, Pink and Purple Section 04: 1993-1995 Complete Restoration Section 05: 1995 Shows Section 06: 1996 The Wreck Section 07: 1997-2000 Re-Body Donor Preparation Section 08: 2000-2002 Re-Body Section 09: Post-2002 Car Shows Section 10: Bonus Section - Bradley GT Manuals and Literature Section 11: On The Road Section 12: Restoration Parts, Literature and Instructions Section 13: Sun Ray Products - Bradley GT Kits and Parts Section 14: Reference Materials Section 15: VW Part Source Catalogs Section 10: Work In Progress Files (additional files to be edited for all sections) Bradley GTII Structural Plans & Updates on CD-ROM Section 01: GTII Structural Plans, Screen Section 02: GTII Structural Plans, Print Section 03: GTII Parts Inventory Section 04: VW Part Source Catalog Recommendations Section 05: Kit in California 2000 Section 06: Arrival in Lancaster PA 2000 Section 07: Assembling the GTII Full Kit – NEVER BUILT: EMPTY FOLDER Section 08: Bradley Automotive Catalogs & Literature Section 09: Reference Book Recommendations Section 10: Dropping the Pan Thanks and warmest regards, As for posting pictures this image should help Wyn  |
|
|
|
Post by Wyn on Jun 20, 2013 19:42:45 GMT -5
Dan its a long and involved Story. But to keep it short! The purpose of this inspection is to verify the ownership of all parts and to review all required documentation. Any parts presented that are questionable or missing vehicle identification numbers are subject to seizure. Documentation required for self-assembled inspections: 1. Titles, receipts, and documentation of the source for the replaced major component parts, which includes the Vehicle Identification Number (VIN) of the source vehicle. If receipts are from a casual sale from an individual, they must be notarized. Photocopies of receipts are not acceptable. 2. The inspecting officer may require receipts or documentation for any part of questionable origin (ORC, Section 4505.11). 3. When "kits" are used, the manufacturer's certificate of origin must be presented. 4. The inspection receipt. Any vehicle or component part bearing a VIN or VIN derivative determined to be stolen/missing or altered will result in the vehicle being impounded and held as evidence and/or seized for forfeiture. bmv.ohio.gov/salvage_inspection.stmusers.alink.com/aeolus/Bradley.htmWyn |
|
|
|
Post by Wyn on Jun 20, 2013 17:15:21 GMT -5
 I need to finish connecting the engine wiring, get the brad painted, get the upholstery completed, install the windows, then what ever little adjustment needed. Then comes the bigest problem get it to the State for inspection and get a new title. If they don't title it, they will take it and crush it. Wyn |
|
|
|
Post by Wyn on Jun 19, 2013 19:52:16 GMT -5
I have at times install a new master cylinders and have them fail while bleding the brakes. I had new fail about 4 months latter.
I had one fail 10 month and just after I sold the motor home to some one else, he lucked out he got it stop with the ebrake.
I would really look at that master cylinder. Its good to find it now and not later on the road.
Wyn
|
|
|
|
Post by Wyn on Jun 12, 2013 21:10:05 GMT -5
If your pictures did not show you have an error in their web address. To test your picture's web address just copy and paste it to your web browser, if the address is correct the picture will appear. A correct web address will post directly to the internet. If you click on any one of the web addresses below they will open in your web browser out side of this Bradley site. To post them on the Bradley web site they need the image brackets. ( [ img] web-address[/img] ) I had to place a space inside the first set of brackets so my example of the brackets would not activate as an image. www.ksus-62.net/Brad/Misc/post-pic-2p.jpgwww.ksus-62.net/Brad/Misc/Bill_Johnsons-gt2.jpg the top address has the Brackets added and the image is now activated so you now see the image below here on the Bradley site. |
|
|
|
Post by Wyn on Jun 9, 2013 20:48:49 GMT -5
Greg, Great looking GT-2.  I am using a king pin front and it is also low, but the rear torsion assembley was removed from a dune buggy and the torsion bars are set all the way up, so I'm going to need someone to reset them lower. Wyn  Man I love that Blue !  |
|
|
|
Post by Wyn on Jun 8, 2013 9:20:10 GMT -5
I have attached an image of the old club page. How many of you remember the old club web site? The water mark is hard to recover. I'll take a copy of the watermark to a shop in our Mall that does air spray designs on T-shirts and others. They also do vinyl prints. I'll see what they can do. What would you like to see done on the watermark, colors, size, materials, badges, T-shirts, shoulder patches?  Wyn  Click link for larger copy of page, then click on image to inlarge it. www.ksus-62.net/Brad/Misc/BGT-car-club.jpg |
|
|
|
Post by Wyn on Jun 1, 2013 18:42:43 GMT -5
If you have the standard School bus tail light It will only have the single dual filament bulb. The only reasion I can see if this was a mod to add brake lights, because the GT2 converter module does not work. Check with a volt meter and see if you have 12V when the brakes are applied or the directional are applied.  Wyn |
|
|
|
Post by Wyn on May 31, 2013 23:08:27 GMT -5
|
|
|
|
Post by Wyn on May 28, 2013 19:00:12 GMT -5
While working the roof I thought I'd light up the third brake lights.  Wyn |
|
|
|
Post by Wyn on May 23, 2013 12:00:44 GMT -5
Toddmo Fri, May 31 after 6:00PM, the wife and I are heading for Effingham, Ill. You should schedule a stop in Upper Sandusky, OH, during your trip to Indiana at UNI-Grip uni-grip.com/ That is where I bought my weather seals. Check out their Tape Seals is which you will need for your doors. Uni-Grip 9823 State Highway 53 North Upper Sandusky, OH 43351 (800) 257-2289 (Toll Free) (419) 294-2358 (Phone)ý (419) 294-1221 (Fax) Wyn |
|
|
|
Post by Wyn on May 22, 2013 4:31:37 GMT -5
Todd I have an extra engine cover Its not in good shape needs a little repair. I keep that last hinge as I am missing them. Make offer on the engine cover.  I saw where you were looking for the latches. I recovered two of the latches, I decided I'm not going to use them. I had new latch pins made. I'll sell the two latches and two pins for $20.00. I'm going to use the Bear Claw latch system for the engine cover and the front tank hatch.  As for the rear window I'm going to use a linear actuator a cylinder type latch and a locking pin from the older latch. The linear actuator has a 3 inch movement. I'll be able rise and lower the window the 3 inches for ventlation.  I was going to use a different linear actuator, but it only had a 7lb lift. I one I bought has a 150lb lift and it was a few dollars less.  Wyn |
|
|
|
Post by Wyn on May 18, 2013 22:06:42 GMT -5
Minax, Your GT2 is looking great! I'm just about ready to mount the roof on mine and I'm going to mount it down like you did no webbing. Any notes you might add for mounting the roof would be appreciated.
Wyn
|
|
|
|
Post by Wyn on May 15, 2013 12:05:38 GMT -5
I'm just about in the middle between them. Google Earth gives me 326 mi 5hr 28min - Newark, Ohio to Carlisle, Pa and 355 mi 5hr 33 min - Newark, Ohio to Effingham, Ill. The wife tells me only one or the other, I can't do both. Wyn |
|
|
|
Post by Wyn on May 14, 2013 7:44:41 GMT -5
|
|
|
|
Post by Wyn on May 13, 2013 14:23:14 GMT -5
Can you drive a car with a joystick?
Can anyone build this into their Brad? Skip what about you?The SCARY THOUGHT is: NOW a 3-YEAR-OLD can STEAL your car AND DRIVE IT BETTER THAN YOU CAN!  Presenting the New Mercedes Benz SCL 600 Presenting the New Mercedes Benz SCL 600  Wyn
|
|
|
|
Post by Wyn on May 12, 2013 14:43:01 GMT -5
Never seen one before. My trany is from a 73 type 3 only has a reverse sw. My sons 73 bug only has the reverse sw. The old 57 VW chassis I have does does not have one on its trany.
I had an old 52 plymouth and I'm glad it did not have a kill sw as I have used the starter and battery to move it several times. ;D
Wyn
|
|
|
|
Post by Wyn on May 12, 2013 10:14:54 GMT -5
It should be the reverse SW. Run a hot wire to one post of the SW, the other post run it to the backup lights and ground the backup lights. Wyn |
|


 Wyn
Wyn