|
|
Post by topdude on Jan 6, 2011 18:49:17 GMT -5
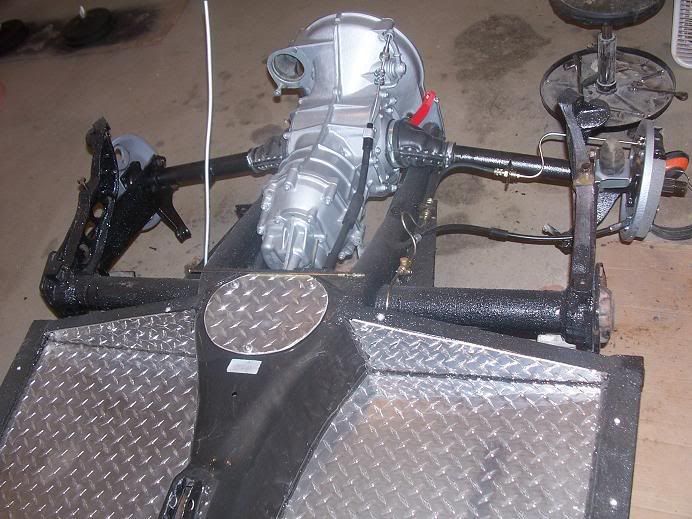
Have not posted in a while- too much travel for me but making progress with the car. Please review the pics and give me some feedback. Getting the chassis right is a priority, prior to dropping the body back down on it. Attachments:
|
|
|
|
Post by topdude on Jan 6, 2011 18:50:26 GMT -5
the new alternator should have plenty of power 90 amps
|
|
|
|
Post by mrbigh on Jan 6, 2011 22:11:53 GMT -5
Have not posted in a while- too much travel for me but making progress with the car. Please review the pics and give me some feedback. Getting the chassis right is a priority, prior to dropping the body back down on it. Nice looking engine; I wish mine sparkle like yours |
|
|
|
Post by topdude on Jan 7, 2011 7:05:10 GMT -5
Thanks for your good thoughts- my chassis is nearly ready for the body to come back down Attachments:
|
|
|
|
Post by jspbtown on Jan 7, 2011 9:28:47 GMT -5
topdude,
It looks like you have an internally regulated alternator so why are you using an additional external regulator?
|
|
|
|
Post by don29163 on Jan 7, 2011 16:39:23 GMT -5
Will it drop on with the gas tank mounted?
|
|
|
|
Post by topdude on Jan 7, 2011 17:29:34 GMT -5
Regulator is internal you are correct- just left it on prior to taking the pic- it will not be left on and yes the body will drop over the tank. It's sitting on the chassis now.
|
|
|
|
Post by topdude on Jan 7, 2011 17:42:01 GMT -5
Replaced all brake lines, new steel fuel line to engine, bigger master cylinder with Volvo reservoir, electric fuel pump with pressure regulator, and tie rod ends. New shocks around and cleaned and restored the pedal assembly. The sending unit was purchased from egages- thank you to everyone who are posting their ideas and work - it has made all my project GT II much better. Attachments:
|
|
|
|
Post by mwilson on Jan 9, 2011 19:23:07 GMT -5
Great looking chassis. So that's what it is supposed to look like. All I see on mine is rust! : (
|
|
|
|
Post by topdude on Jan 10, 2011 21:59:13 GMT -5
While the body was up I also installed a linear actuator- thanks for the tip guys. The pop up lights should work very nicely Attachments:
|
|
|
|
Post by jspbtown on Jan 11, 2011 9:02:46 GMT -5
That is the ultimate solution right there.
|
|
|
|
Post by topdude on Jan 11, 2011 18:22:01 GMT -5
After the body went up, I spent more hours than I want to count wire brushing everything to clean metal and painting. The PO sprayed everything with rubberized undercoating- the rust was covered up- but still there. Better to start with a good foundation and then move ahead for me. Trying to keep it simple and remember parts left off don't break. Attachments:
|
|
|
|
Post by mrbigh on Jan 11, 2011 20:11:40 GMT -5
While the body was up I also installed a linear actuator- thanks for the tip guys. The pop up lights should work very nicely And the actuator solution works very, very well. I like the picture of the assembly with the body off, mine where taken only from above. |
|
|
|
Post by topdude on Jan 11, 2011 20:21:53 GMT -5
after spending time looking at your work decided to do the same instillation. used a bronze bushing for a spacer and welded an additional support piece onto the bracket, in the back after testing. Thank you!
|
|
|
|
Post by mrbigh on Jan 11, 2011 20:36:24 GMT -5
after spending time looking at your work decided to do the same instillation. used a bronze bushing for a spacer and welded an additional support piece onto the bracket, in the back after testing. Thank you! You will be satisfied with the headlight operation. The change over from the original mechanicals is much simpler, reliable and light weight. |
|
|
|
Post by horen2tas on Jan 11, 2011 20:49:53 GMT -5
Gotta give "Kudos to Brian Boggs" for the body lift, more and more owners are putting that great design to use!
It's one of those simple things in life that make everything better!
THANK YOU BRIAN!!!!!!!!!!!!
|
|
|
|
Post by topdude on Jan 12, 2011 17:41:12 GMT -5
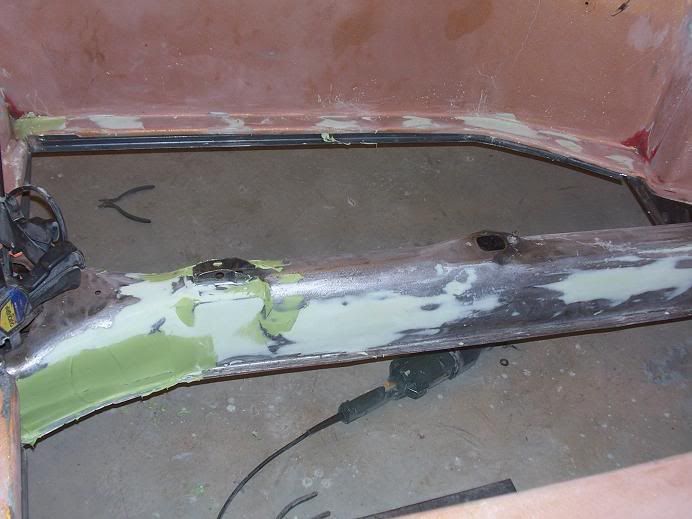
The lift Brian shared with the board was a lifesaver for me in my very small garage. could work on the car underneath with the body still inside- very nice, one person operation and many thanks again. Cleaned off all of the old sound deadener, wire brushed the tunnel, painted and welded in a new frame rails to beef up the chassis. Next I dropped the pans 3 inches and welded them in. Will be modifying the stock GT II seats to fit by removing the outer lip before redoing the upholstery and installing. Attachments:
|
|
|
|
Post by horen2tas on Jan 12, 2011 21:02:56 GMT -5
Really nice job on the rails and the pans!!! But one question is what do you do to reach the pedals? (Wear size 17 shoes for driving???)
|
|
|
|
Post by jspbtown on Jan 12, 2011 22:08:47 GMT -5
Drop that rear inner lip on the tunnel so its level with the rest of the lip. It makes it much easier to install a flat pan (dropped or not).
I have a pic if your interested.
horen2tas,
The pan is only dropped in the seating area. It tapers back up at the pedals.
|
|
|
|
Post by topdude on Jan 13, 2011 7:30:40 GMT -5
Yes I like to see the pic would have made the install easier, ( will keep it for future reference). The pic shows the taper up to the front on the drop of the pans after welding them in. Attachments:
|
|
|
|
Post by brianboggs on Jan 13, 2011 7:43:25 GMT -5
Hey Topdude, glad my little idea worked out for you. They say nessecity is the mother of invention. So when you are by yourself it sure helps to have the right tools. You are moving right along with your project and its looking good.
|
|
|
|
Post by jspbtown on Jan 13, 2011 12:24:21 GMT -5
  You can kinda see how I cut out the rear lip, welded it closed, and welded in a new 1/2" angle to make a new lip. Those mod makes the floor perfectly flat which I think is a better foundation for either seats or a dropped pan. |
|
|
|
Post by topdude on Jan 14, 2011 13:14:51 GMT -5
Very nice would have made that job way easier, and not to mention you pick up some additional width.
|
|