|
|
Post by Dan MacMillan on Dec 23, 2010 19:55:00 GMT -5
Well I changed my mind again. Cip1 got some frameheads in stock. They offered me a discount due to the computer glitch they had re stock numbers. I went to order one and was informed that all were pulled from the shelf as their supplier sent them link pin frameheads with ball joint labels. I went with building my own. Pics to follow.
|
|
|
|
Post by Dan MacMillan on Dec 25, 2010 21:59:37 GMT -5
|
|
|
|
Post by Dan MacMillan on Dec 25, 2010 22:13:45 GMT -5
For Christmas the family got me some much needed supplies for this project. My oldest daughter surprised me with this one of a kind painting of three of my cars. 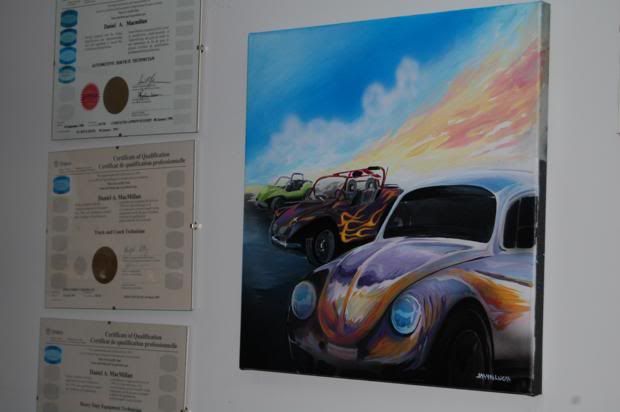 The artist is Jasyn Lucas jasynlucas.ca/index.html |
|
|
|
Post by thehag71 on Dec 26, 2010 1:47:39 GMT -5
The painting is awesome!! The progress on the car is great, I only wish that I had enough motivation to work on mine everyday. Keep up the good work and keep us informed of the progress. It motivates me everytime I see a new posting from you.
|
|
|
|
Post by Dan MacMillan on Dec 27, 2010 12:21:07 GMT -5
As I go on night shift tonight, the progress report is short. I shaped the floor under the pedal assembly for clearance of the pedal stops and installed the pedal adjuster bracket. Shaped the frame head a bit more for master cyl clearance. I could not find any master cyl bolt spacers {between the Napoleon's hat sides} so I made my own using 3/8 steel line and 7/16 aluminum tubing, one inside the other. Works perfectly. They are well coated in grease to reduce the possibility of corrosion due to dissimilar metals. Installed the master and the park brake handle assembly and painted half of the chassis.Pictures to follow after I paint the other side.
|
|
|
|
Post by Dan MacMillan on Jan 1, 2011 14:56:14 GMT -5
Well I have been rather busy the last couple of days. The paint on the chassis is dry. 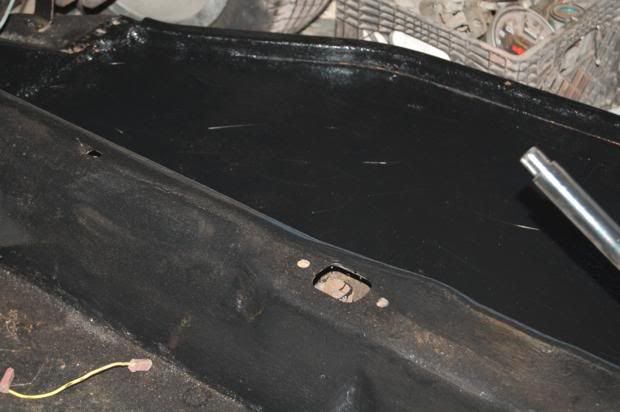 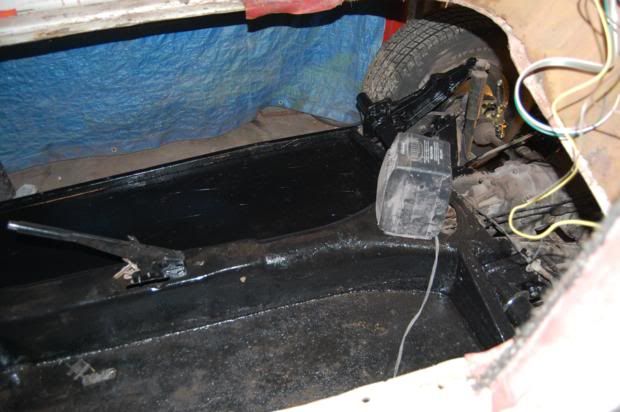 Some of the parts I ordered arrived. A used alternator to replace the generator. Something that has to be changed when reversing a Corvair. It was in bad shape. Needed new brushes, bearings, a reverse cooling fan and a deeper pulley due to the alt no longer being on the tension side. 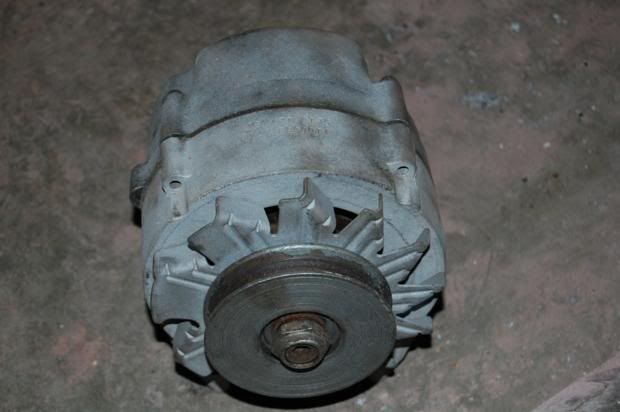 The old 50lb generator. 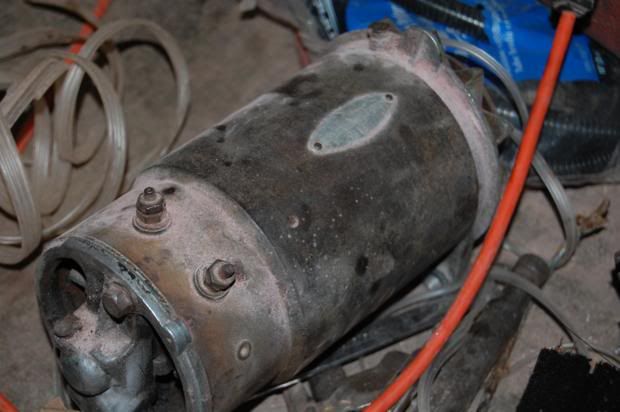 I also got a used newer mobel dist. The old one was not the right design for the reversing parts. When reversing you have to keep the distributor going the same direction as stock rotation as it drives the oil pump. New thrust washers and a new drive gear get installed. The used one had way too much play in the shaft so I made a new bushing and rebuilt the dist. Sorry forgot to get a pic of the new one after rebuild. 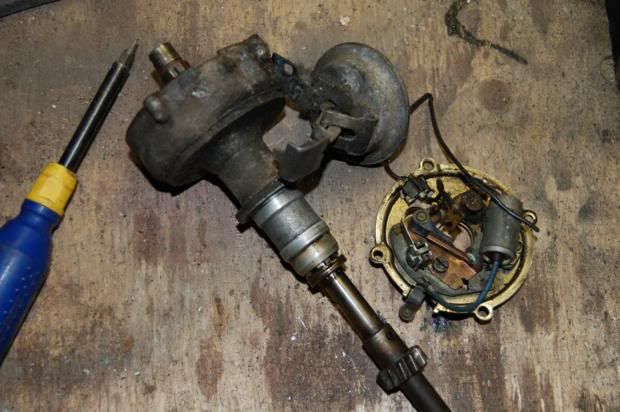 I decided to get as much as I could get done on the engine. First step take it apart. 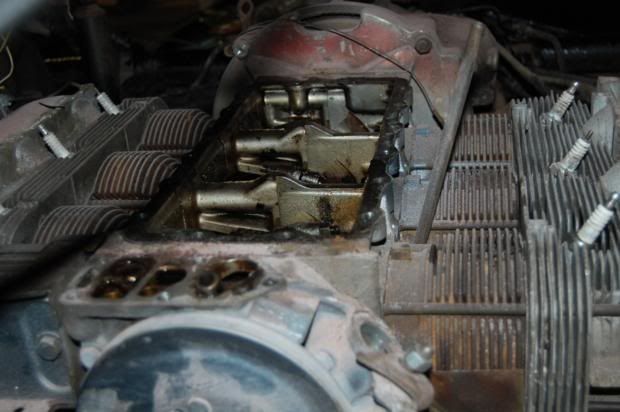 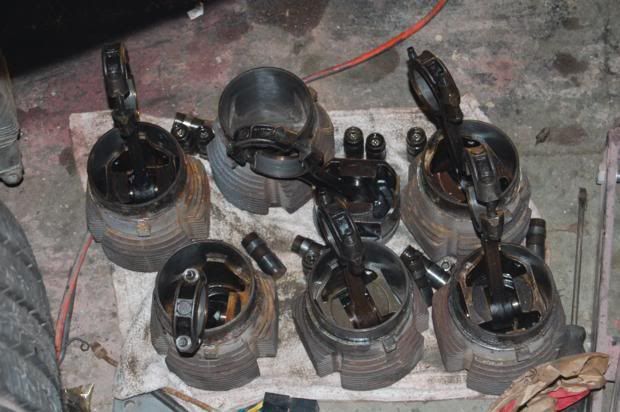 Most of it was stripped while still in the car. As I had originally chosen to flip the transmission crown gear to deal with the engine spinning the wrong way, I now had to remove the transmission. This is the one I flipped. 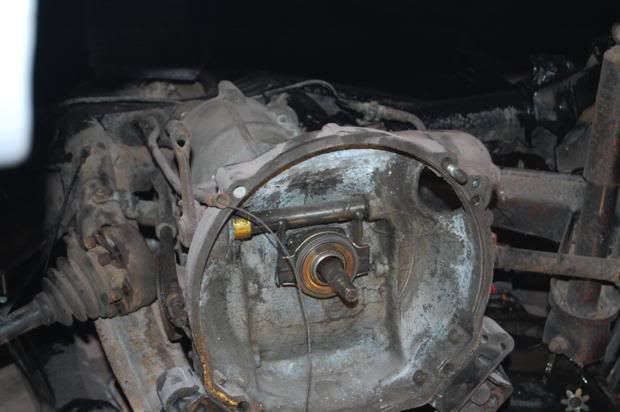 Instead of re-flipping it I just got another from my parts shelf. 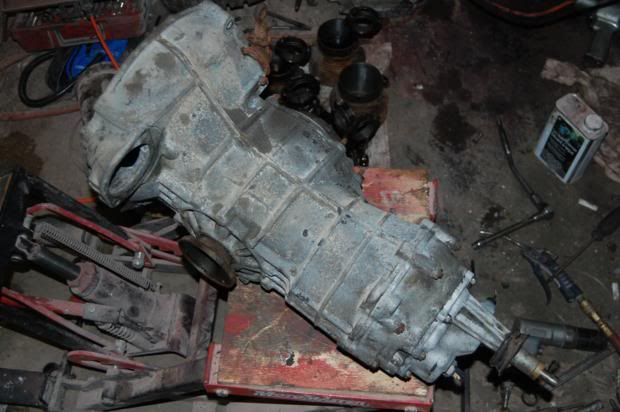 While the trans was out I replaced the rear flex hoses and installed the brake cables. 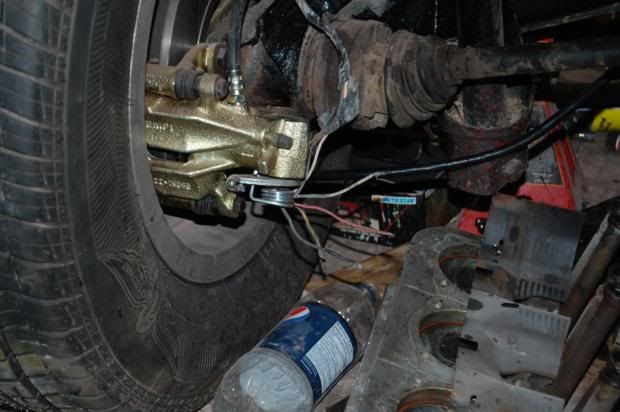 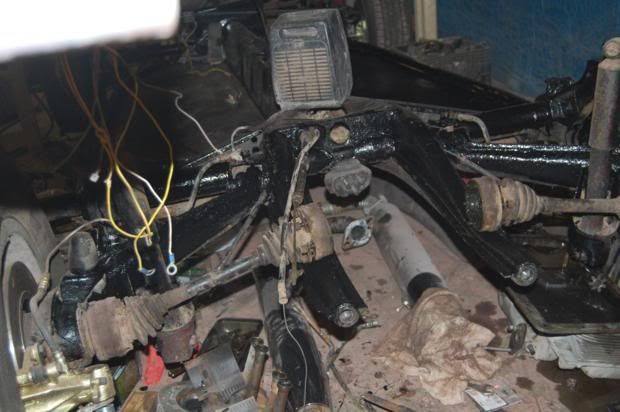 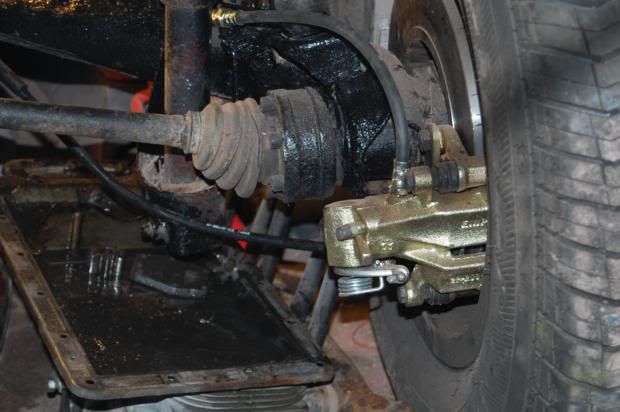 The trans going back in. It is nice that these transmissions are so light. Hold it with one hand install the fasteners with the other. 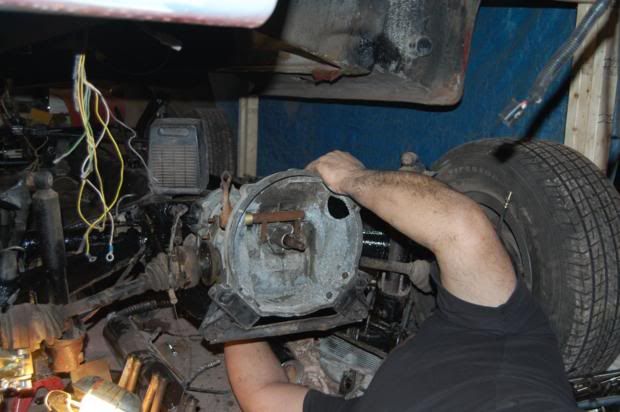 This is what a split Corvair case looks like 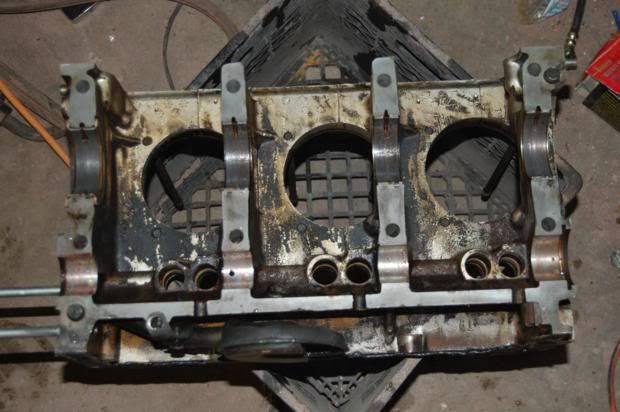 I took the engine case to our local CASINO car wash {casino as it eats more coins than a slot machine} They have a setting for engine degreaser. Going back together. Reverse rotation camshaft, and crank installed. New trans adapter plate and Flywheel. As GM went and used 11/32x24 grade 8 bolts to hold the flywheel on and I could not get any locally. I drilled and rethreaded the crank to accept 3/8x24. Grade 9 bolts were used. This is standard practice for race applications. 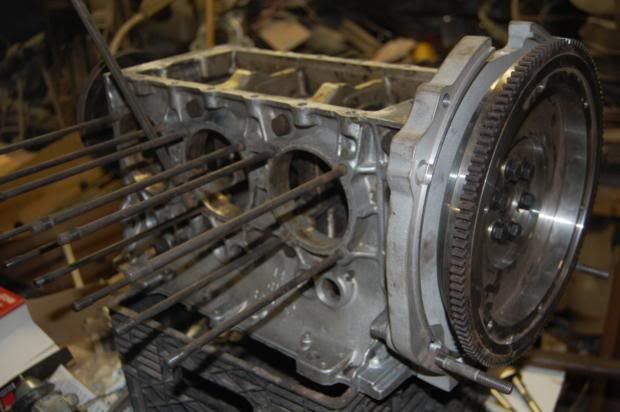 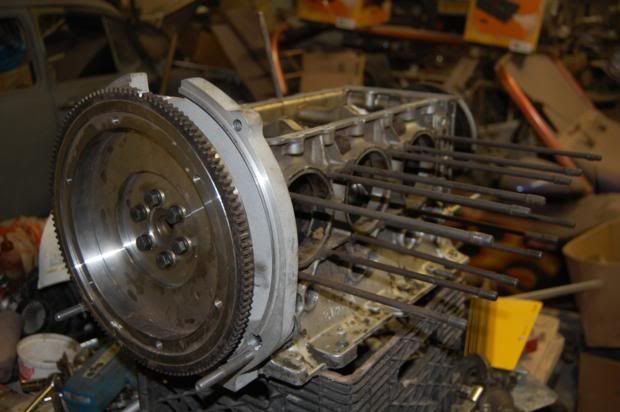 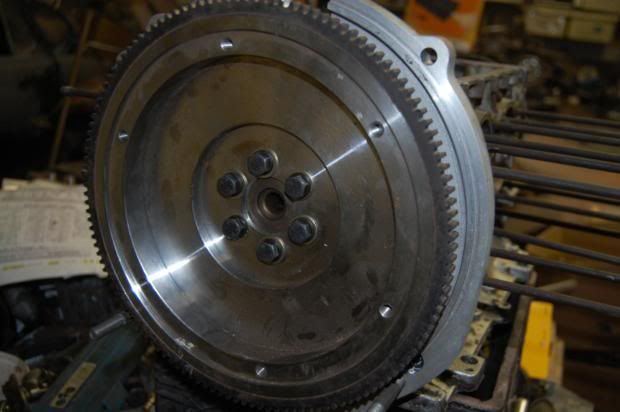 Reverse rotation distributor drive gear. 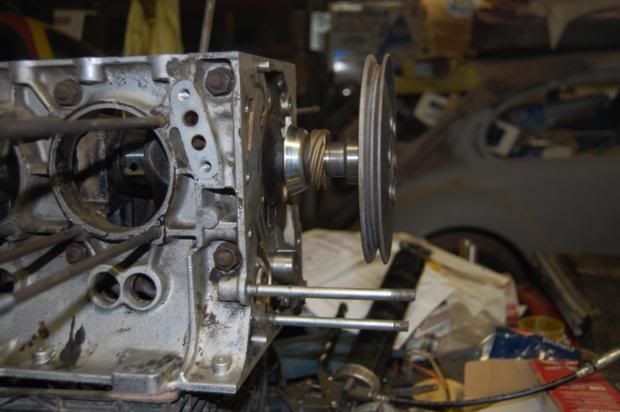 Once the clutch and crosshaft kit come in and are installed, the engine goes back on where I will finish the reassembly. |
|
|
|
Post by Dan MacMillan on Jan 1, 2011 21:25:12 GMT -5
Stock early cooling fan, made of steel, heavy. Due to the design it cannot spin backwards, the heavy weight contributes to fan belts coming off. 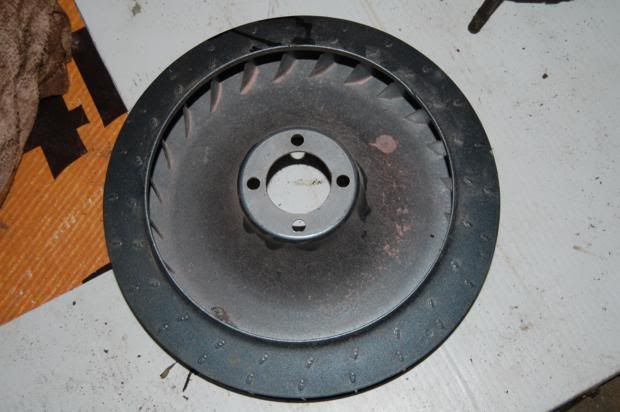 Later model magnesium fan, can be spun in either direction. About 1/4 the weight. Helps keep the belt on when making quick, high acceleration changes. 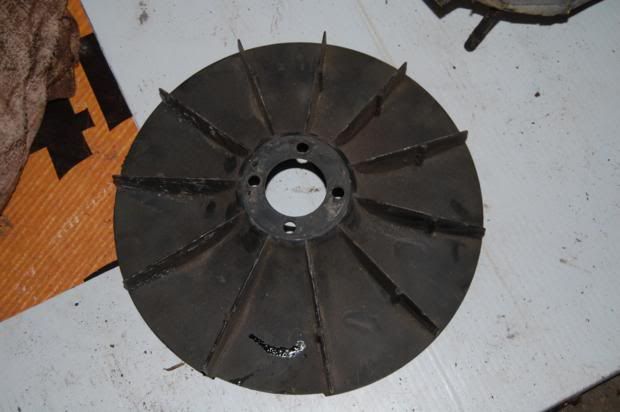 |
|
|
|
Post by Dan MacMillan on Jan 12, 2011 13:11:05 GMT -5
|
|
|
|
Post by Jeff Lande on Jan 27, 2011 14:38:05 GMT -5
just wait until you drive it and hit a bump... you'll get tired of watching them go down and back up.
|
|
|
|
Post by pushnfords on Jan 30, 2011 16:31:38 GMT -5
Wow, lots of progress. What did you use to make the windows for the tops of the doors? They look good!
|
|
|
|
Post by Dan MacMillan on Jan 30, 2011 17:39:43 GMT -5
Wow, lots of progress. What did you use to make the windows for the tops of the doors? They look good! Thanks, even more progress to report but that will happen later tonight. The glass for the door tops is 1/4 smoked plexi. Cut to size using an electric jigsaw, paper on. Sanded the edges with 220 Then I removed the paper and used a propane torch on the edges to bring them back to clear. Next I laid 1/4 plexi scraps along the top of the door to space the tops for future seals. Bolted the edge near the hinges snug and loose at the outer edge. Next was the neat part. I ran the propane torch all over the plexi, top and bottom. When it was hot enough and pliable, I snugged down the outer bolts and clamped the outer edge till it cooled. When I finish the paint removal on the doors I will put tubes around the bolts so I can remove the scraps, apply a release agent to the plexi and fill the gap under and around them with black silicone, They will be finished off with stainless carriage bolts. |
|
|
|
Post by Dan MacMillan on Jan 31, 2011 4:27:08 GMT -5
After checking my headlights for bounce I decided to break down and invest $144 on an actuator. Not because the go up and down {cycle}. They do not. When up, even if the limit switch was to "open" during a bump, they stay put. The decision was due to the fact that the motor has play and the lights will move about 1/4 inch when pushed down. The torsion spring then moves them back up. The actuator will be wired to the "lock" switch using 2 relays so that when off, the relays draw no power and the lights go down, turning them on will activate the 2 relays reversing the polarity causing them to open. I will post a schematic when they are done.
|
|
|
|
Post by Dan MacMillan on Jan 31, 2011 4:32:26 GMT -5
Check this site, www.paintwithpearl.com/candy_paint.htmAdditives that you mix into clearcoat for that special paint effect. Prices are dirt cheap. Placed my order last week. My final paint will be a subtle but custom effect. |
|
|
|
Post by Dan MacMillan on Jan 31, 2011 9:51:18 GMT -5
This last few days was time to concentrate mainly on bodywork. Cleaned up the rear end wiring. 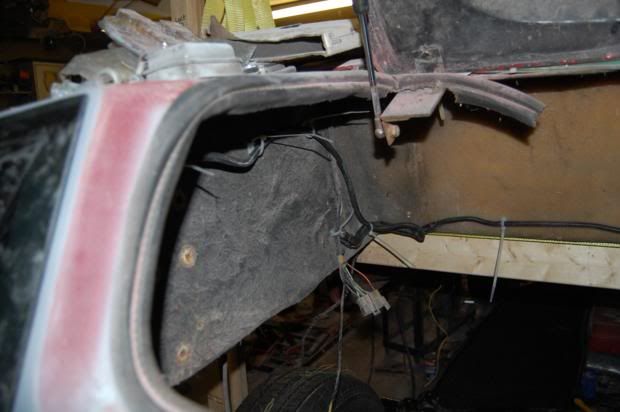 Made a mold of the left tail light bucket and glassed it into the body. Cut the remaining plexi tail light cover and wired up the tail lights. 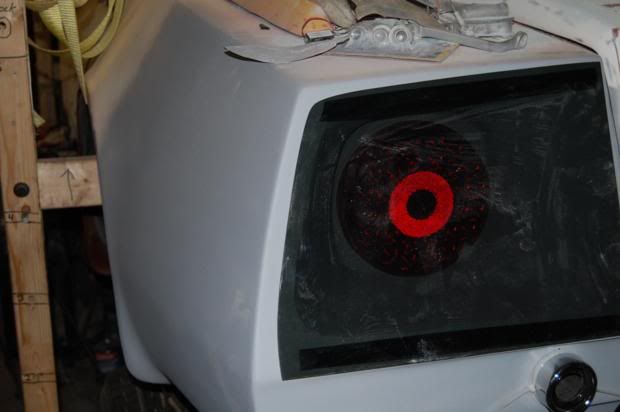 I also cut the second exhaust outlet. The Harley mufflers will join to these chrome extensions with silicone hoses. 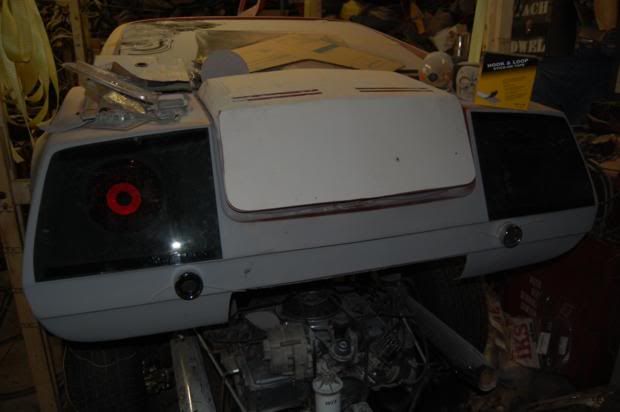 Laid a bit of the carpeting to see how it would look. 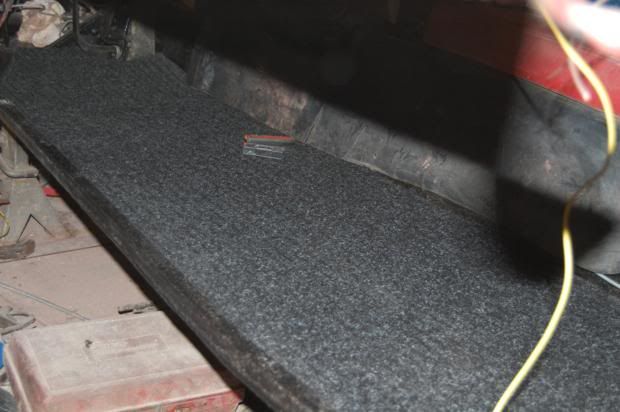 I had a couple of GM side markers and mounted them. I had to cut the lenses off the marker assemblies, heat and mold them to the body contour, then reassemble the lamps. I chose to flush mount them and built retainers that are similar in design to the stock tail light retainers. 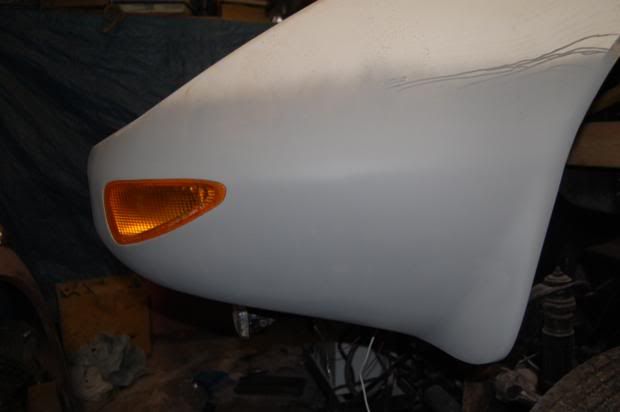 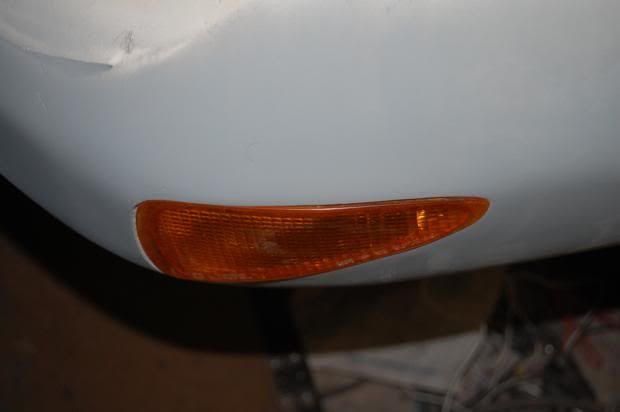 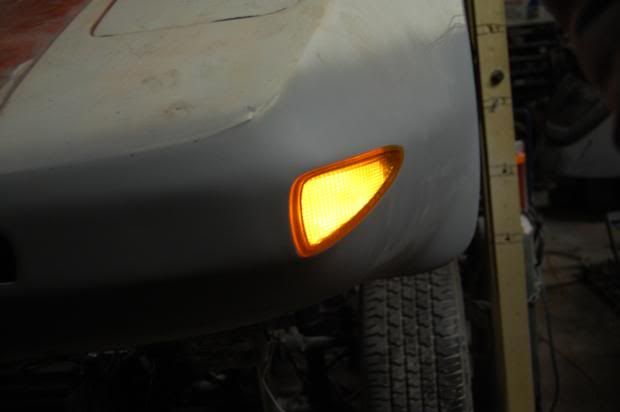 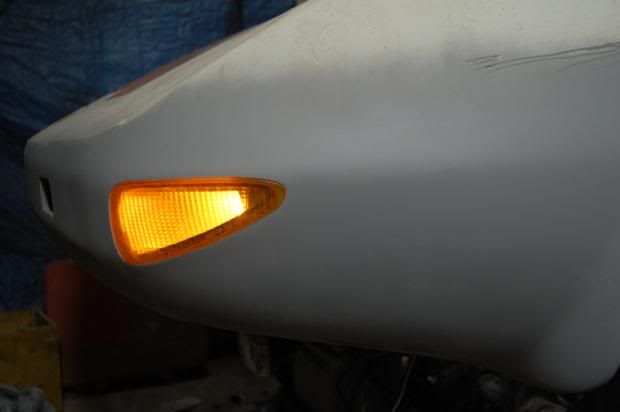 While at Princess Auto I found some small almost round driving lights. I thought that they would look good in the front end where the original bumper tubes went. They did not. A second trip out and I had a pair of rectangular units. I filled the bumper holes cut them for the new lights and glassed the lenses in with a .010 gap around them, just enough to allow adjustment. 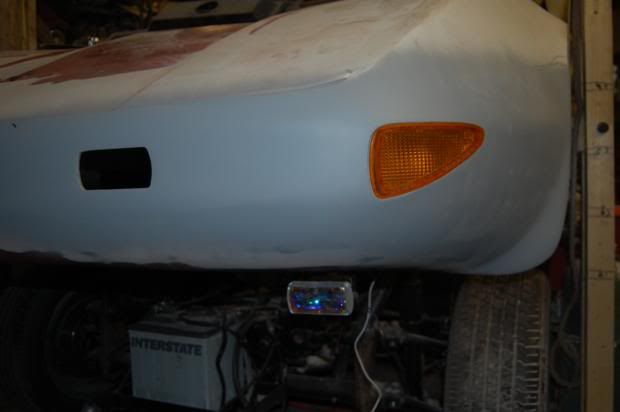 It too looked terrible as it took away from the clean lines of the front end. So I removed them and glassed in the holes. Next choice was to mount them under the front end, hanging down. Still did not cut it. So my 4th choice was to mount them in the body, below the "bumper" and shining through. Measurements were taken to ensure the look was clean and invisible when viewing the car. Here is the result. They will get a mesh cover molded to the body. Internally I may duct them so they double as brake coolers. 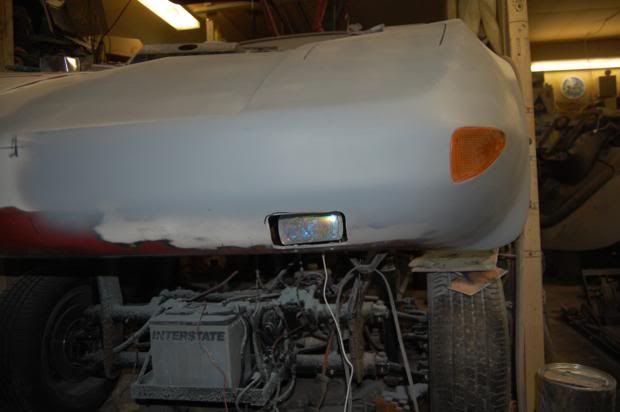 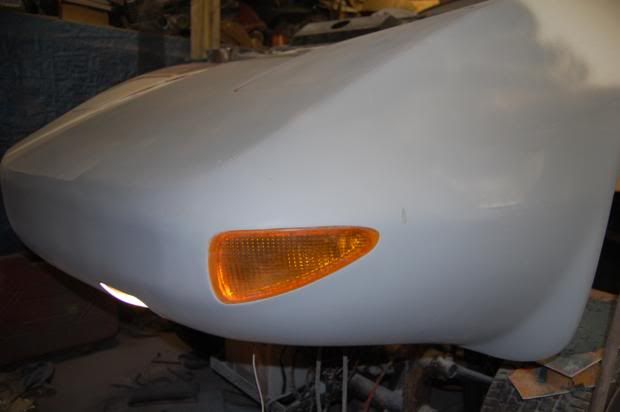 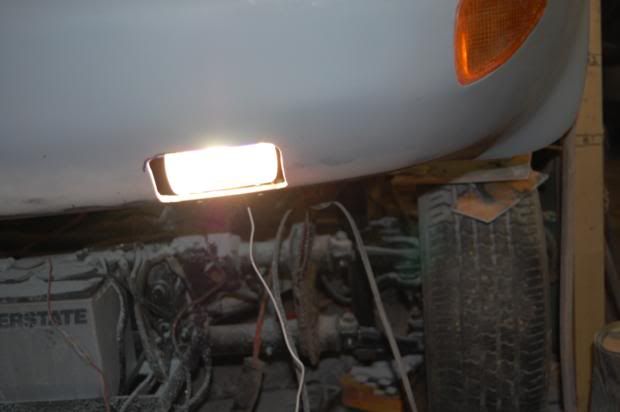 Now if you go back to the beginning you will know that the PO really messed up my hood and opening. I was able to buy a used hood for an ICE Bradley. Problem was I only had 2 louvers left on the car, the ICE hood has 2 louvers and I needed 5 in total. Due to the placement of my battery I also needed a hood that is 3 louvers wide. I grafted the 2 louvers from my electric hood to the 2 from the ICE hood. As the upper ICE louver is thinner than the lower it allowed me to overlap the 2 parts and end up with 3 louvers at the right height. 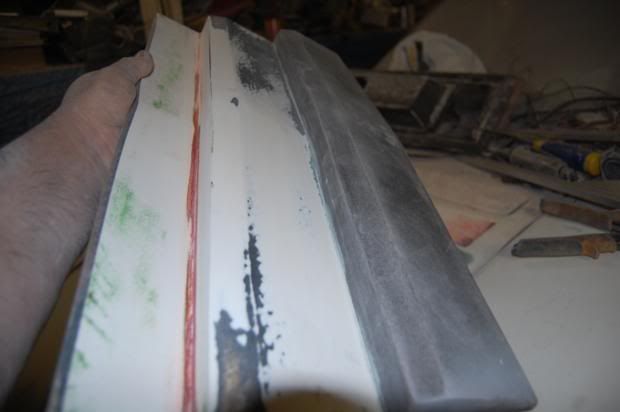 Next I had to repair the opening. After building forms and glassing the body with lots of sanding here is the result. 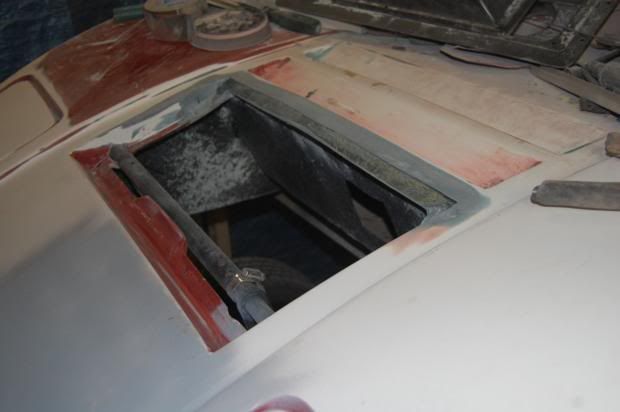 Fitting the hood went well 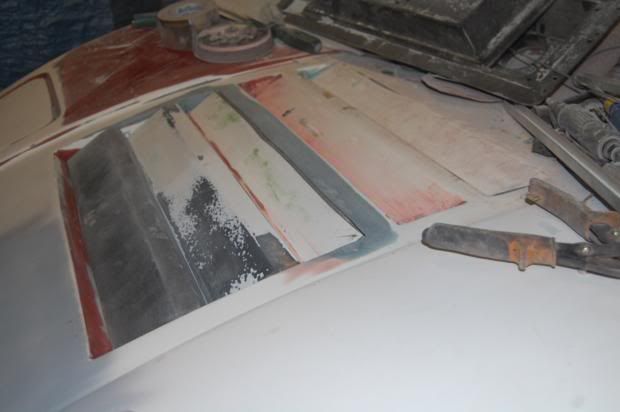 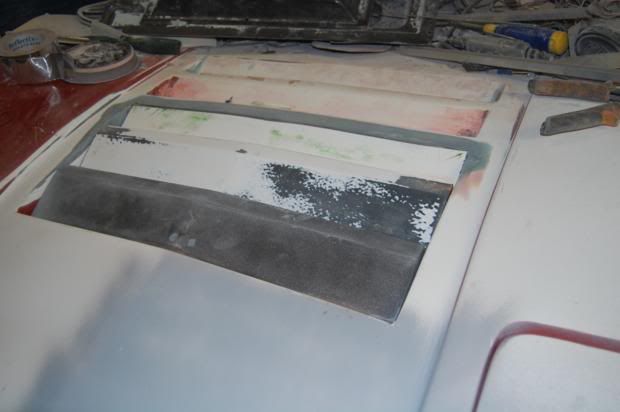 Next was to hinge it. I installed some invisible cabinet hinges but due to hinge design and the fact that the hood rear edge was not straight, it was arrow shaped, the hood would not open. Even after grinding away most of what I had done. Second try went perfect. By riveting some aluminum to the top of the body I was able to cut a perfect rectangle. This also allowed me to mold the hood to the body resulting in the required gap and shape. It also made the hood thicker at the rear edge giving it more strength. I got a pair of 170* full overlap cupboard hinges from the hardware store. They are a 2 piece hinge that clips together very securely and push the panel outward as it opens. I have used a similar 2 piece hinge on my Manx with no issues of it coming apart. 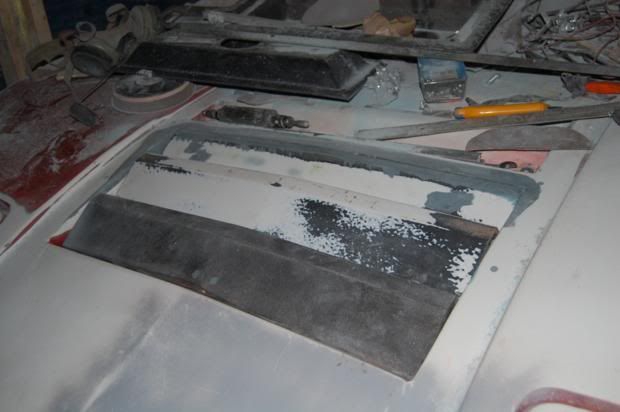 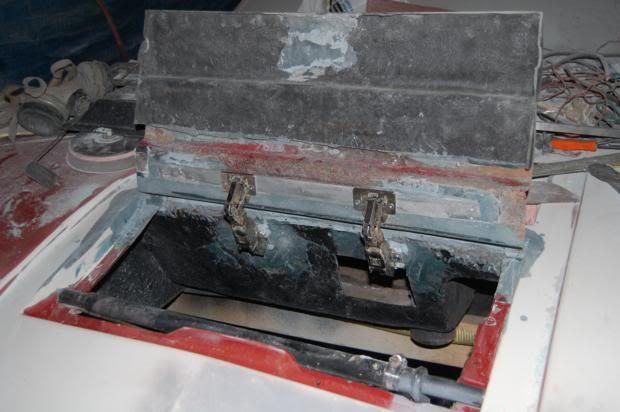 Still some finishing to do on the underside. Put a coat of paint on the transmission and installed the HI Torque starter. What a difference in cranking speed. 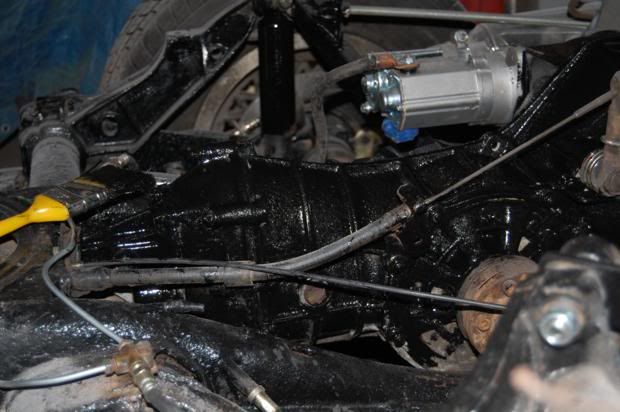 My gas cap that will get installed just behind the rear hatch glass on top of the body. Fuel tank will be in the back seat. 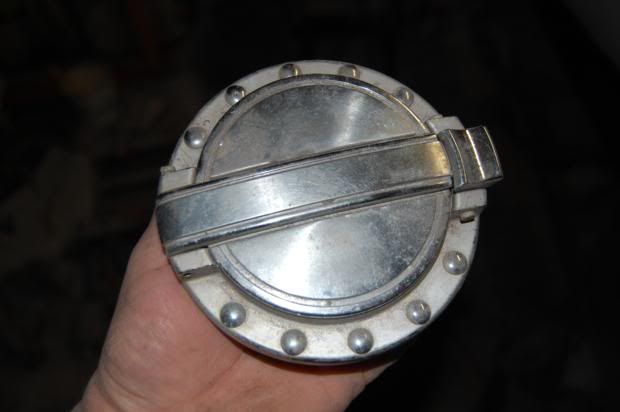 While out getting parts for the hood I came across a great deal. A new steering wheel reg $110 on for $44. They had 2, one all black and this one. I could not pass this one up. 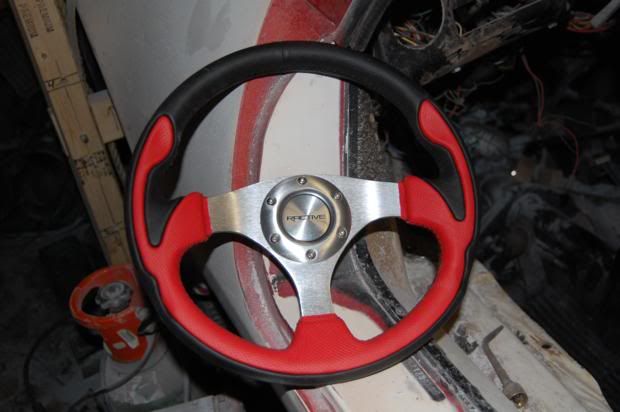 Well that is it for this week. Back on night shift tonight. The Bradley will have to wait until Friday. |
|
|
|
Post by smyrnaguy on Feb 1, 2011 17:30:39 GMT -5
Nice work. I see possibilities for those hinges for my doors. The markers look great.
|
|
|
|
Post by Dan MacMillan on Feb 2, 2011 13:55:39 GMT -5
|
|
|
|
Post by Dan MacMillan on Feb 6, 2011 19:52:14 GMT -5
Sorry no pics of the process, but today I installed the adjustable IRS springplates. When doing this you have to replace the long rear torsion bars with the short pre 68 bars. Hardest part was getting the old bars out. This is not as dangerous a job as everyone thinks. No special tools and did not have to tie the chassis down to the jack. My body is still off the chassis.
|
|
|
|
Post by Dan MacMillan on Feb 8, 2011 1:32:41 GMT -5
Spark plug wires made and installed. Custom set made with proper ends and NOS wire core ign wire. Front wheel spacers made and installed, I used a ser of aluminum wheel adapters, minus the studs. Drilled out to 11/16 amd longer mag wheel nuts. This widened my front wheel track by 2 inches. Headlight actuator installed, Control circuit built and working just like the original. 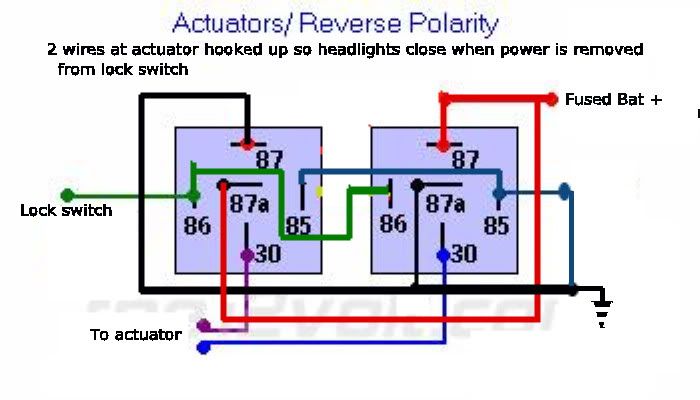 This wiring results in the lights opening if the headlights sw is on AND the lock sw on. They will close if either sw is turned off. There is zero parasitic draw on the battery when turned off. By supplying the headlight sw with IGN controlled 12v instead of constant BATT 12v, the headlights will automatically turn on and open when the car is started {if the HL and lock switch are on} and close when the car is turned off. UPDATE: A fellow builder asked me the following:My actuator has 5 wires coming out: Red, Black, White, Purple,Yellow. Do I ignore the others and just use the red and black? Yes, you ignore the remaining 3 wires. Only the red and black are used. They are connected to the relays so that when power is removed from the "lock" wire, the headlights retract into the body. |
|
|
|
Post by Dan MacMillan on Feb 8, 2011 19:16:29 GMT -5
Due to interference between my new shifter and my choice of stereo location I chose to relocate the stereo. It is now below the gauges where the switches were. That took up a good part of the day, along with repairing the PO's butchered dash and designing a way to raise the steering wheel. The switches are now to the left of the steering column. Then I had to freeze my butt off fixing my daughter's blower motor outside, {-25*c with windchill= -36*c, for those that are unaware -40*c equals -40*f}. That ended my day. It is now 4 hours later and my feet are still frozen. Well at least I go back to work 4250 feet underground in the morning where it is always warm.
|
|
|
|
Post by Dan MacMillan on Feb 16, 2011 22:24:07 GMT -5
I managed to get about 10 hours on the car this week. Took a few pics of the previous work and some updates. The adjustable springplates with shorter torsion bar. 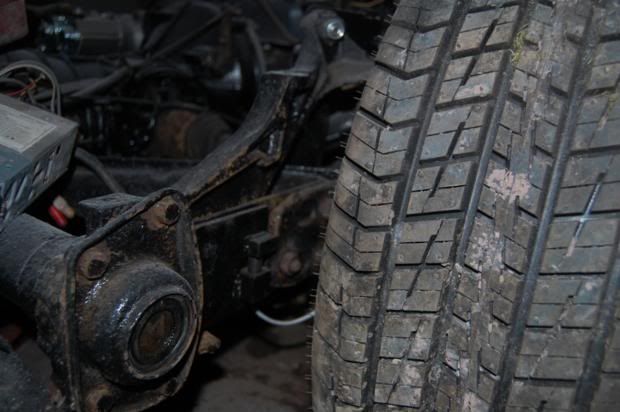 The difference with and without the front wheel spacers. with: 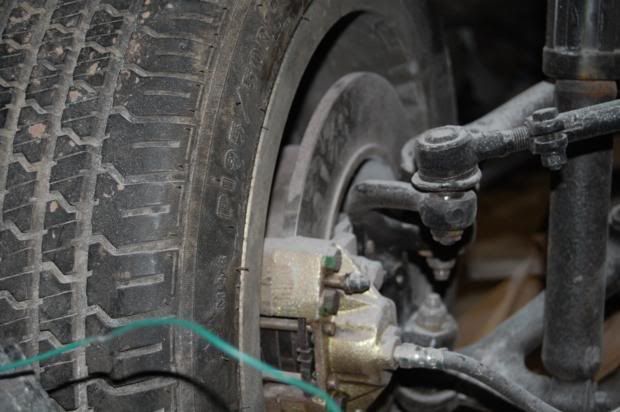 without: 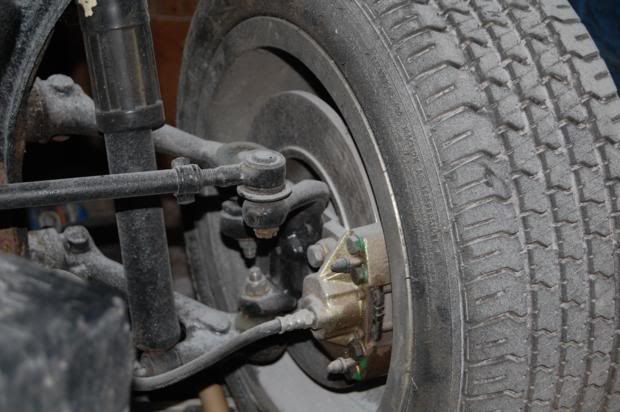 A better shot of the hood 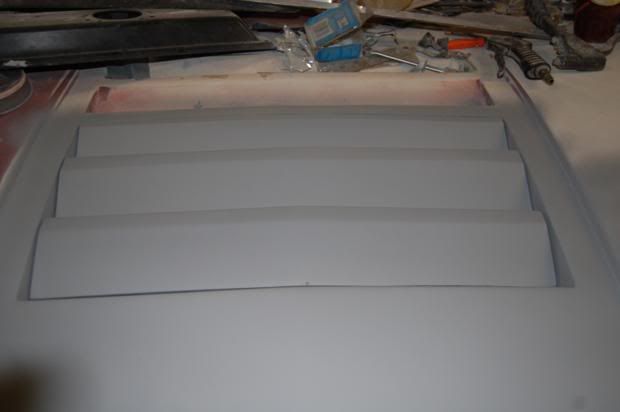 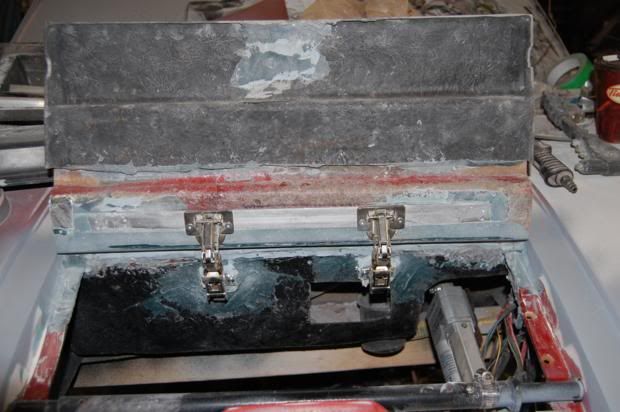 My headlight linear actuator. For anyone doing this mod, you need one with 4 inches of travel. 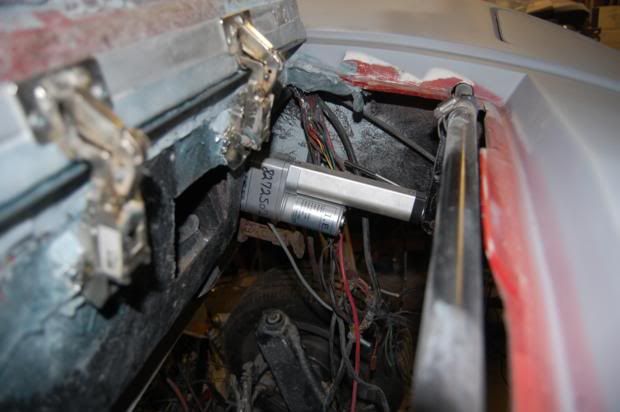 My newest update is the dash. remember what I started with... 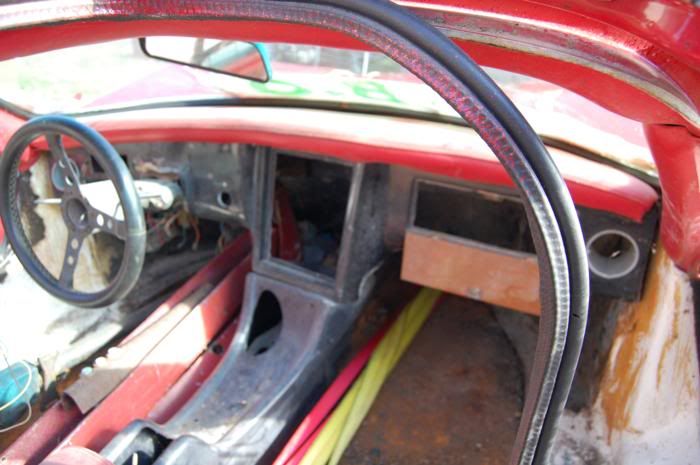 Well after many hours of filling holes and getting it straight, I tackled the steering column. I raised the column 3/4 inch at the dash and shifted it in 1/2 inch so that it is actually in the dash. Next I worked on the column itself. To my surprise the part that holds the ignition lock cyl was all aluminum,not a plastic cover like many VW columns had. I removed all the paint and polished it to a chrome like finish. I did the same to the steering wheel adapter. The turn and wiper levers I left in a brushed aluminum finish. I moved my switches to the left of the column. Actuator/Headlights/Driving Lights/Fan/Gas Heater. The wipers are now on the column. The dash was sprayed with paintable gravel/rocker guard then topped with gloss black. 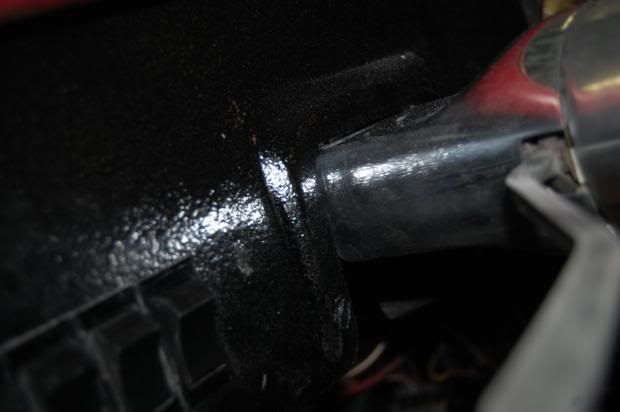 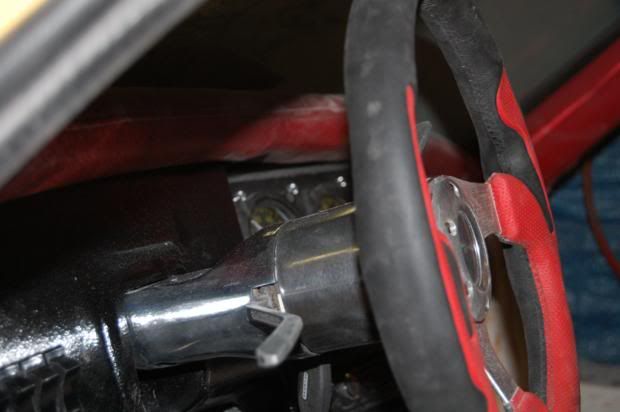 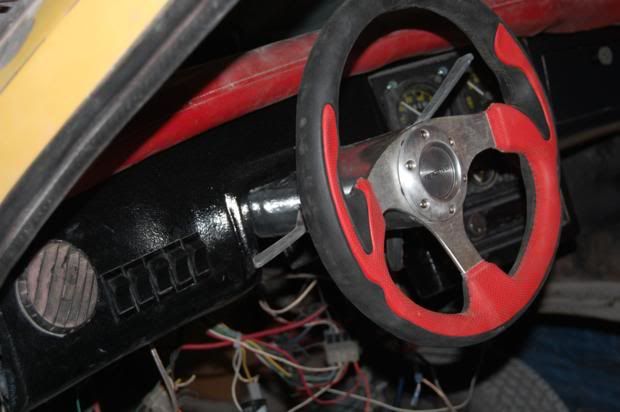 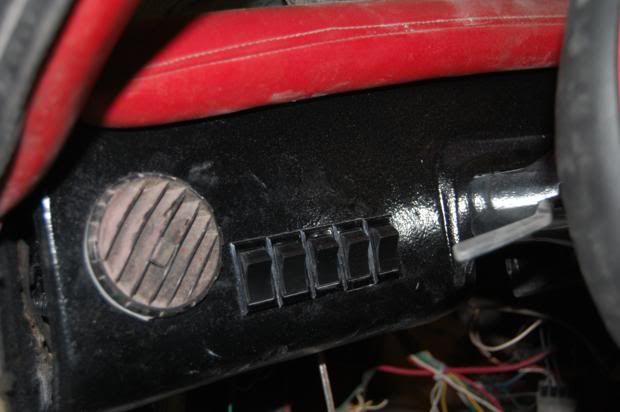 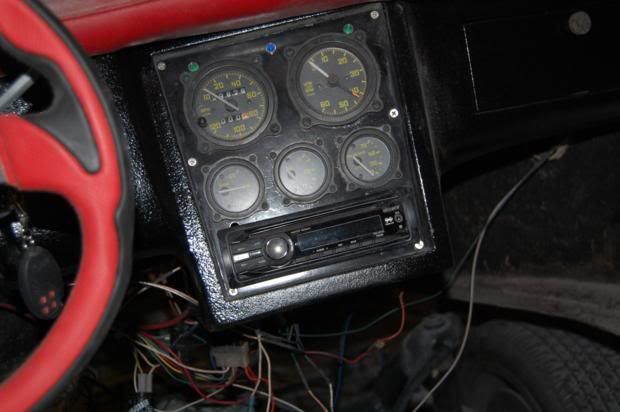 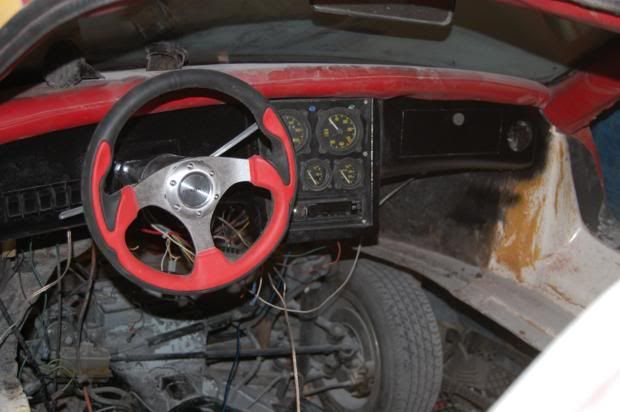 |
|
|
|
Post by Dan MacMillan on Feb 18, 2011 11:42:18 GMT -5
Thoughts and suggestions?
|
|
|
|
Post by pushnfords on Feb 21, 2011 0:31:10 GMT -5
Thoughts and suggestions? You make good progress and it looks good. Want to come work on the one I have in the garage? ;D |
|
|
|
Post by thehag71 on Feb 21, 2011 6:23:45 GMT -5
Put some floors in it... Too hard to stop Fred Flintstone style  Other than that, it looks great so far, I only wish I could say the same about my gt1. |
|
|
|
Post by Dan MacMillan on Feb 21, 2011 7:48:53 GMT -5
I do have floors. The po welded in 1/8 steel plate. and a 1" square tube perimeter, I even have carpet.  |
|
|
|
Post by dawgdk on Feb 21, 2011 8:42:04 GMT -5
put em together and drive that thang!
|
|
|
|
Post by Dan MacMillan on Feb 24, 2011 11:28:37 GMT -5
put em together and drive that thang! All in good time. This is going together once. I still have a bit of under dash work to complete. Got a couple hours in today. Reassembled and sealed the fresh air blower box, installed the blower, and repaired the wiring to the blower. I also molded the 2 speaker enclosures for the front "kick panel" speakers out of fiberglass. I am normally off for 5 days this week but have decided to go in for two night shifts [Thurs/Fri], so I won't be back on it till Saturday. The goal is to complete the under dash and lower the body onto the chassis by Sunday night. |
|
|
|
Post by mrbigh on Feb 24, 2011 12:01:14 GMT -5
put em together and drive that thang! All in good time. This is going together once. I still have a bit of under dash work to complete. Got a couple hours in today. Reassembled and sealed the fresh air blower box, installed the blower, and repaired the wiring to the blower. I also molded the 2 speaker enclosures for the front "kick panel" speakers out of fiberglass. I am normally off for 5 days this week but have decided to go in for two night shifts [Thurs/Fri], so I won't be back on it till Saturday. The goal is to complete the under dash and lower the body onto the chassis by Sunday night. Dan How this blower box mounts on the body? Mine is there but I remember that I had a whining noise after a while of switched on, I may have to lubricate the motor's bearings and shaft. While there and exposed, some pictures will help. Thanks |
|
|
|
Post by topdude on Feb 24, 2011 19:35:36 GMT -5
Very nice work. Wishing I was home to do some more work on my
GT II.
|
|
|
|
Post by Dan MacMillan on Feb 25, 2011 7:58:24 GMT -5
All in good time. This is going together once. I still have a bit of under dash work to complete. Got a couple hours in today. Reassembled and sealed the fresh air blower box, installed the blower, and repaired the wiring to the blower. I also molded the 2 speaker enclosures for the front "kick panel" speakers out of fiberglass. I am normally off for 5 days this week but have decided to go in for two night shifts [Thurs/Fri], so I won't be back on it till Saturday. The goal is to complete the under dash and lower the body onto the chassis by Sunday night. Dan How this blower box mounts on the body? Mine is there but I remember that I had a whining noise after a while of switched on, I may have to lubricate the motor's bearings and shaft. While there and exposed, some pictures will help. Thanks I will get you some pics on Saturday. |
|
|
|
Post by Dan MacMillan on Feb 27, 2011 21:36:45 GMT -5
|
|