|
|
Post by agraham52 on Nov 14, 2014 20:06:09 GMT -5
after driving the bradley around a bit the past couple of days, iv really contimplated a body lift. maybe not the full 3" kit. maybe make a 2"? i find my boot keeps getting caught on the steering column. and the extra headroom would be nice. so the question is... what are the pros and more specifically the cons of body lifting?
|
|
|
|
Post by cocacoladodge on Nov 14, 2014 20:40:27 GMT -5
Pros, More space! For headroom, tire clearance, engine accessibility, ground clearance (very helpful on roads with potholes and steap angled driveway aprons to various places you may go) better visibilty driving at night as headlights reach further...
Con's, repositioning steering column, removing windows to avoid breakage due to body flex while pulling from frame, electrical connections / wires may need to be replaced or added to (this could be a blessing too, as you can get it done to avoid future issues). Realigning body perfectly straight, ifthe angle is off, you will have an odd feeling when you drive it. The contour of the Napoleon hat and rear trans area have to be test fitted multiple times to get right fit... That is if you just use 2" stock there too, you will have a lot of cutting to do. Its like fitting an O in the size made for an o. Can someone else show a picture of what I'm trying to say?
If you have the time, space, and frabrication know how, it would be well worth it. An easier option would be a pan drop, but your foot clearance would still be an issue.
|
|
|
|
Post by cocacoladodge on Nov 14, 2014 20:46:28 GMT -5
As a side note, my boots often get stuck between the pedals also, so I have a pair of tennis shoes I wear just when I'm driving it. There are also kits available that increases the space between pedals for people with wider feet, I've seen them on www.thesamba.com in the past, but don't know of anyone who has done that yet. I am thinking of doing that soon, I wear a size 14wide. |
|
|
|
Post by agraham52 on Nov 14, 2014 20:50:10 GMT -5
not very many of those cons worry me so much so thats a good thing. im an auto tech by profession so wiring im not very scared of. nether is most of the work for that matter. dropping the pan makes sense but our roads can be horrible at times here in maine. my car has no rear window and the front window is more of a plastic so i dont think it would be necessary to remove.3 the only reason i didnt want to go with the 3" is i was worried it would be too much and make things like bumpers and the engine look funny. speaking of bumpers, how do people go about re aligning those after a lift?
|
|
|
|
Post by cocacoladodge on Nov 14, 2014 21:02:55 GMT -5
A lot of people just leave the front bumper off, it really depends on how yours are currently mounted. If its like mine, there is a round pipe that is bolted to the pan that the bumper piece slides into and bolted or welded in place. You can pull the pipe, cut it, weld in a 2" spacer and weld the other section back on. That's part of the great thing about kit cars, you can make it your own by your likes.
I was going to ask about the windshield, couldn't tell if it had gotten broken or if the light was shining in a odd angle, but being plastic that explains it. Good idea, and a lot cheaper than a new windshield for a 66 corvette
|
|
|
|
Post by skip20 on Nov 14, 2014 21:04:36 GMT -5
Try a 1/4" spacer plate O--------O
-------------------------------O--------O
|
|
|
|
Post by agraham52 on Nov 14, 2014 22:44:53 GMT -5
Try a 1/4" spacer plate O--------O -------------------------------O--------O sorry but can you explain further? |
|
|
|
Post by jspbtown on Nov 14, 2014 23:09:01 GMT -5
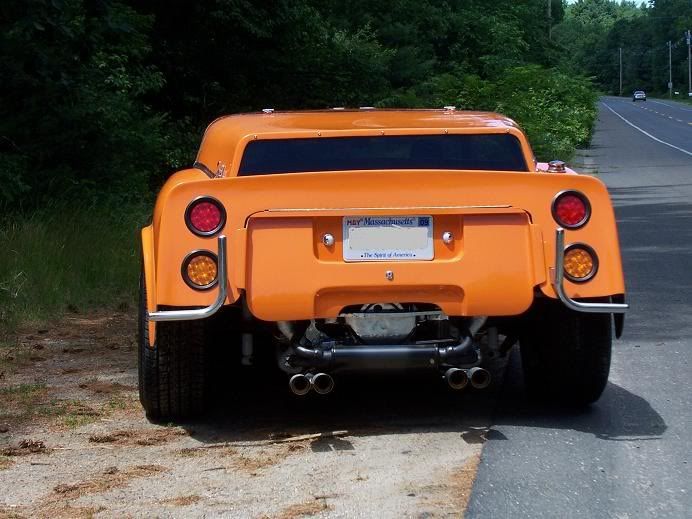
The only "con" is the amount of work it takes. The pro's are numerous. I used a 3" composite body lift. The pedal extender kit is called Big Foot. Its available on The Samba. Its excellent quality and a very good product. I used it on my Deserter. Here is the engine with the lift:  The bumpers mount to the body so that shouldn't be an issue. |
|
|
|
Post by agraham52 on Nov 14, 2014 23:27:10 GMT -5
that doesnt look bad at all. atleast from that angle. clean looking car too. car come with that rear deck lid? do you have any writeups or atleast more details about your experience lifting the body?
|
|
|
|
Post by jspbtown on Nov 15, 2014 11:37:01 GMT -5
|
|
|
|
Post by agraham52 on Nov 16, 2014 8:41:40 GMT -5
I love that car haha. Great idea with the decking board. I have to ask about the hump part. Did u stick boards together like 4 or 5 high, lay it on its side and cut out the shape. Or did u try to get te wood to bend to shape?
|
|
|
|
Post by jspbtown on Nov 16, 2014 10:24:53 GMT -5
I took a piece of cardboard and cut the general shape of the hump so it would come close to sitting in place. I then used a compass to scribe the exact shape. Once I was comfortable with the fit I set the compass for 3" and scribed the second line.
I then took the first piece of decking that was the entire length of the template. I then stacked smaller pieces on each end. moving toward the center, until I had the overall height. So the bottom had a complete board but the center was open. I used adhesive and some small brads (from my air nailer I used on trim boards) to bond everything. The small thin brads hold everything together while the adhesive dries yet are easily cut when I need to shape the part.
So to answer your question....I stacked boards I did not bend them. Its MUCH easier that way.
|
|
|
|
Post by agraham52 on Nov 16, 2014 20:44:43 GMT -5
Sounds it! Definitely sounds like something I could do.
|
|
|
|
Post by easyejl on Jan 1, 2016 12:12:43 GMT -5
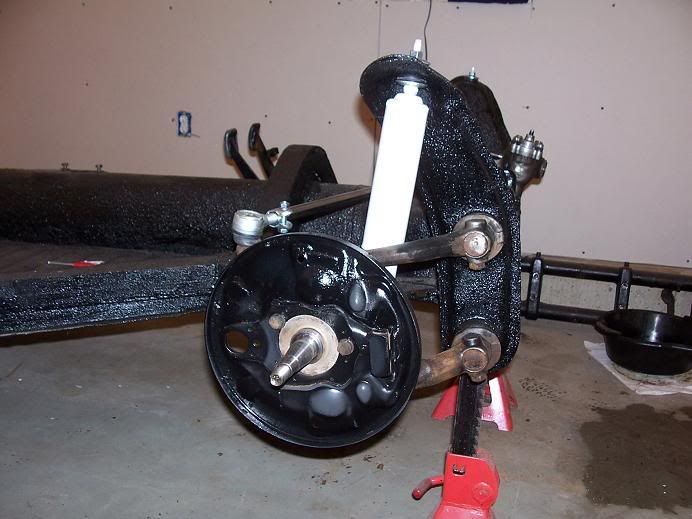
I wasn't the best of picture taking back when I built this car. Here are a few more shots:  The material is composite decking material. You laminate it with construction adhesive and I used some small finishing nails. You then template the front napoleon hat area and cut it out. The stuff is formed with normal woodworking tools. It won't rot. It won't compress. It won't hold water. I then covered the entire chassis with Herculiner bedliner. The rear hatch came with the car. No idea if it was custom (I think so) or not. Its a love it or hate it addition. The owner loved it so that's all that mattered. when you say laminate it, do you mean that you used more than one layer of the composite? or that you attached it to the frame that way? Can't really tell from the pictures |
|
|
|
Post by jspbtown on Jan 1, 2016 13:28:56 GMT -5
I am terrible trying to describe something so bear with me.
For the sides I would take a section of the standard 6"x3/4" composite decking material and cut it so it goes from the rear to the bend. Then I would make an angle cut at the end. I would then take a shorter section for the part from the bend to the napoleon hat. I would lay that section underneath the first section , trace the angle and then cut the angle. Now you have a composite material that is a rough outline of the frame rail. You don't have to be too concerned with making it fit exactly at this point. It can run a little long at both ends...in fact I suggest you do that. You just want that bend at the pan to line up pretty close.
Then I would cut another long section that would either be shorter or slightly longer than the first long section and cut a different angle on the end for the bend in the pan. I would then cut a shorter section, lay it underneath the longer section and trace that angle and cut it. What you are trying to do is stagger the angle cuts so they aren't all the same but the boards end up going to the same places. Does that make sense? In other words...say you have a 40 degree angle at that bend in the pan. The first boards can be cut at 20 degrees each. The second set of boards maybe cut at 10 degrees and 30 degrees. The third set maybe at 15 degrees and 25 degrees. And so on.
Cut how many sections you want to get the lift you want. Build it 3/4" at a time. Once you get them all cut use construction adhesive and some mechanical method of securing them together. Don't forget to glue the angle cuts as well. Once it is all glued and dried you have your rough shape.
I then make a cardboard template of the entire length of the pan perimeter. It should be as exact as possible. You want the overall length and shape correct as well as the width. Lay the template over your rough shape and cut with a jig saw. Finish shaping with a sander.
I coated mine in Herculiner bed liner. As you can see I covered the entire pan with it. Its basically an open air car and I didn't want it to rust. I will assure you that it wont.
|
|
|
|
Post by easyejl on Jan 1, 2016 17:54:08 GMT -5
That makes sense. I was thinking somehow the composite 2x4s vs the 3/4 thick material, which was what lost me with the word "laminating". I get what you mean about the end part angles, that way the seam there isn't a extra easy to break point.
So 3 layers should be around 2.25", is that still so much that i'll need to monkey with the steering wheel and/or pedals at all? Don't really mind the idea. Actually what i'd like to do is taper the lift, from about 3" at the back to maybe 2, even 1.5 at the front, but it seems like a lot of effort to get right
|
|
|
|
Post by jspbtown on Jan 1, 2016 17:58:24 GMT -5
2x4's will work just as well.
Pedals are attached to the pan. Your seating position remains the same...the body is only lifted around you.
The orange Bradley used a stock column.
|
|