|
|
Post by centralvalleygter on May 29, 2012 0:26:10 GMT -5
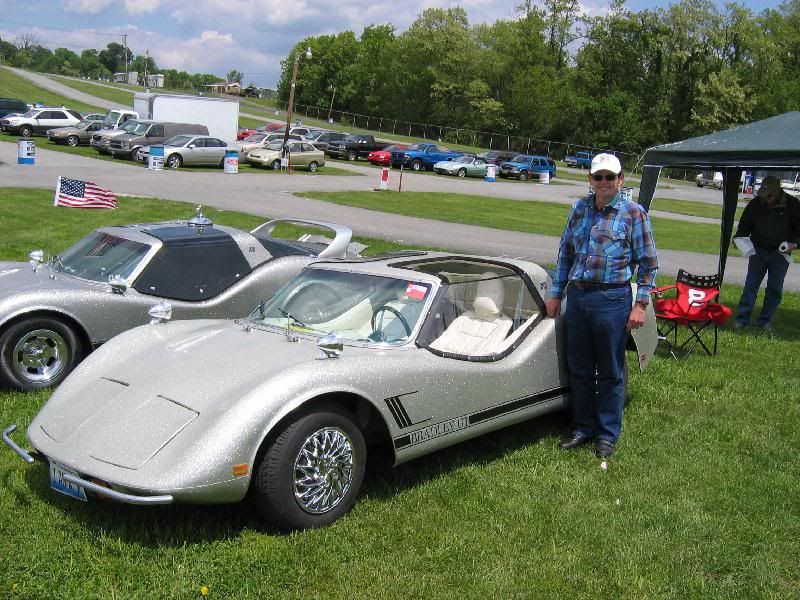
I've been wearing out my Bradley faster than restore/build in the last couple of years, so I hope to do some fixin' this summer.
--------------------------------------------------------------------------------
Summer to-do list on Bradley
I¡¯ve been trying to write this to-do list for months. If I cannot find time to make the list, how am I ever going to be able to do the things on the list? Oh well, I¡¯ll just do what I can.
In no particular order:
1.) Move mirrors back so they are adjustable from driver¡¯s seat. While their placement on the fenders allows for good rear visibility, they are a pain to adjust. Since I now have a permanent wing window, I do not have to worry about them being hit when opening the door.
2.) Move front turn signals into headlight well.
3.) Relocate fuel filler to top of tank (tired of taking 10 minutes to fill the tank).
4.) Install ventilation scoop at front center of passenger roof.
5.) Fiberglass in all the holes created by items 2, 3 & 4 above plus make other minor repairs in body.
6.) Replace black trim on headlight covers (covers had uv shield which allowed black trim to peel).
7.) Replace license plate cover at front.
8.) Replace glass cylinder fuse boxes with modern slot fuse boxes. Do other minor wiring modifications.
9.) Revise fold-down dash panel (make slimmer & improve dash lighting over switches (3rd time is a charm!)
10.) Move front speakers from side panels to visor area above windshield.
11.) Insulate and close in bottom and rear area (already done front, behind front wheels) between interior and exterior wall at sides.
12.) Close in area between rear tires and tail light panel.
13.) Finish making second-effort doors. Figure out and fabricate removable Lexan or convertible clear side windows (want doors/windows that I can keep in car or on luggage rack when not in use).
14.) Coat new doors and rear window housing with truck bed liner material.
15.) Find/fabricate Naugahide/vinyl seat covers or replace seats with ones that can be recovered.
16.) Locate and fix minor oil leak on engine, fix/replace alternator.
17.) Replace worn carpet at interior.
18.) Start Design/Fabricate rear apron
19.) Locate matching paint so I can touch up scratches in paint on body, paint new scoop, etc.
20) Locate/fabricate/install front bumpers.
Yeah, well maybe I will have the time and money to do some of them.
Just thinking out loud....
Warmest Regards....
|
|
|
|
Post by skip20 on May 29, 2012 4:19:17 GMT -5
I like that, a list you can check off as you go!!!!! I jump around as the mood it's me.  |
|
|
|
Post by smyrnaguy on May 29, 2012 12:30:34 GMT -5
A list is a good idea. I'm curious about #4. How and where? Wouldn't that become a ram-air driven rain distributor or are you thinking about something similar to a cowl vent. I can help you a little with #14. I have seat cover patterns available. You might try a marine fabricator for #20. They should be able to construct bumpers out of either aluminum or stainless.
|
|
|
|
Post by centralvalleygter on May 29, 2012 13:36:23 GMT -5
On #4 - I will have to design the vent so that rain doesn't come in with the air. I just know that when I am shut in, it gets pretty stuffy and I saw some supercar that had an intake cowl where I was thinking it would work on the Bradley. Will definitely include a way to control air flow.
On #15 - I have Tenzo seats, which fit, recline, offer side support and are very comfortable for long distances, BUT, they have thin fabric glued directly to the foam for a covering, which has not held up well to sliding up and down the seat that entering & exiting the Bradley requires. However, they are a complicated shape, so I am not sure how economically I can get them covered.
On #20 - I have access to equipment & people to help me, just need to get around to designing & fabricating it.
Thanks for the interest in my project.
Warmest Regards....
|
|
|
|
Post by cocacoladodge on May 29, 2012 17:06:41 GMT -5
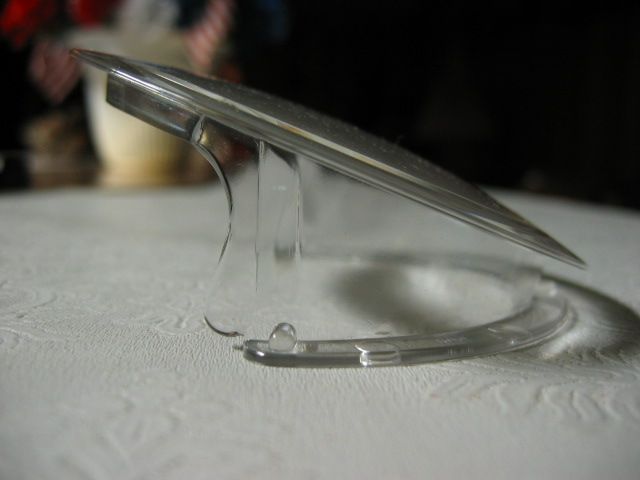
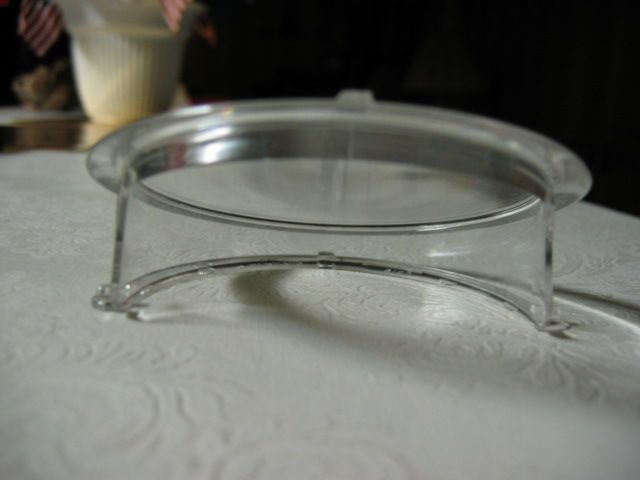
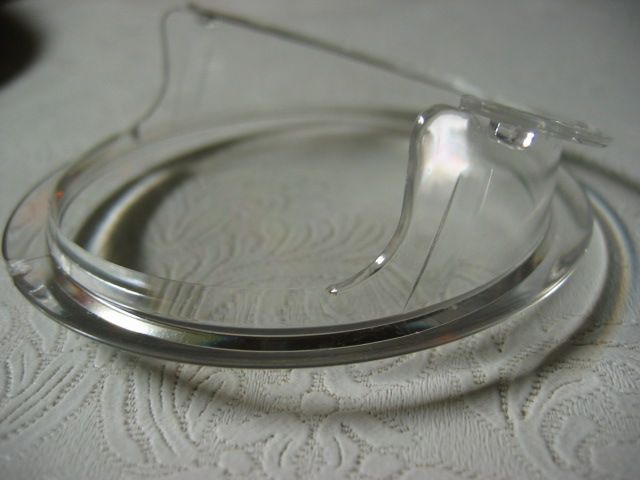
I have these cool little 2" or so cirular vents in the gull wing that you can rotate to adjust how much air comes in. Under the dash by where your feet are I have two large circular 6" vents that you can close off ( one for each side ). Also the rear window towards the top has a 4 or 5" hole with a low profile scoop with the opening facing the rear (and downward) to keep well ventalated and not too much airpressure on the parts... send me your email address and I'll send pics if you like.
|
|
|
|
Post by leonardabell on May 30, 2012 8:41:35 GMT -5
I have these cool little 2" or so cirular vents in the gull wing that you can rotate to adjust how much air comes in. (quote)
I ordered the circular vents for my gull wings and the gull wings were too thick, so couldn't - never used them.
|
|
|
|
Post by centralvalleygter on May 31, 2012 12:39:56 GMT -5
Leonard, do you still have them? I am using thinner Lexan windows, so they may work. Could you send a pic or copy of installation instructions or something, along with a price? My email address is available by the icon at the left, or you could message it through this board. Thanks!
|
|
|
|
Post by skip20 on May 31, 2012 16:49:19 GMT -5
|
|
|
|
Post by leonardabell on May 31, 2012 20:57:15 GMT -5
Yes, I should still have them, I never throw anything away. Just ask my wife! I am getting ready for the bugfest in Effingham tonight, and my camera is packed. I will make a search next week.
|
|
|
|
Post by centralvalleygter on Jul 9, 2012 20:00:24 GMT -5
Well, I actually ran the gas out of my tank so I could work on my Bradley. Really tempted to refill it, so I could keep driving it, but I really need to get going on the repairs & upgrades.
Put it up on blocks this last week, hopefully, I'll start chipping away at my list now.
Warmest....
|
|
|
|
Post by leonardabell on Jul 9, 2012 22:31:18 GMT -5
|
|
|
|
Post by centralvalleygter on Jul 10, 2012 10:36:56 GMT -5
Leonard,
It seems like those would work, the lexan, though I am not fully understanding the mechanics of their function from the pics, I think they would be worth trying. How much do you want for two of them?
Warmest Regards...
|
|
|
|
Post by leonardabell on Jul 10, 2012 12:49:25 GMT -5
It looks like you bore a hole big enough for the smaller simi circle to fit, and compress the ears into the hole. they then would snap open or closed and could turn into the wind or face the back. I wouldn't have the nerve to bore a hole and hope they work!!! Make an offer plus what it costs to ship.
|
|
|
|
Post by centralvalleygter on Jul 21, 2012 23:07:56 GMT -5
Well, making some progress. Got front turn-signals into headlight wells. Put new trim around healight covers. Took off mirrors & started preping all the holes for fiberglass repair. Got the engine pulled out, ready to chase down oil leak, generally detail, put on new alternator. Will be pulling gas tank shortly.
Warmest....
|
|
|
|
Post by centralvalleygter on Jul 26, 2012 10:33:08 GMT -5
Pulled gas tank, plugged old fill tube and installed new one on top by using regular pipe fittings (finding someone who can weld aluminum and is willing to weld a tank that has already had gas in it is not easy). Have pics in my phone, but have not got them to my computer yet. Got the pics off my phone:    Warmest.... |
|
|
|
Post by centralvalleygter on Aug 1, 2012 11:09:32 GMT -5
I am modifying original post with strikethoughs as I complete the tasks. Just about finished the bodywork. Ordered paint, got replacement alternator with new regulator. Making progress, but still a long ways to go.
Warmest....
|
|
|
|
Post by Dan MacMillan on Aug 1, 2012 11:36:34 GMT -5
Pulled gas tank, plugged old fill tube and installed new one on top by using regular pipe fittings (finding someone who can weld aluminum and is willing to weld a tank that has already had gas in it is not easy). Have pics in my phone, but have not got them to my computer yet. Got the pics off my phone:    Warmest.... Fill it half full with hot water and laundry detergent, Seal it and shake it around, empty it. Refill completely with hot water. Stick your garden hose in it and add water till about 2 gal overflows. Drain and dry it out. bring it in for welding and if they ask tell them it is for oil. |
|
|
|
Post by centralvalleygter on Aug 1, 2012 13:00:23 GMT -5
Since I used the fittings, I no longer need to do any welding. My brother's father-in-law (now passed away) used to weld gas tanks by running car exhaust through the tank while he was doing the welding, the non-explosive exhaust gasses would displace the gas fumes.
warmest....
|
|
|
|
Post by Dan MacMillan on Aug 1, 2012 14:56:54 GMT -5
Did you use seal-all on the threads and fittings. gasoline will leak through the smallest gap or hole?
|
|
|
|
Post by centralvalleygter on Aug 1, 2012 16:20:05 GMT -5
Yes, I did and it held 20 psi air pressure until I released it, so I am thinking it should be leak proof.
Warmest....
|
|
|
|
Post by horen2tas on Aug 1, 2012 18:45:31 GMT -5
Where did you get the alternator from?
|
|
|
|
Post by centralvalleygter on Aug 2, 2012 14:00:41 GMT -5
In my case it was a hand me down from my brother. He blew out the regulator because he used it on his buggy with lots of high powered lights. You can get rebuilt/new stock (55 amp) ones for $100 - $150 from various vw supply sources (JC Whitney, cip1, Moore, jbugs, etc.), but if you want chrome or higher output ones (90 amp) $150-$250 range is common.
Warmest Regards....
|
|
|
|
Post by centralvalleygter on Nov 8, 2012 11:17:24 GMT -5
Progress Update!
Got the gas tank reinstalled with the new filler location and venting system. Found oil leak on the engine, in the process of cleaning and painting components. I have a 3-day weekend coming up and will not be R/C plane flying, so I should get the engine ready to reinstall and finish the rear tire wheel-wells then. I have the body repairs substantially done, so I will begin the touchup painting soon.
Slowly, but surely making progress.....
Warmest Regards
Steven
|
|
|
|
Post by centralvalleygter on Jun 5, 2013 18:46:41 GMT -5
Progress Update!
Yeah! Bradley is back on the road! Not everything is done that I intended, but the engine is back in, the fiberglass has been repaired, the repairs have been touched up with matching paint. I also got new front tires and the front end aligned (old tires were beginning to show metal belting) and painted the luggage rack black (installed sand tread on potential wear areas).
It is really nice to be able to adjust the mirrors from inside the car and fill the the gas tank in a couple of minutes, instead of 15-25 minutes.
Still lots to do, but hey I can at least drive it again. Will attempt to find time to post some pics in the near future.
Warmest Regards....
|
|
|
|
Post by centralvalleygter on Jun 13, 2013 11:11:01 GMT -5
A few pics of my recent efforts!  There used to be a 2" hole for a gas filler cap and a large crack from a failed attempt by the previous owner to fix another filler location.  Here you see my luggage rack now painted black and my new gas filler location nestled between the rack rails.  There used to be a big crack here on the passenger front fender lip where a previously used larger front tire hit when I turned.  Here you can see where I moved the turn signals into the headlight wells and repaired the 1 inch square holes that were outside the light wells.  This view shows the new mirror location (yeah! I can now adjust the mirrors from inside the car - allowed because of the permanent fixed wing type windows at the front) and where I repaired several holes due to previous door latch mounting efforts. That's it for now... Warmest Regards |
|


