|
|
Post by Dan MacMillan on May 21, 2011 16:58:25 GMT -5
Could have used that a few months ago however shipping would have been way out there. Do you live in the Saguaro Nat Park?
|
|
|
|
Post by Dan MacMillan on May 21, 2011 16:56:14 GMT -5
Still looking for an aluminum passenger side door opening to carpet trim. Also 2 outer door lock buttons with keys and clips Dan that aluminum trim piece is a common stock one. Mines are unmounted yet and very accessible. Tomorrow I will take a picture of the profile and post it for you. Are you saying that they are available at a carpet or building supply store? Do they come straight in the Bradley kit and the builder bends them? |
|
|
|
Post by Dan MacMillan on May 20, 2011 18:45:13 GMT -5
Still looking for an aluminum passenger side door opening to carpet trim. Also 2 outer door lock buttons with keys and clips
|
|
|
|
Post by Dan MacMillan on May 17, 2011 17:50:49 GMT -5
Welcome, another great source for bug info can be found at www.thesamba.com look in the forum " Beetle - Late Model/Super " also " Fiberglass Buggy/Kit Car " Although you have a GT, check out the GT2 forums here as well. Many issues apply to both versions. I currently own 13 VW based vehicles {drive 9} and have been a licensed auto tech for 20 years, in the trade for 35 years. Don't be afraid to ask questions. www.cip1.com is a pretty good place for VW parts, free shipping on most items. |
|
|
|
Post by Dan MacMillan on May 17, 2011 3:57:31 GMT -5
I'd give it away before cutting it up,
|
|
|
|
Post by Dan MacMillan on May 12, 2011 18:33:09 GMT -5
I have to get a bonded title here in NC too. The bond has to be carried for 3 years here. Its odd though. I've had my 1969 chassis titled in my name since 1975. I have bills of sale for my Bradley bodies. Still have to jump through hoops. My car will be titled as a 2011 custom. Nevermind that almost every piece is at least 35+ years old. I've had both the regional DMV inspectors over to take pictures and document numbers before the body is mounted. They have to take some more pics after completion and my new title will be on its way. Being titled as a 2011, will you be able to get insurance? Here in Canada, the regular ins companies will not cover a custom or modified. The specialty companies that do historic and streetrods and modifieds want it at least 15 years old on paper. |
|
|
|
Post by Dan MacMillan on May 12, 2011 18:28:21 GMT -5
This past couple of days I have been solving problems and rerouting and cleaning up my interior wiring .
I installed a second u-joint on the column with a collapsable lower shaft and a lower column bushing to solve an alignment issue.
I was also fighting with the seats. I finished the 2.5" dropped seat pocket on the drivers side and had to solid mount my Nissan 240 seat. The top of the seat bottom is pretty much level with the rest of the floor. I am 6'2" 300lbs and just fit. So my question is. Will the dash and console flex enough if I put a 1" lift at the rear body mount location but leave the front mounts in the stock location? {console in stock location}
|
|
|
|
Post by Dan MacMillan on May 10, 2011 17:01:43 GMT -5
Location, pics, details. Are all parts still in packaging and all there.
|
|
|
|
Post by Dan MacMillan on May 8, 2011 14:20:17 GMT -5
Don't cut it. Find a bigger storage place. You will never replace the structural integrity, body alignment and clean finish without a massive amount of work. I have a NOS Jeffries Kyote body, storage solution for me was to hang it from the ceiling in my garage.
|
|
|
|
Post by Dan MacMillan on May 2, 2011 17:39:46 GMT -5
|
|
|
|
Post by Dan MacMillan on May 1, 2011 18:20:26 GMT -5
You could set up a 90 deg bellcrank. If done with a linear actuator you can omit the latch.
|
|
|
|
Post by Dan MacMillan on May 1, 2011 17:34:08 GMT -5
I just replaced all my brake lines with steel braided lines, adapters and couplers from JEGs. All were bubble flared. Install was very easy. Yes, it was expensive but compared to what was there before, priceless. I was just at Jegs looking to see these steel braided lines that could be used in place of hard brake line but could only find some flex hoses and trans lines.. What product did you use? I did notice they sell teflon hose with the following description JEGS PTFE (Teflon®) lined hose is for use on brake lines, clutch lines, mechanical gauges, power steering and other applications that require high pressure. The steel hose ends feature a miniature brass "olive" (or ferrule) which retains the fitting inside the hose and must be used with PTFE hose. This product, while quick and convenient, is ILLEGAL FOR STREET in Canada and probably all US states. I did not see where JEGS posted this information for their customers. |
|
|
|
Post by Dan MacMillan on May 1, 2011 17:13:42 GMT -5
Neither of us claimed the first step to producing a double flare made a bubble flare. If I remember correctly(don't quote me)he took a fresh cut segment of line and compressed it with the double flaring tool. You may have not claimed that the FIRST STEP made the bubble, but that is the only way to create something that resembles a bubble using a double flaring tool. You did say that 1 your mechanic showed you how to make a bubble with double flaring tools. 2 it made a perfect flare that looked just like the one that came off of the car. Just the fact that he told you and showed you, tells me that he has probably done this quite often. Why would he give you this false information if he has the proper tools to do it right. I am sorry if I have offended you but the safety of others who read this thread is more important than any one's feelings. Either way, my statement remains unchanged. If you follow thesamba at all, you will notice that myself and a few others look out for major errors in mechanical/electrical repair and the safety of others. We do this to help and protect future reader's. There are some people out there who claim to be mechanics that have never been trained and do not have the experience of doing it the right way. Some of our discussions get very heated and long with us posting data, images and facts to backup and prove our statements. My qualifications speak for themselves. I have over 33 years of non stop experience in these trades. Licensed Automotive Service Technician Licensed Truck and Coach Technician Licensed Heavy Duty Equipment Technician CFC/HCFC/HFC A/C handling and installation license Alignment specialist SMAW 4 position |
|
|
|
Post by Dan MacMillan on Apr 29, 2011 19:35:51 GMT -5
My son is playing a lot with stamp controllers and leds. He made a table that has 25 squares under a translucent glass cover. He has it going to music or preset sequence or random. Give me straight forward electrical any day. I am lost with these new stamp systems.
|
|
|
|
Post by Dan MacMillan on Apr 29, 2011 17:59:49 GMT -5
Thanks for the explanation. Learn something new everyday.
Will you be able to operate the signal lights like a scanner, one led at a time?
|
|
|
|
Post by Dan MacMillan on Apr 29, 2011 15:58:04 GMT -5
Looks good, great idea. Why not wire all leds in parallel and use 1 resistor in series with the leds?
|
|
|
|
Post by Dan MacMillan on Apr 28, 2011 11:00:08 GMT -5
Windshield washer fluid for an anti-tailgating device?? Great idea, I like it and way less hi tech and more legal than the Speed Racer smoke screen generator that I was thinking of making. I still might make some "flamethrowers" for the exhaust tips though. Nothing says get off I disagree like some huge ass flames shooting straight at ya. Maybe I could put both systems on, then once I catch the front end of your tailgating vehicle on fire, I can push another button and squirt ya with windshield washer fluid and put it out for ya. Now that would be a viral video for sure.  I can set you up with the flamethrower exh schematics if you wish. I saw a photo of Jay Leno's turbine powered motorcycle. He had a small sign on the back. Something like caution..stay back 30 feet. The guy behind him moved up to close to read the sign. Today's cars melt fast. |
|
|
|
Post by Dan MacMillan on Apr 28, 2011 10:52:57 GMT -5
I guess I should have posted an update on this The second or third auto parts store I went to had a neat adapter that screwed right into the master cylinder allowing it to accept the standard double flare. I told my mechanic the whole story and he showed me it's possible to make the bubble flare with a standard tool for making double flares. I don't remember exactly what he did, but it was pretty simple and it made a perfect flare that looked just like the one that came off of the car. READ MY FIRST POST. Look at the pics. The first stage of a double flare creates a 45 deg flare on the back side where the nut contacts the flare and the wrong angle on the bubble. It is not the same. Different shape, different angles. I would be leary of any mechanic that does not know the difference. Especially one that tells the general public that they are the same. That mechanic should educate himself and buy the proper tool, instead of being cheap and risking harm to his customers. |
|
|
|
Post by Dan MacMillan on Apr 27, 2011 2:49:22 GMT -5
They are for the dash mounted "brake failure" light. If they both see pressure the dash light stays off.
On early Beetles the dash mounted "B" light was for battery, in later years it became the brake warning light.
With the cheap Chinese parts we have today, install 2 switches so that when one fails {and it will} you still have brake lights. I have seen new switches fail in a week. On one of my cars I installed a mechanical Chevy brake light sw.
|
|
|
|
Post by Dan MacMillan on Apr 26, 2011 21:02:12 GMT -5
When buying heat shrink, spend the extra and get the type with glue inside it. The plastic is thicker and the glue seals out moisture.
|
|
|
|
Post by Dan MacMillan on Apr 26, 2011 20:58:37 GMT -5
The camera on mine ties into the backup lights, no extra circuits or fuses, if you use it for a rearview mirror just tie it into park lights and run the park lights on ign power {daytime running lights}. The display just piggybacks on any ign controlled circuit. It has it's own fuse. Mine is wireless. Wireless ones pick up stray signals..toy dept in Walmart, washroom in meth clinic...you see many strange things in your. I once pulled up behind a guy who had his as a rear view mirror. When my display turned on it was weird seeing the front of my car in my rear view display.
|
|
|
|
Post by Dan MacMillan on Apr 26, 2011 20:44:14 GMT -5
I just did the Corvair in my GT2. Trust me, it is a 100 times easier to do a type 4. To do the vair properly you have to reverse the rotation of the engine. Close to $1000 and lots of labor. Or you can flip the ring gear in the trans but you are running everything in the trans backwards. Either way you need an engine to trans adapter and a modified flywheel. T4 is a direct bolt on to any VW trans. Best case is $20 machining to the stock 1800 flywheel. Worst case is a new flywheel and clutch
cip1.com
ACC-C20-5100 - BUS TYPE-4 17-2000CC NEW 4340 STANDARD WEIGHT CHROMOLY FLYWHEEL FOR ALL 200MM HP BEETLE STYLE CLUTCH COVERS (SHIPPING CHARGES APPLY)
Phone-in/Mailorder Price US $169.95
Website Discount Price US $159.95
$119 for a 2100lb clutch kit
|
|
|
|
Post by Dan MacMillan on Apr 25, 2011 18:10:43 GMT -5
Get the serial number off the transmission, goto thesamba technical section and see what year it was made, you can do the samething with the chassis number it will tell what year and month it was made. The reason for the month VW made mods or upgrades at different months all throught the year. A chassis may or may not have a upgrade. Around 66 to 68 changes in the king pin to ball joint, and swing arm to IRS. Swing arm was 6 volt and IRS is 12 volt which is the different in change of the transmission and the diameter of the flywheel. If that makes any sence to you.  Wyn Swings were also available in 12V. It is easy to mate a 12V 1600 or bigger to a 6V swing trans. No special parts required. You can use the 6v flywheel and starter OR the 12V fly and starter, both using a 12V battery. When using the 12v parts you simply grind about a 1/16" of material from the 4 engine mount bosses. Some even start the engine when partially bolted down {no clutch installed}, then slowly tighten the engine bolts. The spinning flywheel cuts it's own clearance. Shut down engine, remove to clean thefilings, then install the clutch. A bit haywire but it has been done this way a lot. |
|
|
|
Post by Dan MacMillan on Apr 25, 2011 18:02:08 GMT -5
There was a model kit {MPC},   slot cars{Eldon}  and the Barbie car {Mattel}  of the Jeffries Mantaray II Kyote....150 actual cars produced. A model kit of the Kyote II...500 actual cars produced  A Hotwheels of the Jeffries Mantaray. One actual car produced.   Even the Meyers Manx got a Hotwheels car...5000 real Manx's produced. No reason why they could not do the Bradley's |
|
|
|
Post by Dan MacMillan on Apr 24, 2011 13:34:53 GMT -5
Changing the trans to a Bus unit is a lot harder than spending $20 to have the flywheel hole opened up and pressing in a bearing. Remember the 1800 is a dualcarb type 4 engine. You would need a BUS to BUG tranny mount kit. Then there is the clearancing for the shifter and getting it to work properly. And that is if he has an irs unit chassis. Ten times the work on a swing chassis. Besides Bus transmissions are incredibly sloppy in the shifting department.
|
|
|
|
Post by Dan MacMillan on Apr 24, 2011 10:04:46 GMT -5
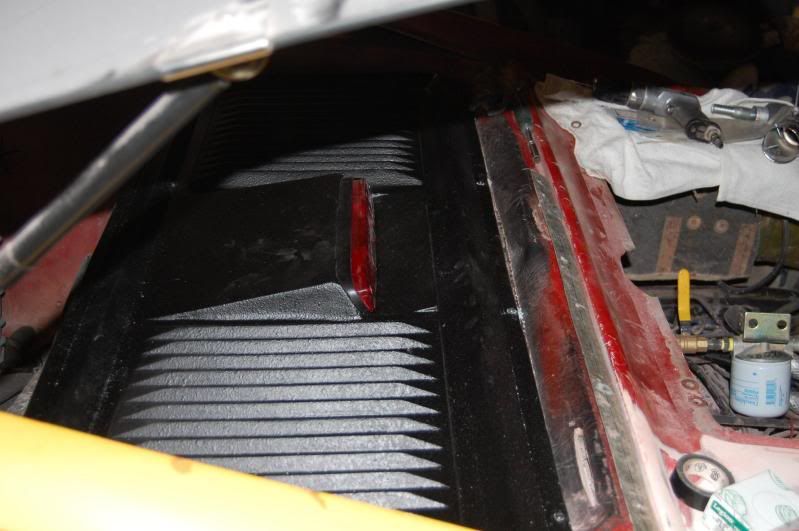
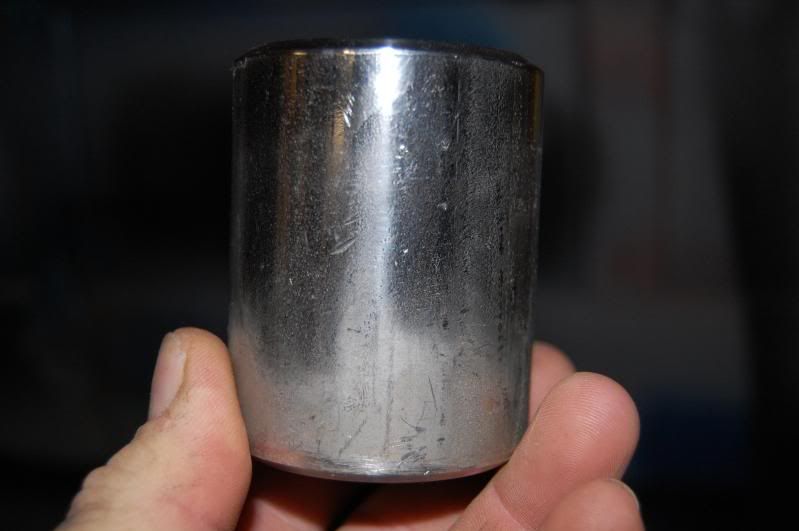
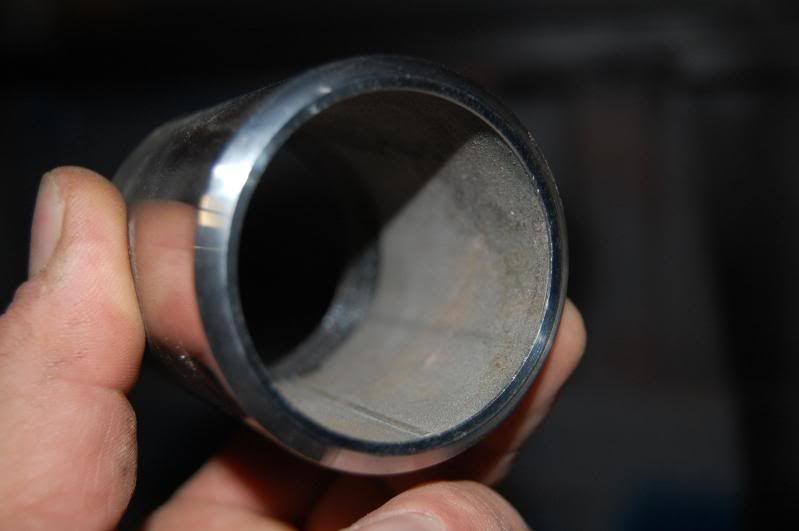
The only changes are you will have to remove the pilot bearing from the crank, have the flywheel machined to accept a new pilot bearing pressed into it. This is providing your trans has the guide tube that the release bearing rides on. 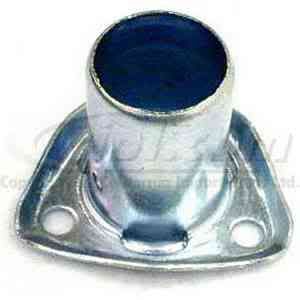 If yours is the older one without the tube, you will need a new "modified" flywheel made for the 200mm clutch. And a new clutch and pressure plate. Here is one of my previous posts on the subject. www.bradleygt.com/index.cgi?action=display&board=general&thread=480&page=1 Will Type 4 engine fit in Bradley Sometimes the search feature helps The type 4 came in 1700 dual carb, 1800 dual carb and 2000 fuel injected, In order to properly mate one to a Beetle trans you will the proper flywheel with a slight modification. The other option is a 200mm flywheel from Kennedy. The nice thing about this is the huge selection of clutch disks and pressure plates available. Check this site www.tunacan.net/t4/howto/starting/The stock parts The flywheels used on Type 4 engines can be classified into two different categories:VW and Porsche. The Porsche 914/912E used a different flywheel than the VW cars (411, 412, and Bus). The Volkswagens used four different flywheels, each having a different diameter clutch disc and pressure plate. The very early 411s used a 200mm clutch, thus it is compatible with the popular aftermarket Type 1 clutch discs and pressure plates. Next came the 210mm, 215mm, and the 228mm flywheels. The 914/912E flywheel had a 215mm diameter face and used a unique pressure plate and disc to mate it to the Porsche transaxle. This flywheel differs from the VW flywheel in that the starter ring gear is offset differently and will cause a VW starter not to engage properly. This flywheel will be necessary only if the car you will be installing the Type 4 into uses a Porsche transaxle, such as the 901 or 915. The rest of this tech article will cover using a Type 4 engine with a Type 1 transaxle, as you can use the stock Porsche starter to finish the Porsche setup. The Type 4 200mm flywheel was only available on the 1969 VW 411. This car was only available in Europe in limited numbers, so finding this flywheel is quite difficult. Due to this scarcity of the 200mm flywheel, Kennedy Engineering, the makers of the famed KEP pressure plates and adaptors, offers a 200mm flywheel for the Type 4s. By using this flywheel, or the original 200mm, a Type 4 engine will slide right into a standard 12V Type 1-3 transmission. These flywheels also give the engine builder a large variety of proven pressure plates and clutch discs. A standard 12-volt Type 1 starter meshes up perfectly, with the self-supporting Bosch SR17X being my favorite. The Type 4 200mm, the 210mm, and the 215mm are all the same outside diameter and are basically identical with the exception of the clutch face diameter. The starter ring tooth count is the same as a 12V/200mm Type 1 (130 teeth). The 228mm flywheel has the same starter ring, but the raised portion on the outer edge of the flywheel makes it larger overall and requires the use of a self supporting starter. As the diameter of the pressure plate increases, the issue of pressure plate height becomes an issue. The larger pressure plates are more likely to have clearance issues in the bellhousing where the housing slopes from the input shaft to the outer lip. It is here that you will run into problems with the 228mm flywheel. It is possible to clearance safely for the 215mm, but the 228mm leaves the bellhousing quite thin. Now let's take a look at the issues of flywheel selections and the best options. Forged vs. Cast Probably the one weakness of the Type 4 flywheel is the fact that most Type 4 flywheels are cast iron. A forged flywheel, like the one used on the Type 1, is much stronger, and for organizations like the NHRA, are often necessary. The Type 1 200mm flywheel was forged from the factory, so it's a non-issue for the Type 1 crowd. A careful reader will notice that I said that most Type 4 flywheels are cast; as there are a few forged options. The 228mm from the Wasserboxer, the 200mm 411, and the Kennedy Engineering 200mm are all forged options for the Type 4 engine builder. But this is only of concern to the few Type 4 engines being built. For 99% of the street engines out there, the cast flywheel does the job quite well. It's rugged and easily obtainable from a manual transmission Bus or 411/412. Pilot Bearing modification All Type 4 engines have the pilot shaft (also called the input shaft) bearing in the crankshaft. There is no pilot shaft bearing installed in automatic transmission engines. The input shaft of the transaxle must be extended to reach the pilot shaft bearing if you are using a Type 1 transaxle. The input shaft of a type 1 trans is shorter to accomidate the pilot sahft bearing in the gland nut. When a short type 1 input shaft is mated to a type 4 engine, the input shaft falls short of the mark and simply rests in the hole in the Type 4 flywheel. To "fix" this condition, remove the old Type 4 pilot shaft bearing from the flywheel. Next, purchase a new Type 4 pilot shaft bearing (this bearing is also the exact same one used in the Type 1 gland nut, so you can use a replacement one from those too). VWC-111-105-313-A - PILOT BRG FOR GLAND NUT - ALL AIR COOLED MODELS & VANAGON 1.9L & 2.1L Phone-in/Mailorder Price US $6.95 Website Discount Price US $5.95 Take the flywheel and the new bearing to a competent machinist. Have the flywheel center hole enlarged so that the new pilot shaft bearing may be PRESSED into position. It should be positioned so that it's flush on the "clutch" side of the flywheel. The thickness at the flywheel is about 0.400" so the new pilot shaft bearing will stick out the backside and end up partially in the crankshaft. Thats why the old one must be removed. A light dab of wheel bearing grease finishes the job. Just as a sidenote: the KEP flywheel already has this modification done to it, so it's a bolt on solution. www.cip1.com offers the kenedy flywheel www2.cip1.com/ProductDetails.asp?ProductCode=ACC-C20-5100ACC-C20-5100 - BUS TYPE-4 17-2000CC NEW 4340 STANDARD WEIGHT CHROMOLY FLYWHEEL FOR ALL 200MM HP BEETLE STYLE CLUTCH COVERS If you already have the proper bus flywheel and clutch assy, the bearing mod can be done for about $20. Will it fit into a GT, I do not know but it probably will. I have a 2.0 914 type 4 in my 74 Beetle, and I know it will fit a GT2 [image] [image] As you can see in the Beetle I had to split and shift the engine cover to accomodate the stock cooling shroud. There are also people offering cooling conversion kits to make the T4 look like a Type 1. www2.cip1.com/ProductDetails.asp?ProductCode=C31-198-230-400 |
|
|
|
Post by Dan MacMillan on Apr 23, 2011 22:55:58 GMT -5
|
|
|
|
Post by Dan MacMillan on Apr 21, 2011 12:18:10 GMT -5
Since apparently no one has a set of GT2 covers for sale. I release my want add to you
|
|
|
|
Post by Dan MacMillan on Apr 20, 2011 10:22:40 GMT -5
Just try reading this without laughing till you cry!!!
Pocket Tazer Stun Gun, a great gift for the wife.
A guy who purchased his lovely wife a pocket Tazer for their anniversary submitted this:
Last weekend I saw something at Larry's Pistol & Pawn Shop that sparked my interest. The occasion was our 15th anniversary and I was looking for a little something extra for my wife Julie. What I came across was a 100,000-volt, pocket/purse-sized Tazer.
The effects of the Tazer were supposed to be short lived, with no long term adverse affect on your assailant, allowing her adequate time to retreat to safety...??
WAY TOO COOL! Long story short, I bought the device and brought it home... I loaded two AAA batteries in the darn thing and pushed the button. Nothing! I was disappointed. I learned, however, that if I pushed the button and pressed it against a metal surface at the same time, I'd get the blue arc of electricity darting back and forth between the prongs.
AWESOME!!! Unfortunately, I have yet to explain to Julie what that burn spot is on the face of her microwave.
Okay, so I was home alone with this new toy, thinking to myself that it couldn't be all that bad with only two AAA batteries, right?
There I sat in my recliner, my cat Gracie looking on intently (trusting little soul) while I was reading the directions and thinking that I really needed to try this thing out on a flesh & blood moving target.
I must admit I thought about zapping Gracie (for a fraction of a second) and then thought better of it. She is such a sweet cat. But, if I was going to give this thing to my wife to protect herself against a mugger, I did want some assurance that it would work as advertised.
Am I wrong?
So, there I sat in a pair of shorts and a tank top with my reading glasses perched delicately on the bridge of my nose, directions in one hand, and Tazer in another.
The directions said that:
A one-second burst would shock and disorient your assailant;
A two-second burst was supposed to cause muscle spasms and a major loss of bodily control; and
A three-second burst would purportedly make your assailant flop on the ground like a fish out of water.
Any burst longer than three seconds would be wasting the batteries.
All the while I'm looking at this little device measuring about 5" long, less than 3/4 inch in circumference (loaded with two itsy, bitsy AAA batteries); pretty cute really, and thinking to myself, 'no possible way!'
What happened next is almost beyond description, but I'll do my best.
I'm sitting there alone, Gracie looking on with her head thingyed to one side so as to say, 'Don't do it stupid,' reasoning that a one second burst from such a tiny lil ole thing couldn't hurt all that bad.. I decided to give myself a one second burst just for heck of it.
I touched the prongs to my naked thigh, pushed the button, and...
HOLY MOTHER OF GOD. WEAPONS OF MASS DESTRUCTION. WHAT THE... !!!
I'm pretty sure Hulk Hogan ran in through the side door, picked me up in the recliner, then body slammed us both on the carpet, over and over and over again. I vaguely recall waking up on my side in the fetal position, with tears in my eyes, body soaking wet, both nipples on fire, testicles nowhere to be found, with my left arm tucked under my body in the oddest position, and tingling in my legs! The cat was making meowing sounds I had never heard before, clinging to a picture frame hanging above the fireplace, obviously in an attempt to avoid getting slammed by my body flopping all over the living room.
Note:
If you ever feel compelled to 'mug' yourself with a Tazer,
One note of caution:
There is NO such thing as a one second burst when you zap yourself! You will not let go of that thing until it is dislodged from your hand by a violent thrashing about on the floor!
A three second burst would be considered conservative!
A minute or so later (I can't be sure, as time was a relative thing at that point), I collected my wits (what little I had left), sat up and surveyed the landscape.
My bent reading glasses were on the mantel of the fireplace.
· The recliner was upside down and about 8 feet or so from where it originally was..
· My triceps, right thigh and both nipples were still twitching.
· My face felt like it had been shot up with Novocain, and my bottom lip weighed 88 lbs.
· I had no control over the drooling.
· Apparently I had crapped in my shorts, but was too numb to know for sure, and my sense of smell was gone.
· I saw a faint smoke cloud above my head, which I believe came from my hair.
I'm still looking for my testicles and I'm offering a significant reward for their safe return!
PS: My wife can't stop laughing about my experience, loved the gift and now regularly threatens me with it!
If you think education is difficult, try being stupid!!!!
|
|
|
|
Post by Dan MacMillan on Apr 17, 2011 16:48:36 GMT -5
Instead of using the lid, I made a fiberglass lid using the underside of the freezer lid for a mold. The plastic part that finishes off the lid. Looks sharp. I have a few imperfections to repair and once they are done I will post pics.
|
|