|
|
Post by one80two on Nov 1, 2010 18:52:13 GMT -5
OK. I went to buy new floor pans last night. I thought the prices were good so I gave them a call to order 2 full pans. Little to my knowledge, shipping is about the same as the pans themselves!
Wasn't planning on that.
My questions are:
1.) Anybody know of anywhere that sells full pans where I don't have to ship them to Columbus, Ohio?
2.) Has any body ever made their own pans out of sheet metal?
I am a welder/fabricator; It doesn't seem like it would be that big of a task. Thoughts?
Also, after gutting my interior, I am wanting to make my rear window a quick release. Right now it is "permanent"; held in by screws all the way around. It would be nice to make it so I could "pop" it out whenever I want, with ease. (Keep in mind, I have the short rear window) I'm sure somebody has done this and I was wanting some insight on what kind of latches/hardware works for such an application.
I am not going to install the door latches after my interior overhaul. I am wondering if there is anyway to incorporate the door latches to make a quick release rear window. Thoughts?
Lastly, I was wondering about sound dampener. When I put in my new pans and before I install my new carpet, what does everybody use for sound dampener? I have done so research and found out there are a lot of products that vary from pretty cheap to outrageously expensive. I feel the need to use something. I didn't know if anybody out there has any reviews, "would of/could of's", and/or recommendations on any product they put under their carpet.
Any, and all, info and thoughts will be greatly appreciated.
Thanks.
-Brad.
|
|
|
|
Post by Wyn on Nov 1, 2010 19:11:15 GMT -5
You can get your pans from Larry's Offroad in Datyon, Ohio, like I did. I drove over and picked them up. Check them out at www.larrysoffroad.com/ . Keep them in mind for other VW parts and engines.  I see the price has gone up a little, I paid about $80 per pan when I got mine, but now they are $119.99 per pan. Wyn |
|
|
|
Post by thehag71 on Nov 2, 2010 4:22:25 GMT -5
Sorry, I can't help with the pans. I do believe that Jeff Troy's cd has some information on making the rear window a quick release. I may be mistaken though. If you don't have one of his cd's yet, I recommend ordering one. I was gonna look it up on the cd, but my girlfriend decided to clean my computer desk yesterday and now I can't find it (the cd, Not the desk.) I will look later today or tomorrow.
|
|
|
|
Post by jspbtown on Nov 2, 2010 8:33:38 GMT -5
I used 1"x2" tube to make the perimeter framing and then some 3/16" diamond plate to make the floor on my VW based Manx buggy: 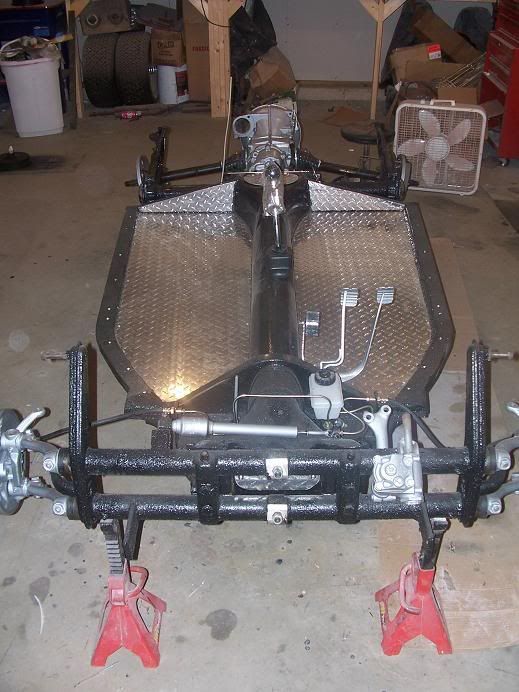 If you are a welder/fabricator I suggest this route. I am neither a welder or fabricator and it wasn't hard for me to do, so for you it would be real easy. You can then drop the pans for more headroom and get rid of the rise in the back of the tunnel which will allow more legroom. This method is also alot stronger than the stock flimsy pans. Lots of things you can use for sound deading. Lizard skin is a spray on, or there are many other sound deadening products out there. I used Herculiner on my chassis and in all the fenderwell areas. It provides some sound deading plus helps to prevent any "stars" in the paint from rocks being thrown up from under the car. There are some who also use a foil lined roofing product available at Lowes as a low cost sound deading option. Can't help you on the rear window. The Bradley I did had a custom rear hatch. 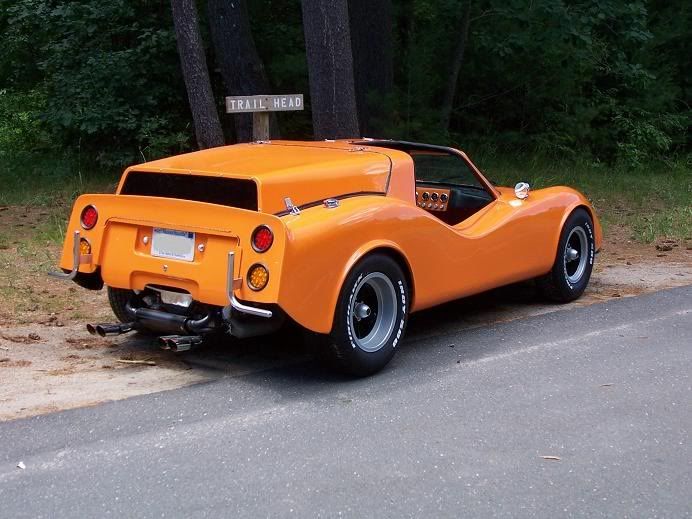 |
|
|
|
Post by smyrnaguy on Nov 2, 2010 8:52:28 GMT -5
I made my pans out of 14 gauge steel from an old RCA radio transmitter. I also made a 3" drop for more headroom. You don't need the seat tracks that may or may not be included with replacement pans. Dynamat comes to mind for sound damping but its very pricey. Hushmat makes a pretty good equivilent but its not cheap either. I'm using original VW asphalt mat and 1/2" felt padding on the floors, front and rear firewalls. The car may sound like a drum inside. I'll know in another month or so.
|
|
|
|
Post by Wyn on Nov 2, 2010 9:37:43 GMT -5
Jeff, Did you butt weld the flooring to the 1x2 tubing? If you surface weld do you grind down the rise of the diamond plate? Or do you bolt the diamond plate to the tubing with a rubber seal? I like your diamond plate flooring.  Wyn |
|
|
|
Post by jspbtown on Nov 2, 2010 10:33:57 GMT -5
Wyn, I used 1/2" angle stock which was welded to the 1"x2" perimeter tubing. In the rear where the stock lip on the tunnel lifts I cut that section off, welded it shut, and welded in some 1/2" angle to make a straight line to the rear support. You can see the old line here under the green filler: 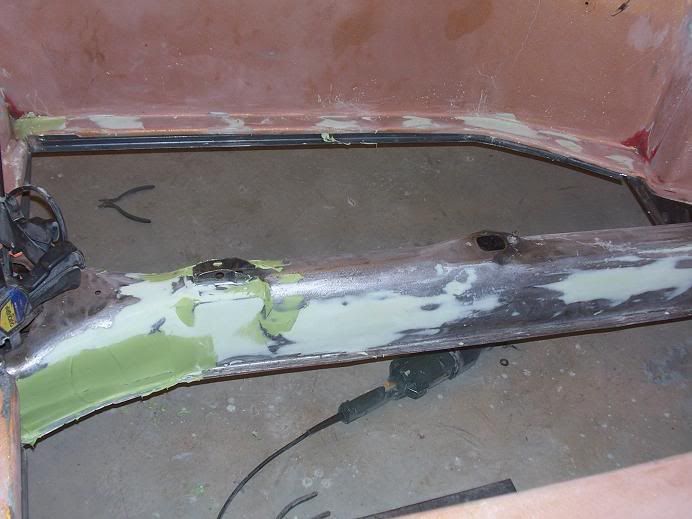 After I cut the diamond plate I used 3/16" rivets to attach it all the way around. |
|
|
|
Post by mrbigh on Nov 2, 2010 12:10:23 GMT -5
So, the Al diamond plate is actually the vehicle floor, am I right?
|
|
|
|
Post by jspbtown on Nov 2, 2010 12:50:51 GMT -5
Yes 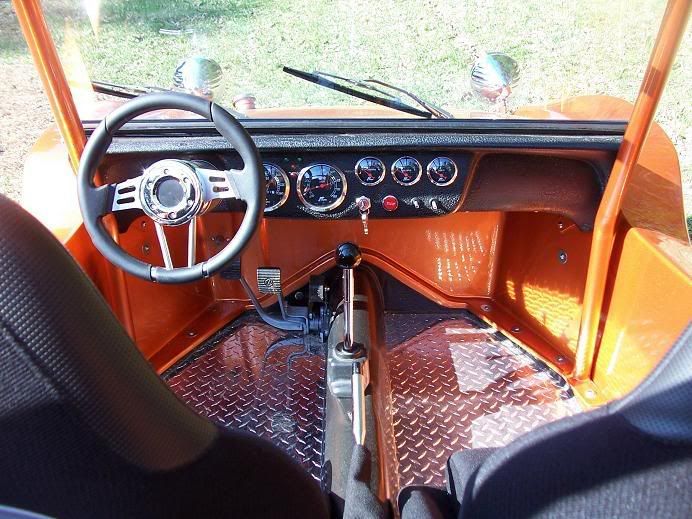 |
|
|
|
Post by Wyn on Nov 2, 2010 13:06:02 GMT -5
The diamond plate is actually the vehicle floor. My Daughter is a 2LT in the Army stationed at El Paso, Tx, she is in charge of a heavy vehicle platoon. I’d like to build her one of the Dune buggies’ from Larrys Off road. Paint it Desert Camo and equip it with three .68 cal machine guns. One on each side and a remote control one on top roll rail. I think the diamond plate floor would deck it out nicely. Wyn   |
|
|
|
Post by mrbigh on Nov 2, 2010 14:17:45 GMT -5
Yes  I do not know why but the floor lines look much better in your vehicle than in my GT II, do you want to do another? |
|
|
|
Post by jspbtown on Nov 2, 2010 14:26:07 GMT -5
Sure! Right after this: 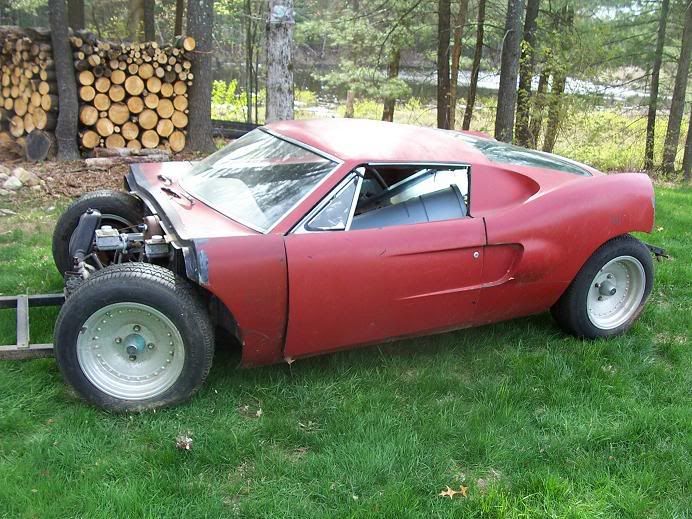 And this:  Oh...and this: 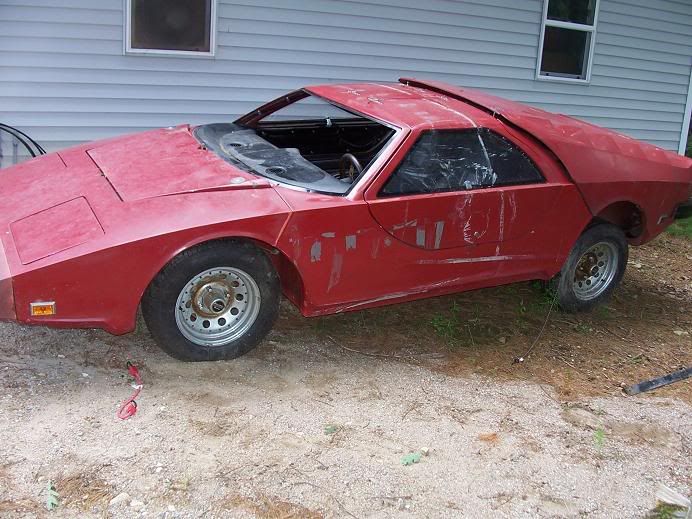 So like maybe 2015? At least the Avenger is all primed and will be ready for paint after I can block it. Suggestions for paint scheme anyone? |
|
|
|
Post by Dan MacMillan on Nov 2, 2010 15:45:37 GMT -5
Aluminum diamond plate is very nice when new but quickly looses it's shine and brilliance. It scratches easily and oxidizes fast. I used it on 2 of my buggies.
|
|
|
|
Post by one80two on Nov 2, 2010 21:17:05 GMT -5
I must say the diamond plate looks awesome, and I have thought about that before, but as the last post brought to light, I was worried about it's appearance after a year or two of use. I have seen other diamond plate products when they look awesome brand new but don't look that good once weathered. Still thinking about it though.
I have done some business through Larry's before; He looks as if he would be the best route for pans without shipping. Thanks for the reminder.
I do, indeed, have Jeff's CD, but I don't remember seeing anything about a quick release back window. I guess I'll have to search it again and see if I can locate that section.
Thanks for the input guys and keep the great ideas coming!
|
|
|
|
Post by thehag71 on Nov 3, 2010 2:41:36 GMT -5
I still can't find my cd, but I think it is in one of the modifications to the factory systems that he has come up with. Bahh!! wish I could be more specific.
|
|
|
|
Post by brianboggs on Nov 3, 2010 4:42:22 GMT -5
Suggestions for paint scheme anyone? Gulf racing colors, blue and orange |
|
|
|
Post by jspbtown on Nov 3, 2010 8:20:31 GMT -5
Brian,
Thats on the short list for sure. The other leading choice is yellow with black stripes. I hate painting two tone though...it takes me so much time.
Oh...and regarding the diamondplate...when it loses its luster and/or personal appeal then just do to it what you would have done to a stock boring steel floor.... coat it or cover it.
I wouldn't use diamondplate on a Bradley anyways. I would use steel and drop the pans. For a buggy though...it looks cool.
|
|
|
|
Post by Jeff Troy on Nov 3, 2010 15:41:16 GMT -5
Hi, OneTwo,
The CD has the removable Sundowner "Convertible" Rear Window on the CD in the Bonus Section (10). It's in the assembly manual, and was an available option after 1976.
My modification for the rear and the gulls is to create leather (vinyl/velour) straps that attach to the rectangular catches on the Plexiglas, then add snap buttons at the end. These buttons snap into studs mounted in the car.
Doing this lets you lose those stupid spring clips, which eliminates the rust and rattles. The only things visible when the Plexiglas is off are the tiny studs that accept the strap snaps. It's just like the boot on a convertible top.
Photos and some rough drawings for my upholsterer are also on the CD.
Three important items to note:
1. Thin plastic strip must be sewn into the straps to prevent them from stretching with time and usage.
2. The snaps for the side straps on the Sundowner rear window must be mounted at an angle that prevents the strap from popping off on its own. This is best accomplished with small blocks of wood that you can install under the jump seat upholstery with epoxy or polyester resin.
3. With or without my strap system, a fifth catch MUST be installed along the top edge of the rear window at the center. Without this, air pressure builds under the rear window and will lift it enough to disengage the spring clips (Bradley) or straps (me). The result is a broken rear window on the ground -- or in the face of the driver behind you. I lost two rear windows to this problem before figuring out that a fifth attach point was necessary. Bradley never knew this, probably because no one had driven his or her car far enough or long enough to discover the problem before the company folded.
Best of luck with the car...
|
|
|
|
Post by Jeff Troy on Nov 3, 2010 15:53:36 GMT -5
Also....
PLEASE pay attention to the good advice you have been given by the other members in this thread.
Big power in a Bradley is needless -- more like asinine -- and will buy you nothing but blown engines, poor handling and a project you will probably never finish.
The Bradley was designed around a VW Beetle, the the lowest-priced, family transportation ever produced. It was never meant to be a race car. You can get there from here, but it will cost a fortune and the reliability will always be questionable, especially if the engine work is done by someone with little or no experience.
If you really want to look and drive like a proper drunken teenager, you'll do a lot better, go a lot faster and spend a lot less if you buy a p.o.s. Mustang.
Mark these words: "A Bradley GT is not the car you want to drive to an accident!"
Regards,,,
|
|
|
|
Post by thehag71 on Nov 4, 2010 1:38:51 GMT -5
As the leading expert on these cars I was hoping that Jeff would add his 2 cents. I am glad he did, cuz I still can't find my cd, and the girlfriend that "cleaned" the computer desk swears she never saw any bradley cd. I think she hid it so I would spend less time working on the bradley (or the motorcycles) and more time with her.  |
|
|
|
Post by Jeff Troy on Nov 4, 2010 7:24:31 GMT -5
Hi, Hag,
Send a pm with your name and address.
If you're in my database, I'll send you a replacement.
Warmest...
|
|
|
|
Post by one80two on Nov 5, 2010 10:41:43 GMT -5
Thanks for your input Jeff. I will keep all of your hints and tips in mind while trying to figure out the best setup for me.
|
|
|
|
Post by modnar on Nov 11, 2010 18:18:43 GMT -5
Rear window is removable, have a look at the photos for this Bradley GT on ebay, item #110609285147, the rear window has latches from the side windows, four to hold it in place. very good looking car for sale.
|
|
|
|
Post by Gary Hammond on Nov 11, 2010 20:56:16 GMT -5
Hi Brad,  .......... I am wanting to make my rear window a quick release. Right now it is "permanent"; held in by screws all the way around. It would be nice to make it so I could "pop" it out whenever I want, with ease. (Keep in mind, I have the short rear window) I'm sure somebody has done this and I was wanting some insight on what kind of latches/hardware works for such an application. I am not going to install the door latches after my interior overhaul. I am wondering if there is anyway to incorporate the door latches to make a quick release rear window. Thoughts? -Brad. I used a pair of the "take-apart" hinges (like used on the doors) to fasten the rear window to the roof. And then I used four of the original style latches to hold it closed. Two on the sides of the window and two near the bottom of the window. This makes it easy to open for access to the rear shelf area, and also easy to remove and reinstall. With six attachment points, there's no danger of it catching the wind and blowing off!  Here's a few pics.     Gary Hammond,   |
|
|
|
Post by superdave008 on Nov 11, 2010 21:20:23 GMT -5
If you want free shipping ..go on line and look up J C Whitney out of chicago . while there order the free vw/empi catalog.
Before ordering look up free coupons JC whitney for major holidays you can get up to 20% off and free shipping.
Good Luck!
|
|
|
|
Post by one80two on Nov 12, 2010 9:14:38 GMT -5
Gary,
Great idea and thanks for the visual! That's exactly what I had in mind!
I see the carb cut out on your car? What kind of motor you got in that thing? Doesn't look V Dub
|
|
|
|
Post by Gary Hammond on Nov 12, 2010 11:14:12 GMT -5
Hi Brad,  That was an internally supercharged experimental engine I built up out of a 1678cc VW. It had a Holley-Weber progresive two barrel carb mounted on top. It didn't pan out!  I'm now running a more conventional engine with dry sump lubrication, fuel injection, and MSD ignition. This one runs great! ;D Gary Hammond,   |
|

