|
|
Post by centralvalleygter on Nov 25, 2009 21:58:42 GMT -5
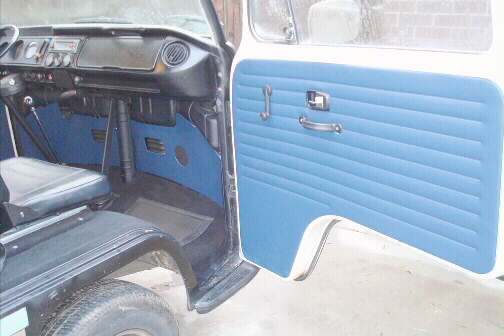
Hi All, I haven't posted lately, but I have been checking the board out periodically. I did get the disc brakes swapped from the Baha to the Bradley, so I'm pretty well done, except for tweaking (and finding a better door solution). So, what do you get when you cross a Baha bug with a trailer? A VW camper bus! We weren't using the trailer much (once every 3 years or so) and I'm selling the Baha - so we needed a spare vehicle. My wife said if I sold the trailer, she wanted a something that we could sleep in if the house burned down or something. So the solution was a VW Bus. I got a 1971 cuz it was the last year they used an upright VW engine (dual port 1600cc) and first year with disc brakes. The engine is fresh and the chassie is solid, but the rest needs work. So I'm starting the restoration process. Below are some pictures of the bus. The first is the outside. 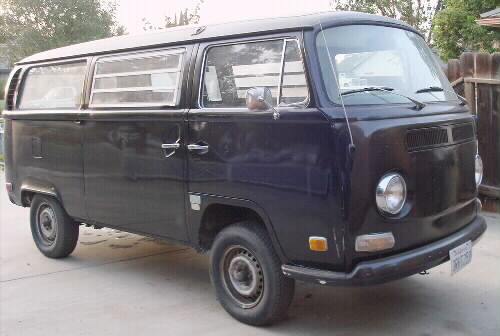 The second is some of the interior stuff I removed. 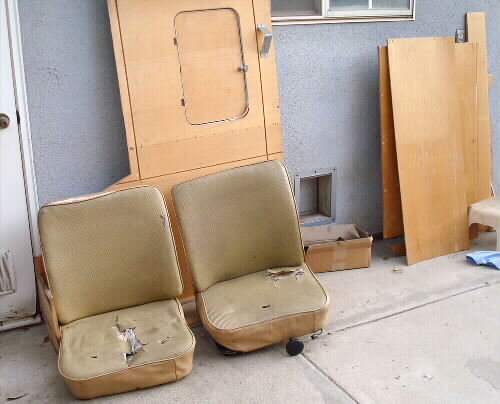 The third and fourth show my initial work - new seats (actually tractor seats - much cheaper than fixing or replacing stock ones), carpeting the wheel wells and replacing the seat belts. 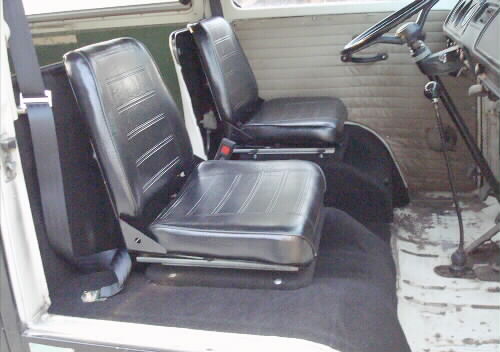 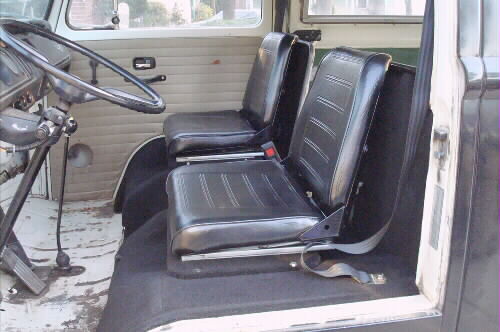 Since these pictures I have redone the dash board (added gauges, filled holes, etc.) and replaced the headliner in the driver's area. Floor repair and carpet is next. Until next time.... |
|
|
|
Post by bowers7 on Nov 26, 2009 15:54:48 GMT -5
looking good and you will enjoy it steve
|
|
|
|
Post by centralvalleygter on Nov 26, 2009 22:15:39 GMT -5
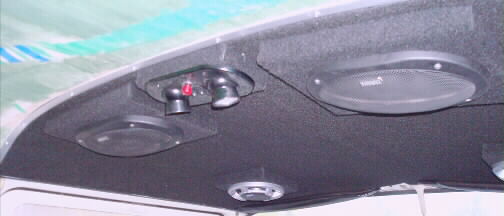
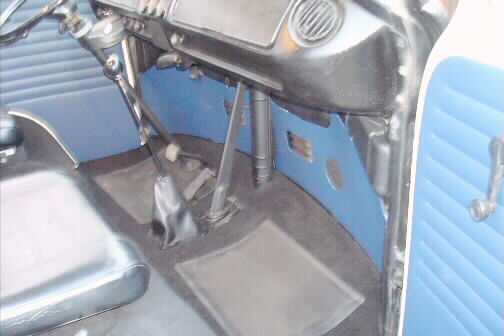
Couple of more pictures, showing later restoration work. The updated dashboard. It had gashes and cracks in it. Also, note the new gauges below the radio. 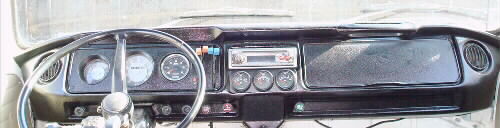 The headliner. The blank standoff between the rear two speakers is for a future aircraft style dome light. 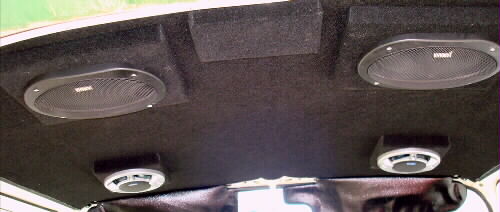 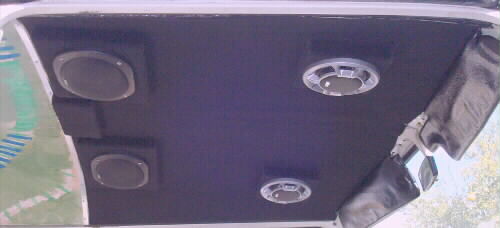 The following pictures show the finishing of the cab floor. I repaired the rusted out area, lined it with foil backed insulation and carpeted it. The first picture shows carpet complete on the driver's side, but insulation only on the passenger side. The second picture shows the completed carpeting. I will be putting on boots/trim pieces around the shifter and emergency brake. Kick and door panels have been ordered and should be arrive in about a week. 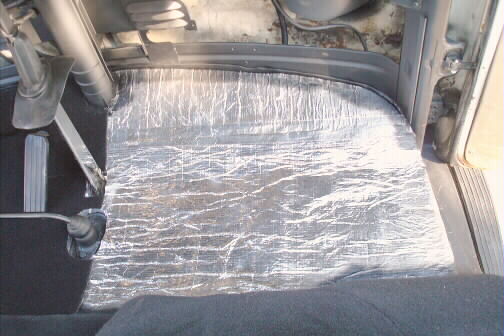 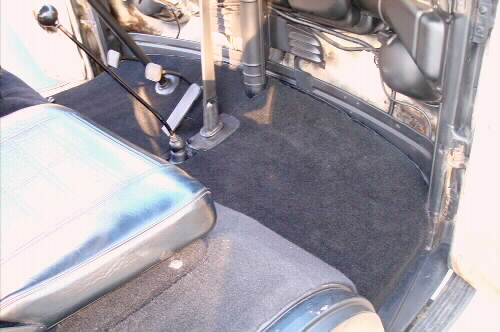 |
|
stevevw
Full Member
 Part VW part Porsche , all Bradley
Posts: 117
|
Post by stevevw on Dec 13, 2009 20:02:10 GMT -5
Way cool We got a 76 last year and have been workin on it a bit . We plan a cross country this coming summer in it . I need to get out there and continue but the cold and me just are not working out right now  |
|
|
|
Post by centralvalleygter on Dec 14, 2009 15:44:35 GMT -5
|
|
|
|
Post by horen2tas on Dec 14, 2009 20:56:55 GMT -5
Nice to see work being done on a "bay window" bus. Door jambs look like they're in good shape! Hows the slider door? They're simple to work on , come off real easy. My '71 has about 500,000 miles on 7 engines between 2 owners my brother (original owner) and me. Seeing your pix got me in the mood to start thinking about working on mine again!
good luck, your work on the improvements looks really nice!
Mike Horen
|
|
|
|
Post by centralvalleygter on Dec 14, 2009 23:48:34 GMT -5
Thanks for the comments. Actually, the sliding door seems to work better than all the other doors and hatches. It looks like it had a pretty good smack on the front drivers side at one time, so the driver's door does not have as good alignment as it could. After doing inside, I'll start strategizing about doing the exterior. Working my way back, now, but still have some details to do in the cab area (new turn signal switch, wire brush & paint defroster trim plates, new visors, some detailing on the post and jambs, etc.).
My supply of funds from selling the BAHA and trailer are running out, so improvements will likely come slower for a while. Also, got it in the shop to completely go through the chassie & brakes - gotta deal with safety and logivity as well as asthetics you know.
|
|
|
|
Post by centralvalleygter on Apr 6, 2010 13:23:07 GMT -5
I have done work on the bus in the last couple of months, but most of it is no longer visible. My brother and I completely rebuilt the chassis components - new brakes (rotors, drums, cylinders, pads, shoes, tubing, etc), new wheel & CV bearings, new tie rods, etc. However, as the picture below shows, I also cleaned up the engine a bit. 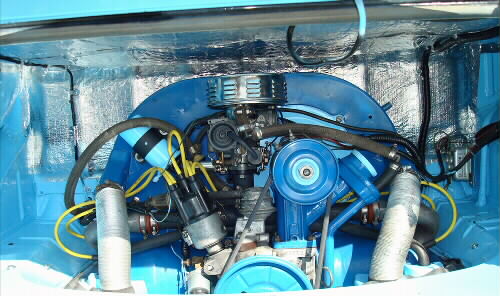 Additionally, in chasing down some electrical problems, I discovered that the fuse block was just lying on a pile of spaghetti-like wiring. Since it's stock location is difficult to get to and it uses old style fuses, I have decided to install a modern fuse assembly in a more accessible location. Below are pictures of top and bottom of the fuse block module that I have fabricated. Note the headlight and accessory relays on the right and the turn signal flasher on the left.  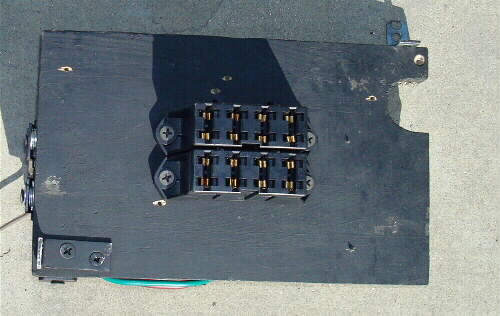 I'm sure that while I'm in the middle of disconnecting wires from the old block and installing them on this one (along with the modifications I am making), I'll wonder why I undertook doing this. Regards, |
|
|
|
Post by superdave008 on May 21, 2010 23:10:38 GMT -5
Nice work are you plannign to go to car shows with it? thats something to be proud of. Enjoyed the Pics.
|
|
|
|
Post by centralvalleygter on Jun 1, 2010 23:02:16 GMT -5
Thanks for the compliment Dave. While I'm making significant improvements, I don't think my fit and finish is up to show quality. I've pretty well finished the wiring on the bus now. The following pics show it as I was buttoning it up. 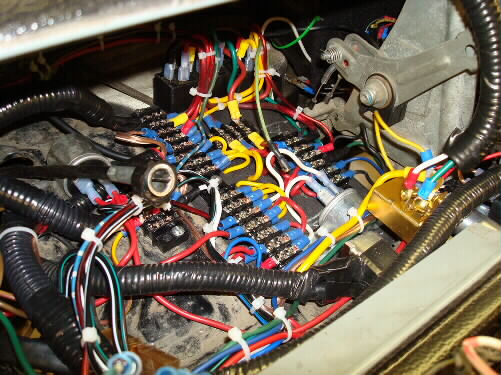 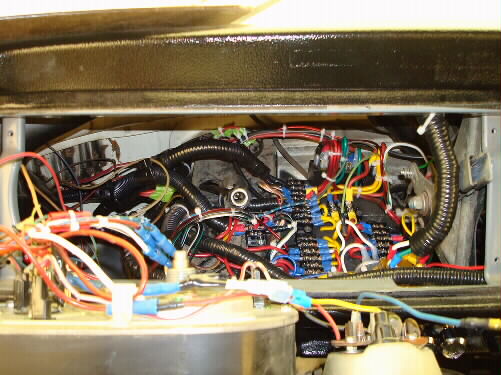 The last picture is of my wiring diagram so I know what I did 5 years from now.  Now back to restoring the interior behind the cab. |
|
Eric A
Full Member
It's an obsession not an investment!
Posts: 223
|
Post by Eric A on Jun 19, 2010 10:30:38 GMT -5
It is looking great! My wife wants to buy an old VW camper. I am not sure if I want to undertake that project just quite yet.
Eric A.
|
|
|
|
Post by centralvalleygter on Jul 11, 2010 19:14:55 GMT -5
I've been working some on the bus. Mainly on the back third of the interior. I have installed some ceiling level cabinets. The first picture shows the framing for the cabinets. 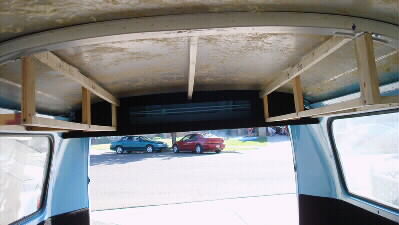 ============================================== The second picture shows the fuse block for the accessories that will run off the deep cycle battery in the rear of the driver's side cabinet. 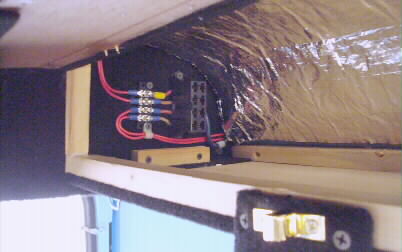 ============================================== Here are several pictures of the finished interior of the rear third of the van. 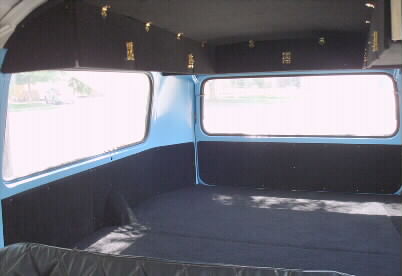 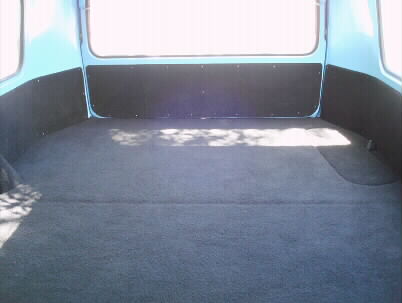 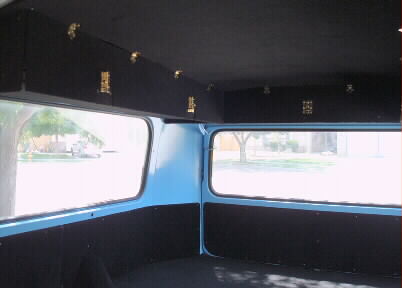 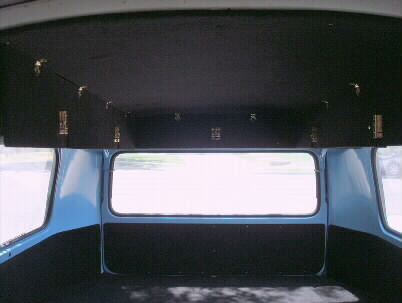  ============================================= The last photos show how I carpeted the back side of the seat dividers. 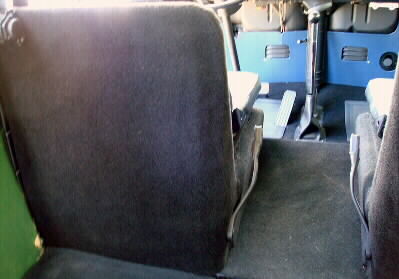 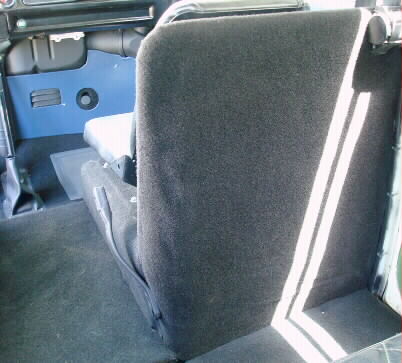 That's it for now. Regards, |
|
|
|
Post by centralvalleygter on Aug 10, 2010 14:47:57 GMT -5
Well, I've pretty well finished the inside of my vw bus. Following is a photo of the middle section with the pedestal back seat. I made this middle section modular so I can pull out the seat and put in a camping modual (when I get it built). 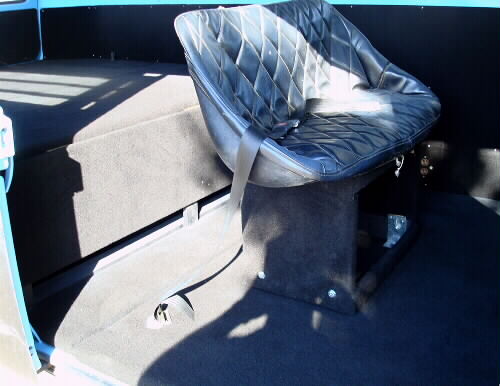 Below is a picture with the extension up that forms the area for a full size double bed. 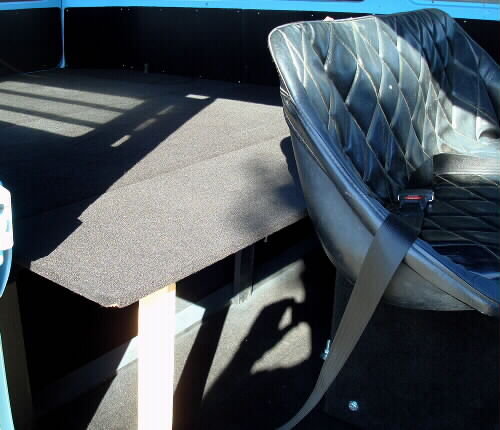 Here is a view from the cab area looking back. You can see the rear seat and cabinets. 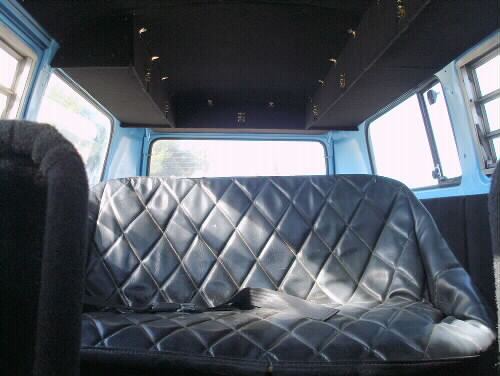 Lastly, here is another shot of the cab with the interior posts etc painted blue to match what at least part of what the exterior will ultimately painted. 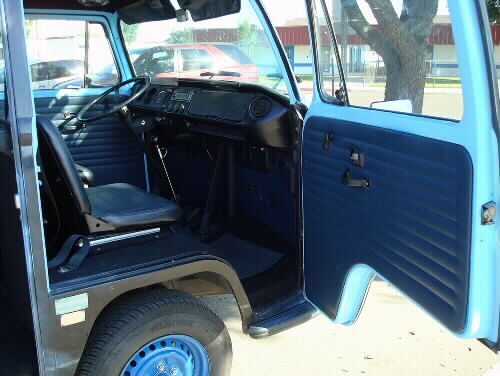 I'll eventually start the outside, but it may be a while as school is starting again. warmest regards, |
|
stevevw
Full Member
Part VW part Porsche , all Bradley
Posts: 117
|
Post by stevevw on Aug 27, 2010 2:11:31 GMT -5
great work looking good . our trip across the states went flawlessly the bus ran great . Wish mine looked as good as yours |
|
|
|
Post by centralvalleygter on Aug 27, 2010 13:12:07 GMT -5
Steven
Thanks for the kind words. Glad your trip went well.
Warmest Regards,
|
|